Warehouse Layout
Audience: Warehouse managers and admins who set up where stock physically lives — plus anyone supporting the tools.
Purpose: This is the front door to the Warehouse Layout guide. It explains the location hierarchy at a glance, then points you to the right page — a single task, a rule, or why the screen works the way it does.
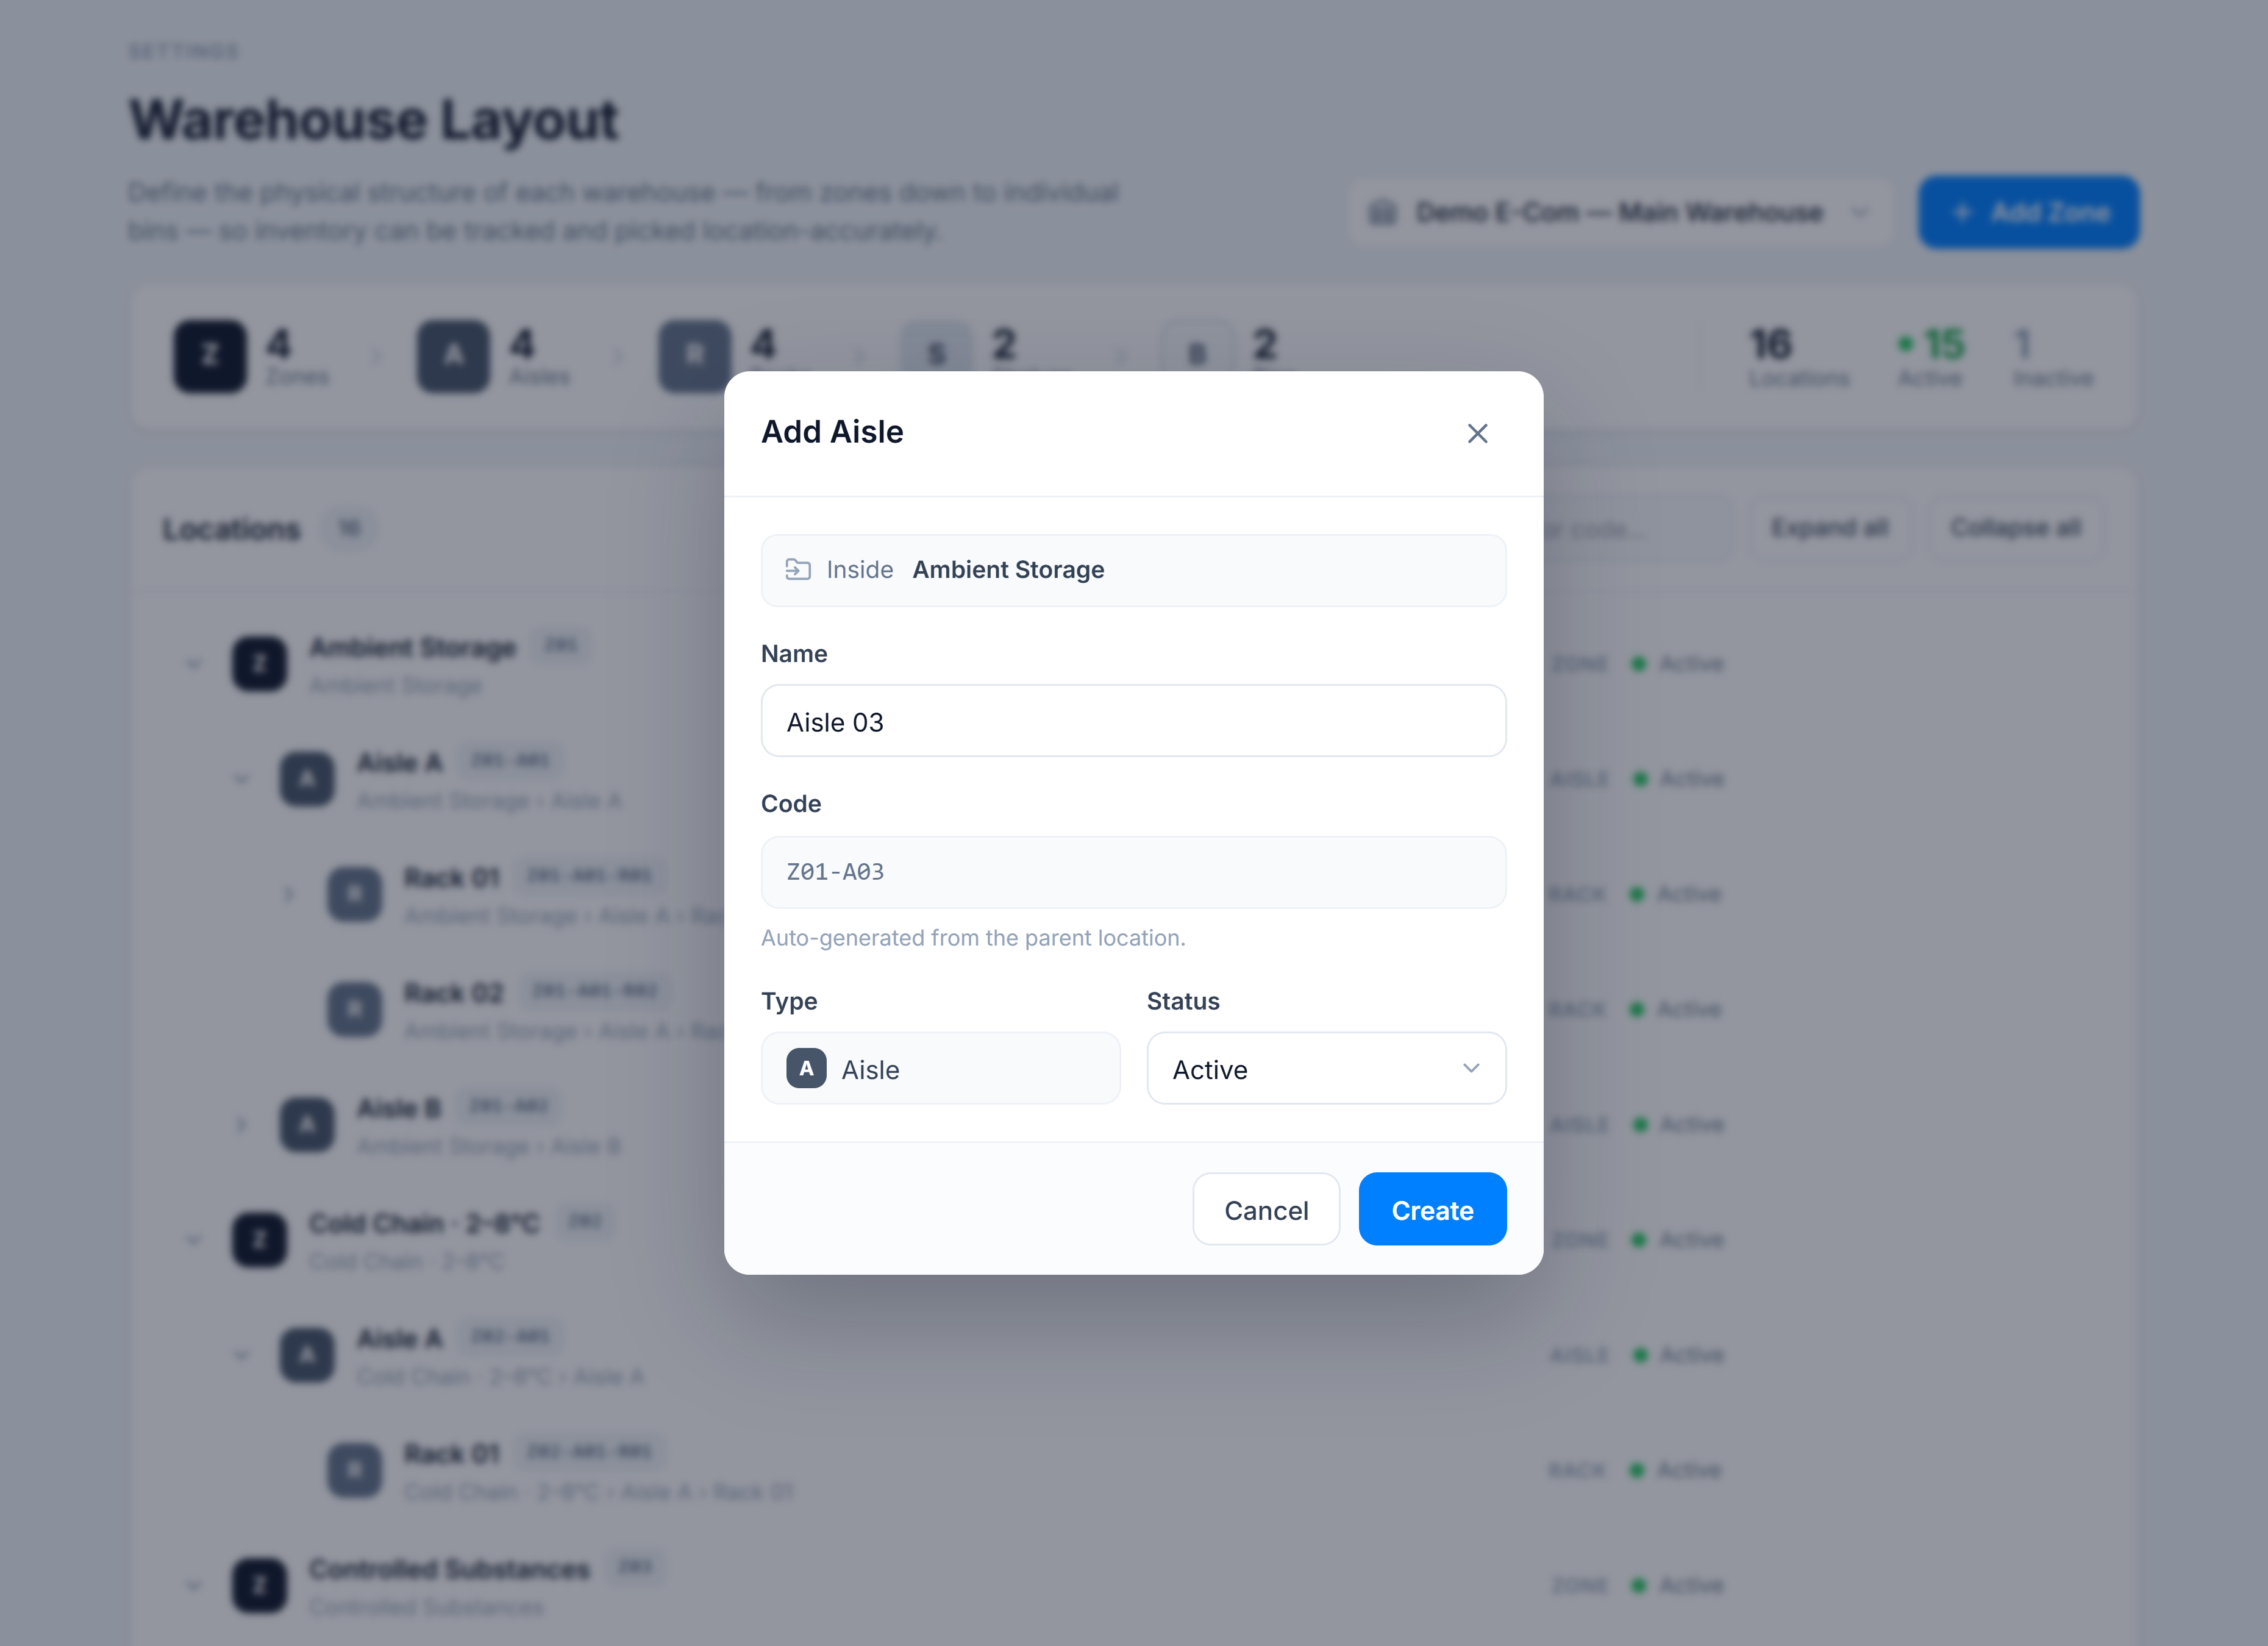
Warehouse Layout is where you model the physical structure of a warehouse as a tree of locations: Zone → Aisle → Rack → Shelf → Bin. Each location gets a short, hierarchical code (e.g. Z01-A01-R01-S01-B01) and a scannable label, so inventory can be assigned to an exact spot and picked location-accurately.
Pick the kind of help you need
The Academy organises every guide as learn, do, look up, understand.
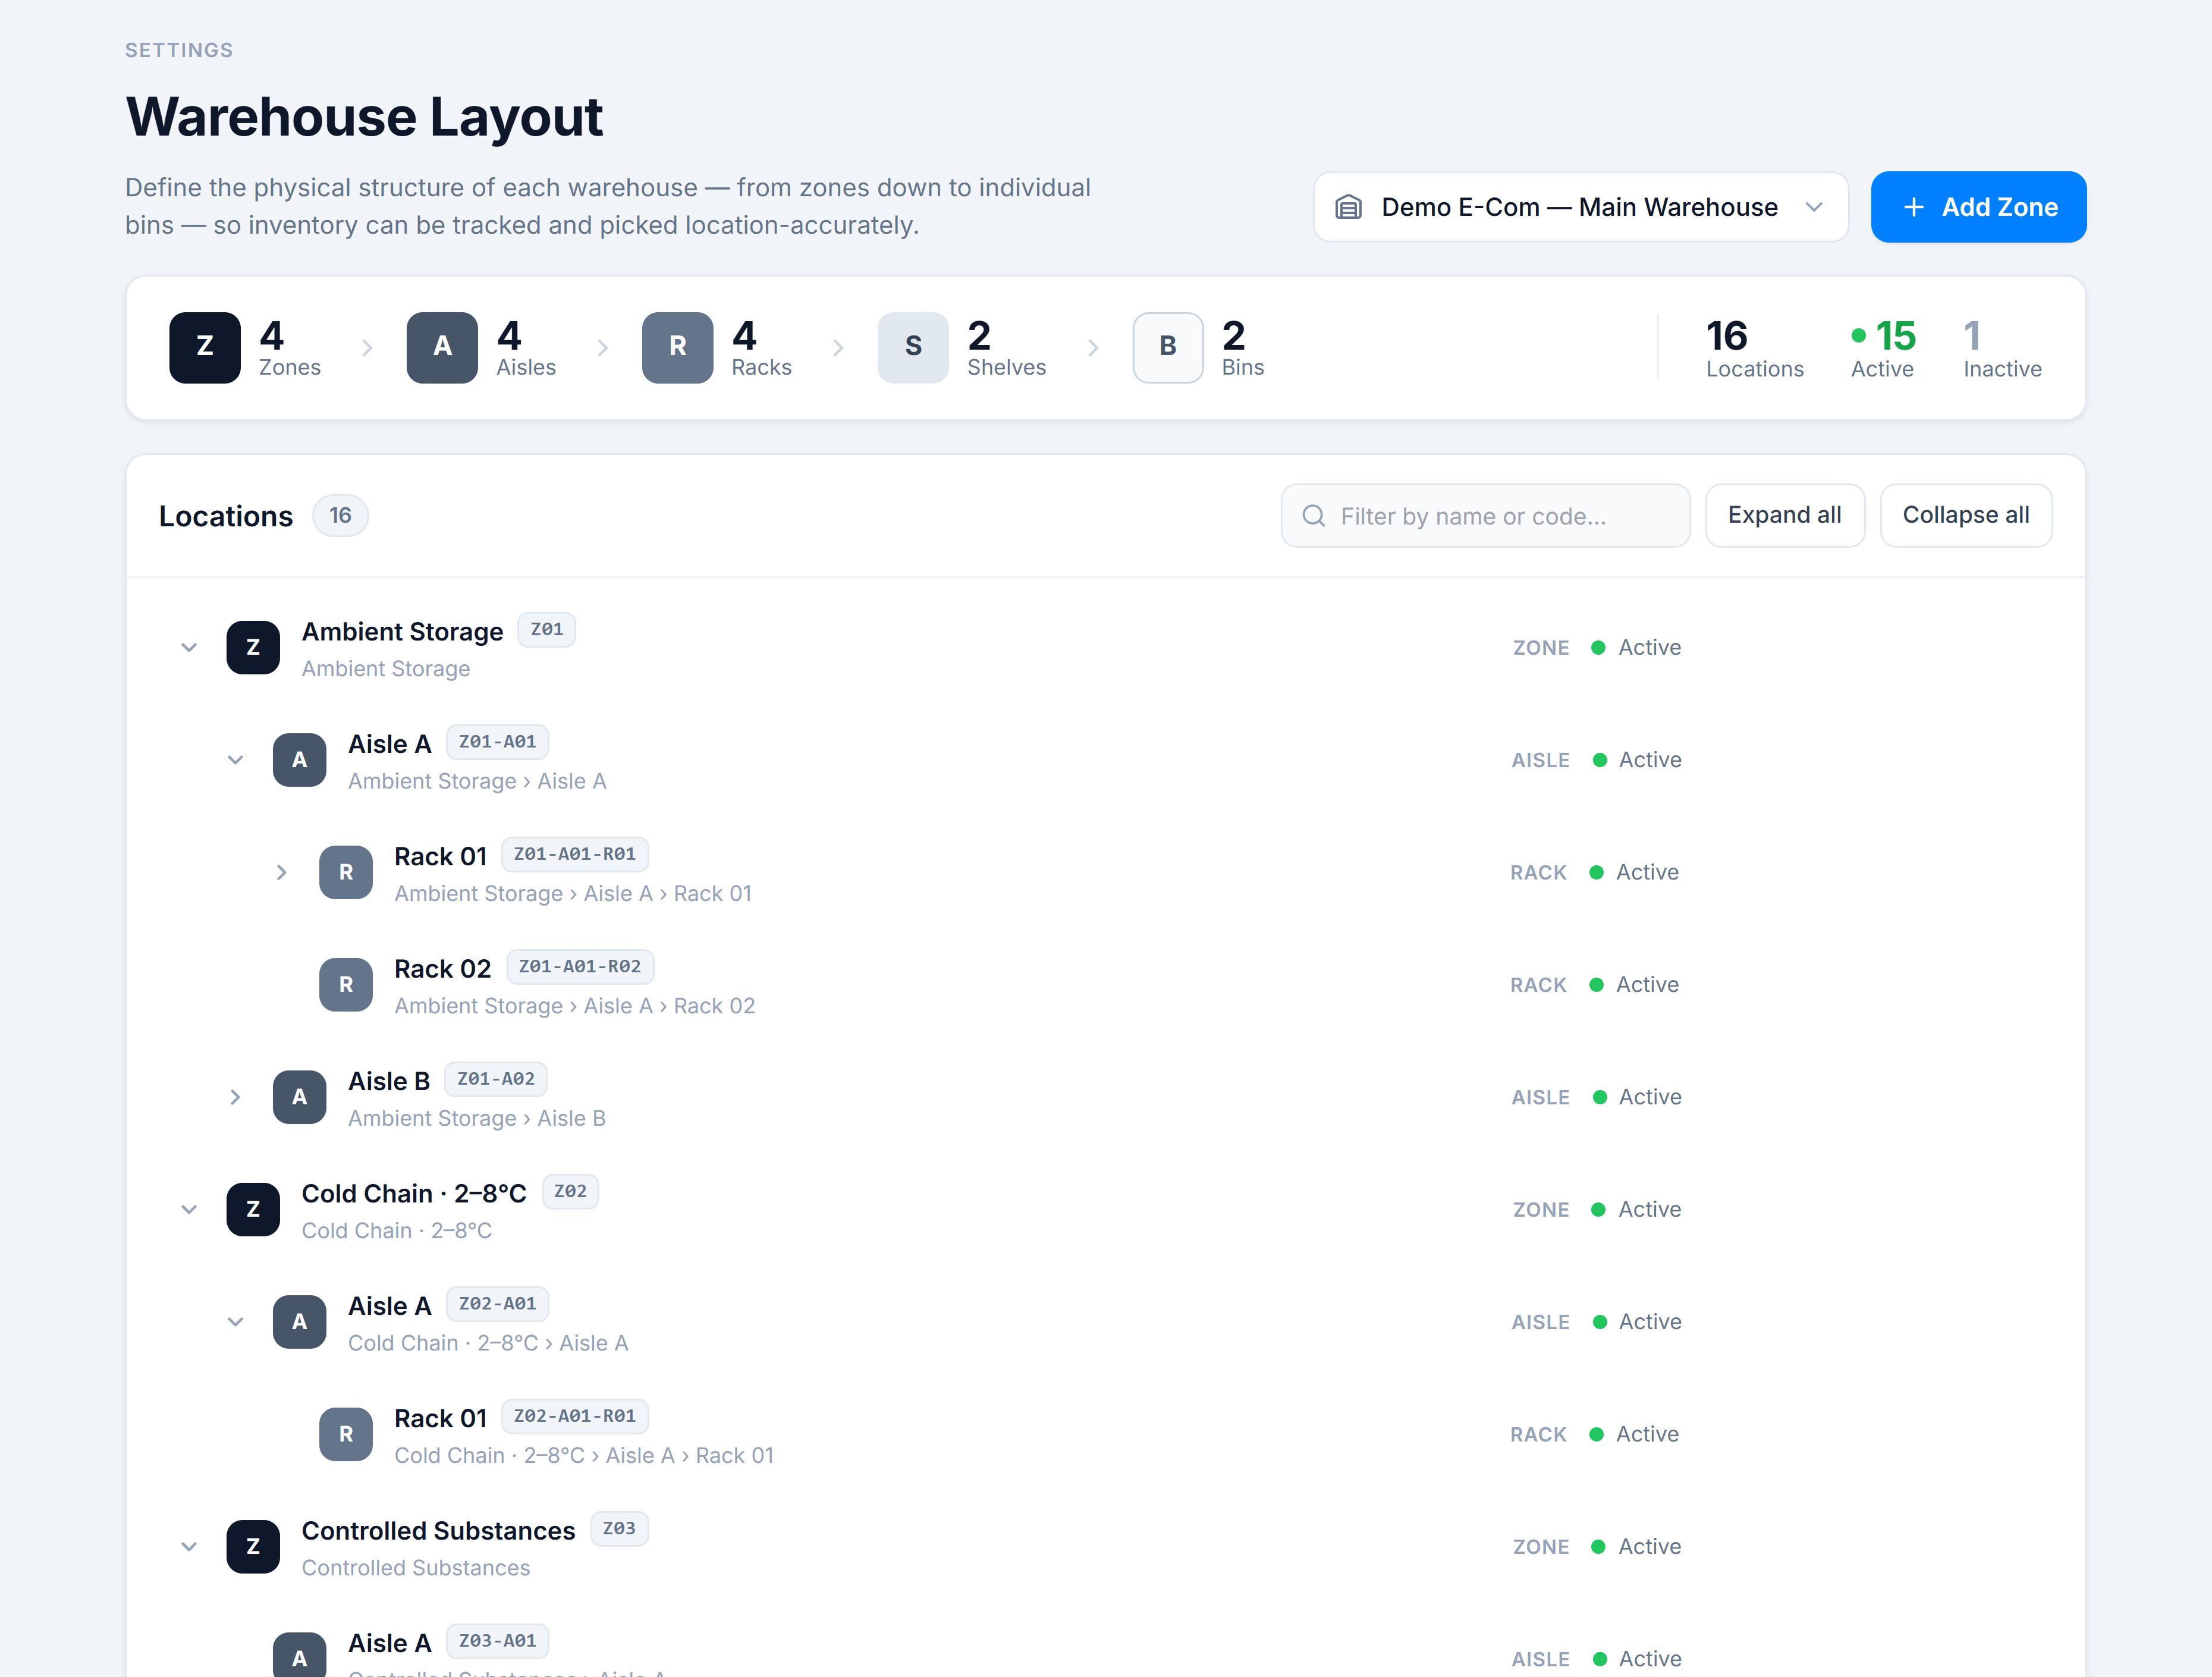
The screen opens with a summary rail (how many zones, aisles, racks, shelves and bins, plus active/inactive), then a filterable tree of every location with per-row actions — print a label, add a child location, edit, or delete.
How to get there
In the app sidebar: Inventory → Settings → Warehouse Layout.
(Optional, for support/dev: route settings/warehouse-layout.)