Tutorial: Run a shift on the Smart Counter
This is a guided walk through one complete shift: open the till, sell to a customer, take payment, print the receipt, and close out at the end. Follow it once start to finish and you’ll have done everything a normal shift needs. For any single step on its own, jump to its how-to page — this tutorial links each one as it comes up.
1. Open your till
You sell from a till session, so the first thing each shift is to open one.
The till picker opens. Pick your store and warehouse, then choose a till from the list — each card shows its status (your open session, Free, In use by a colleague, or Maintenance) and its balance. Click a Free till.
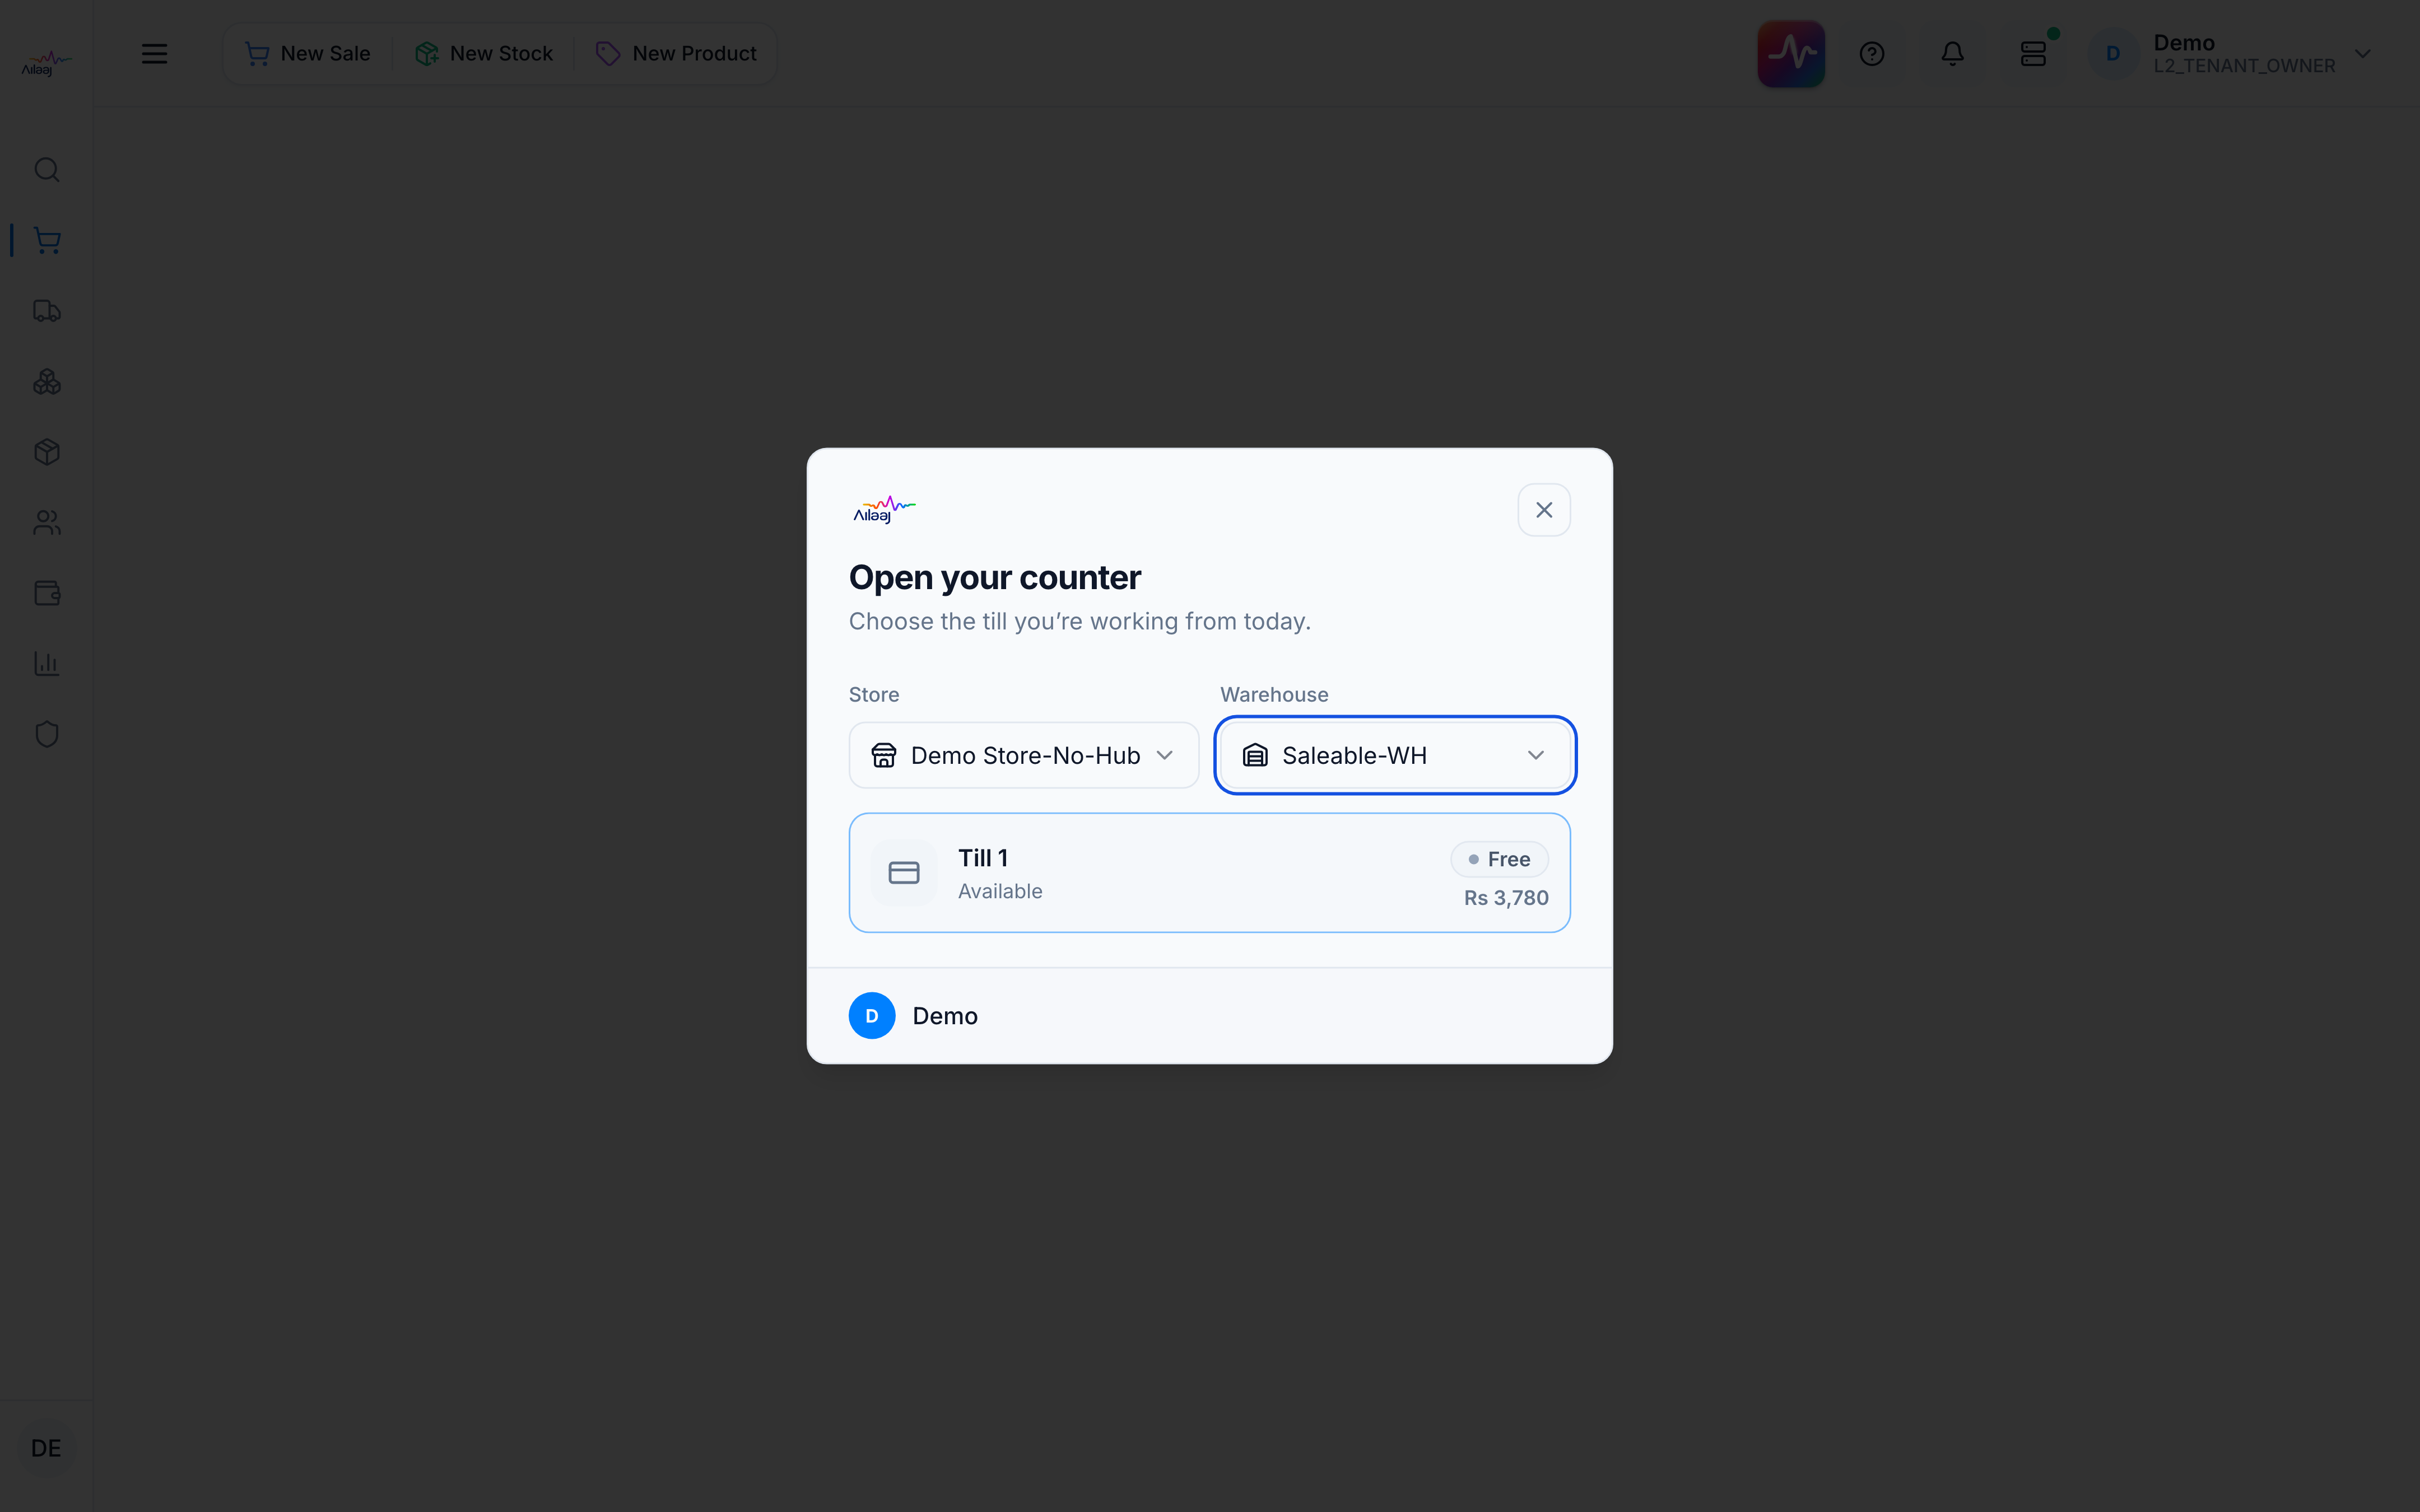
The Opening cash balance pane is pre-filled with that till’s last closing balance (“Suggested Rs N from last closing”). Adjust it if your count differs, then press Open — and you’re in.
The header switches to Online and shows your balance. You’re ready to sell. (Full detail: Open a till session.)
2. Add what the customer is buying
Click Add product (Ctrl+F), type at least two characters of the name or SKU, and pick from the In Stock results. The item lands on the cart at quantity 1 with its quantity field focused, so you can type the count straight away.
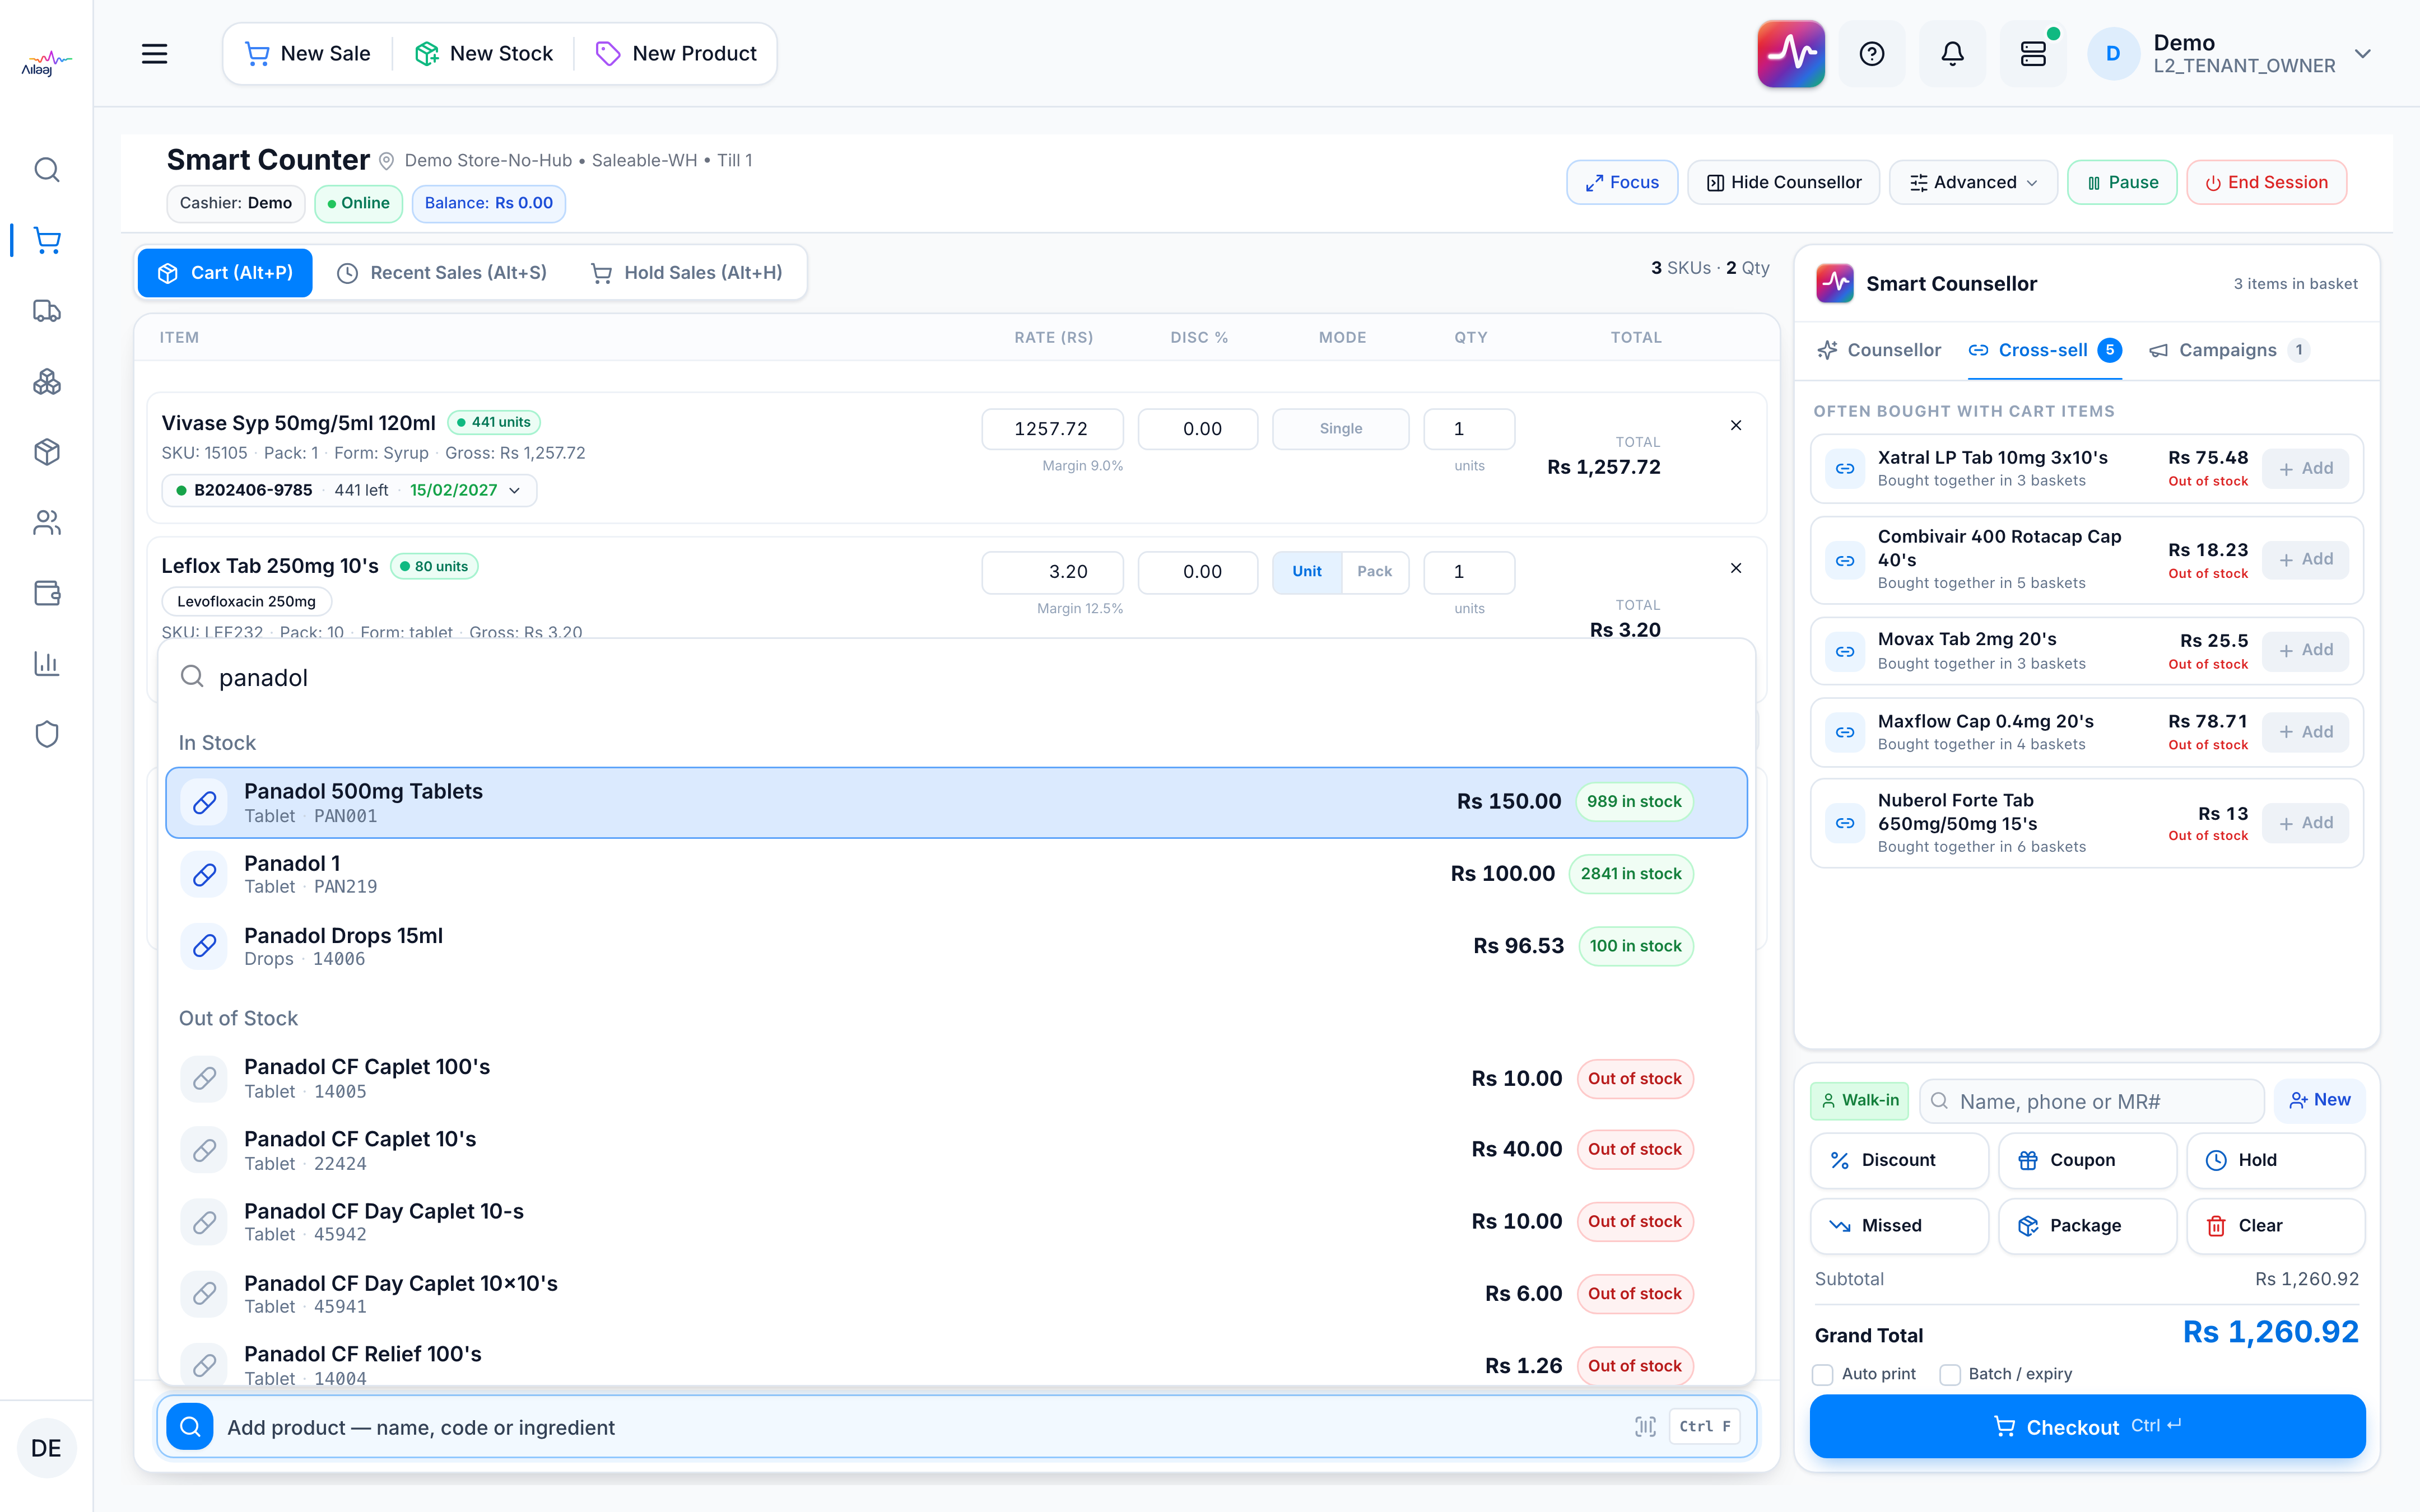
If you have a barcode scanner, scan into the same Add product bar (Ctrl+F) — each scan adds one unit and clears the bar for the next. The batch and expiry are chosen for you (earliest expiry first). (More ways to add: Add products.)
3. Attach the customer
Next to the totals, the customer defaults to Walk-in. Type a name, phone, or MR# and press Enter to attach the match.
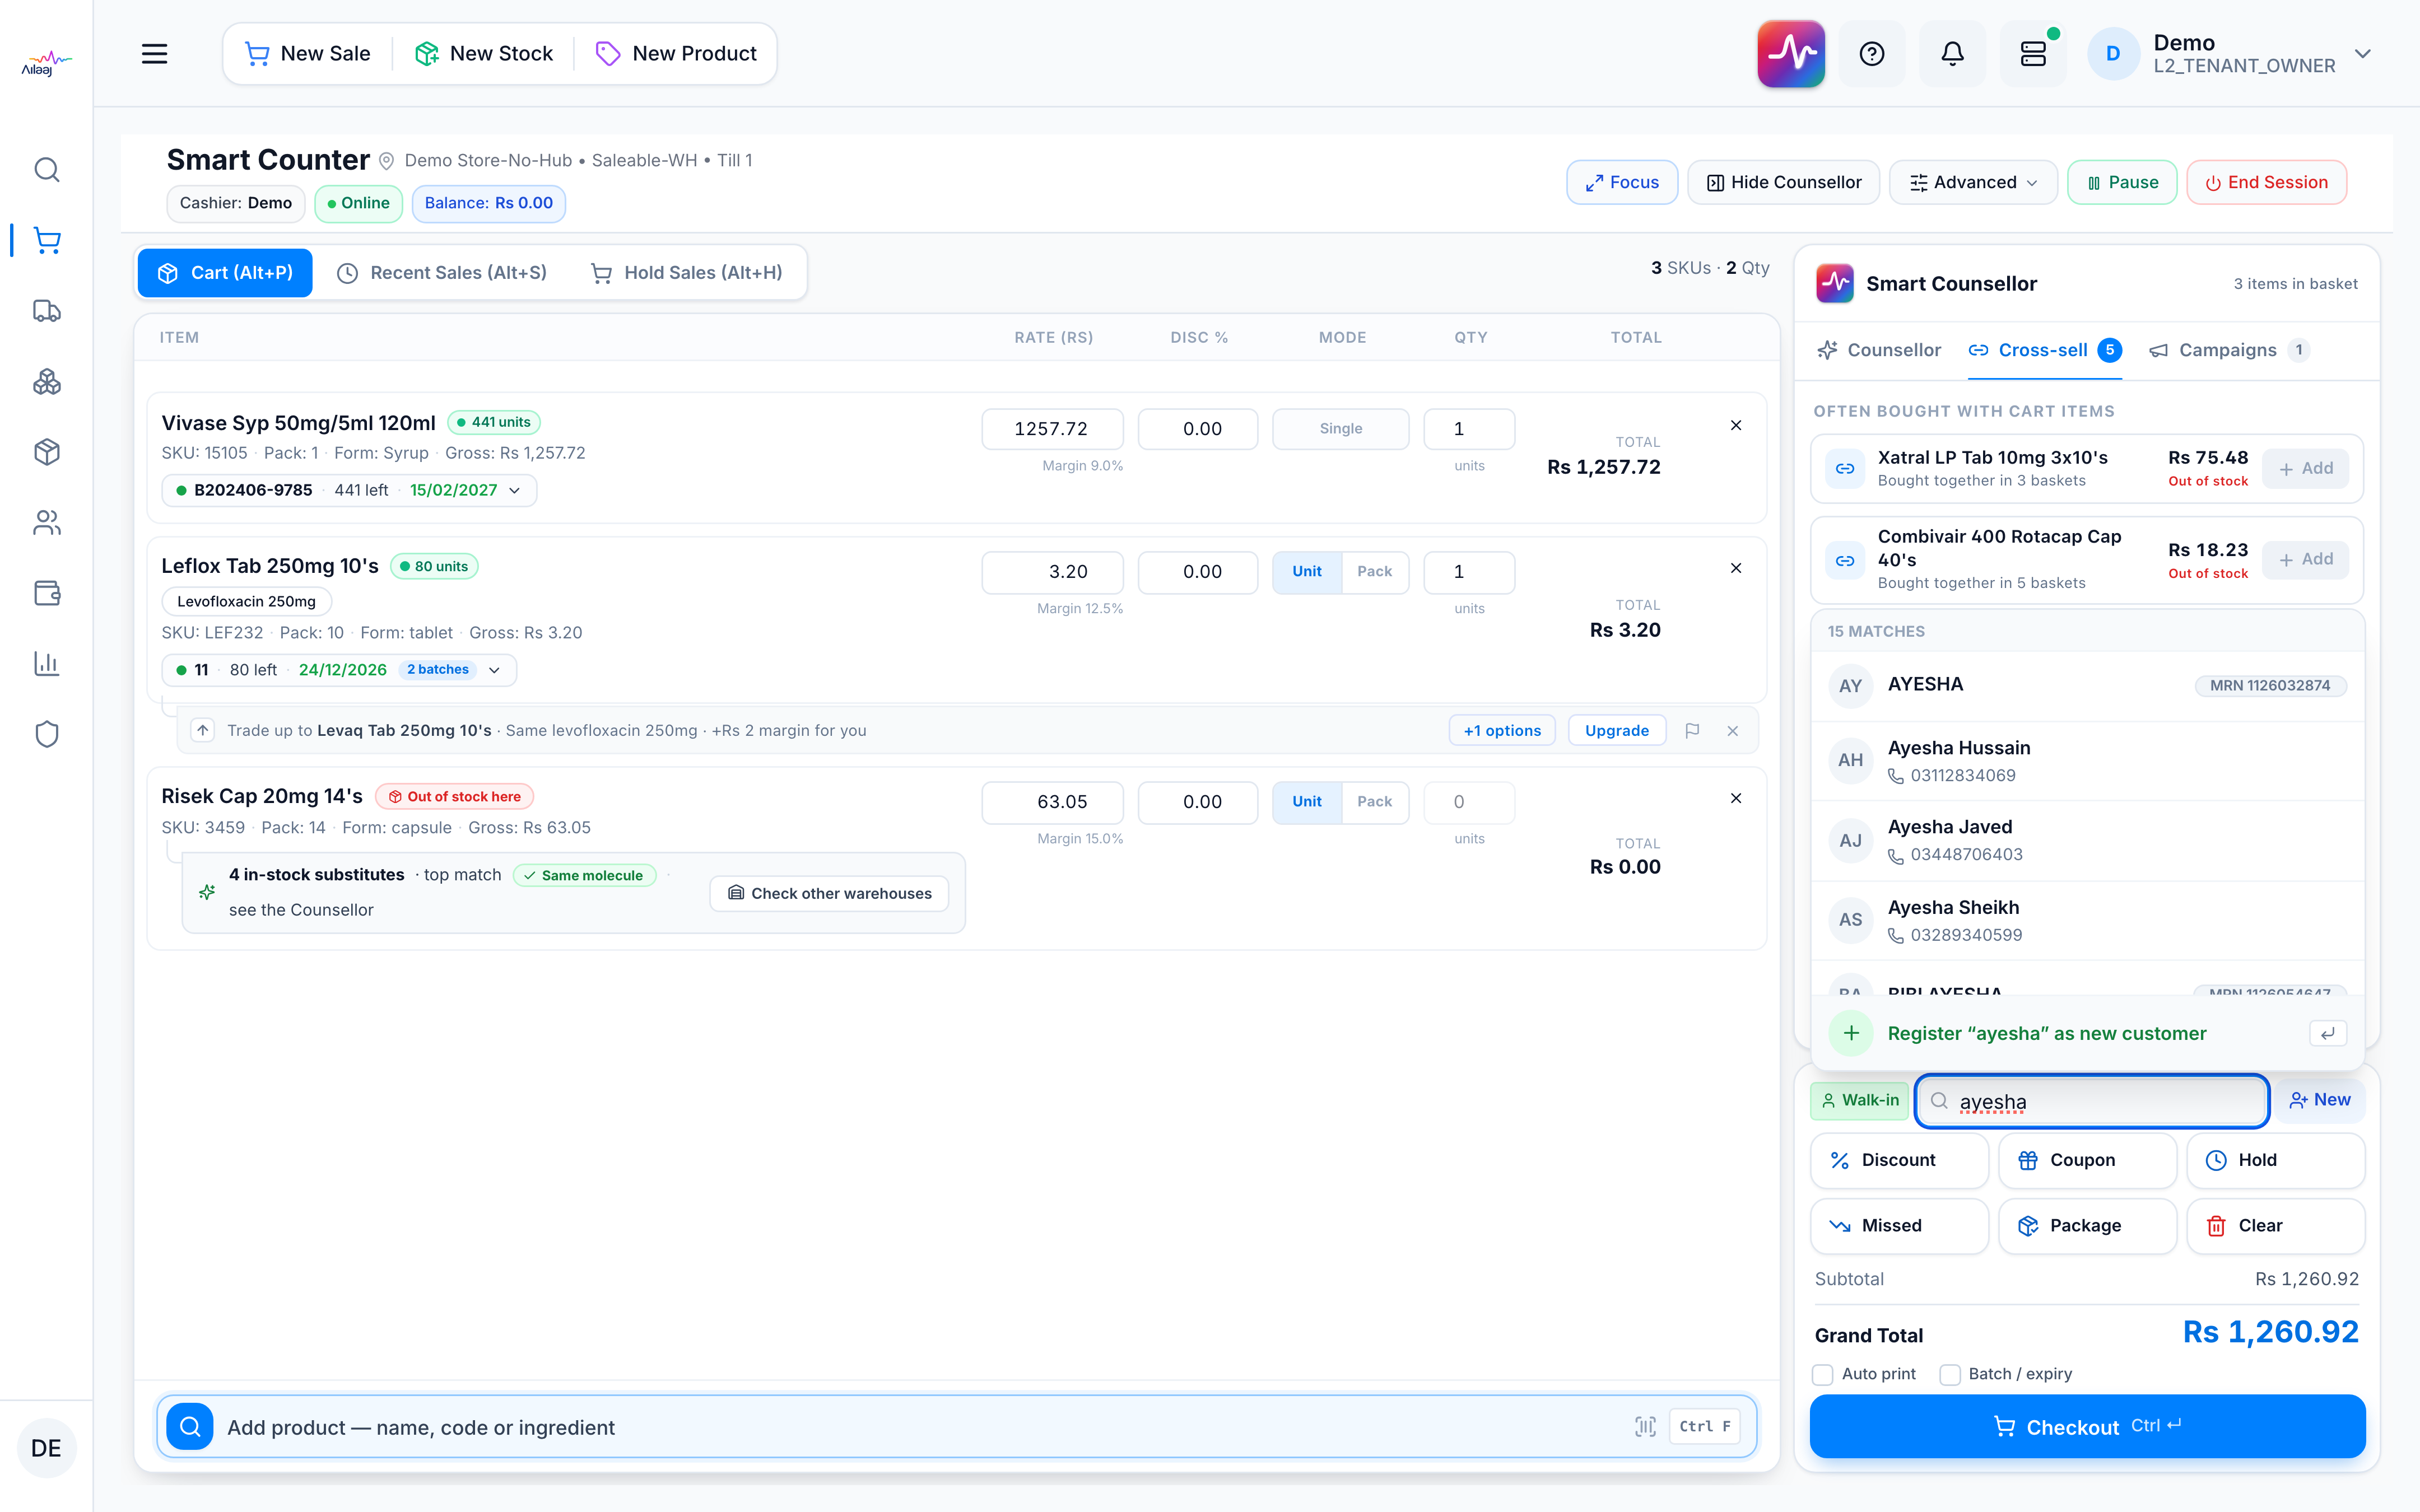
If the customer belongs to a discounted customer group, that discount applies to the cart the instant you attach them — you don’t add it by hand. (Detail, including creating a customer on the spot: Add a customer.)
4. Take payment and print the receipt
Click Checkout (Ctrl+Enter), confirm the payment, and complete the sale. The completion dialog offers Print Receipt and Start New Sale — print, and you’re done with this customer. (Detail: Checkout & take payment and Print a receipt.)
When a customer steps away mid-sale, don’t lose the basket — click Hold (Ctrl+H) to park it and serve the next person, then Recall it later. See Hold & recall a sale.
5. Close the till at end of shift
When the shift ends, click End Session. Enter any deposits or adjustments, count the drawer, and enter the Actual Cash Count. If the variance is Rs 10 or more over or short, add a reason. Confirm to get a printable Session Summary.
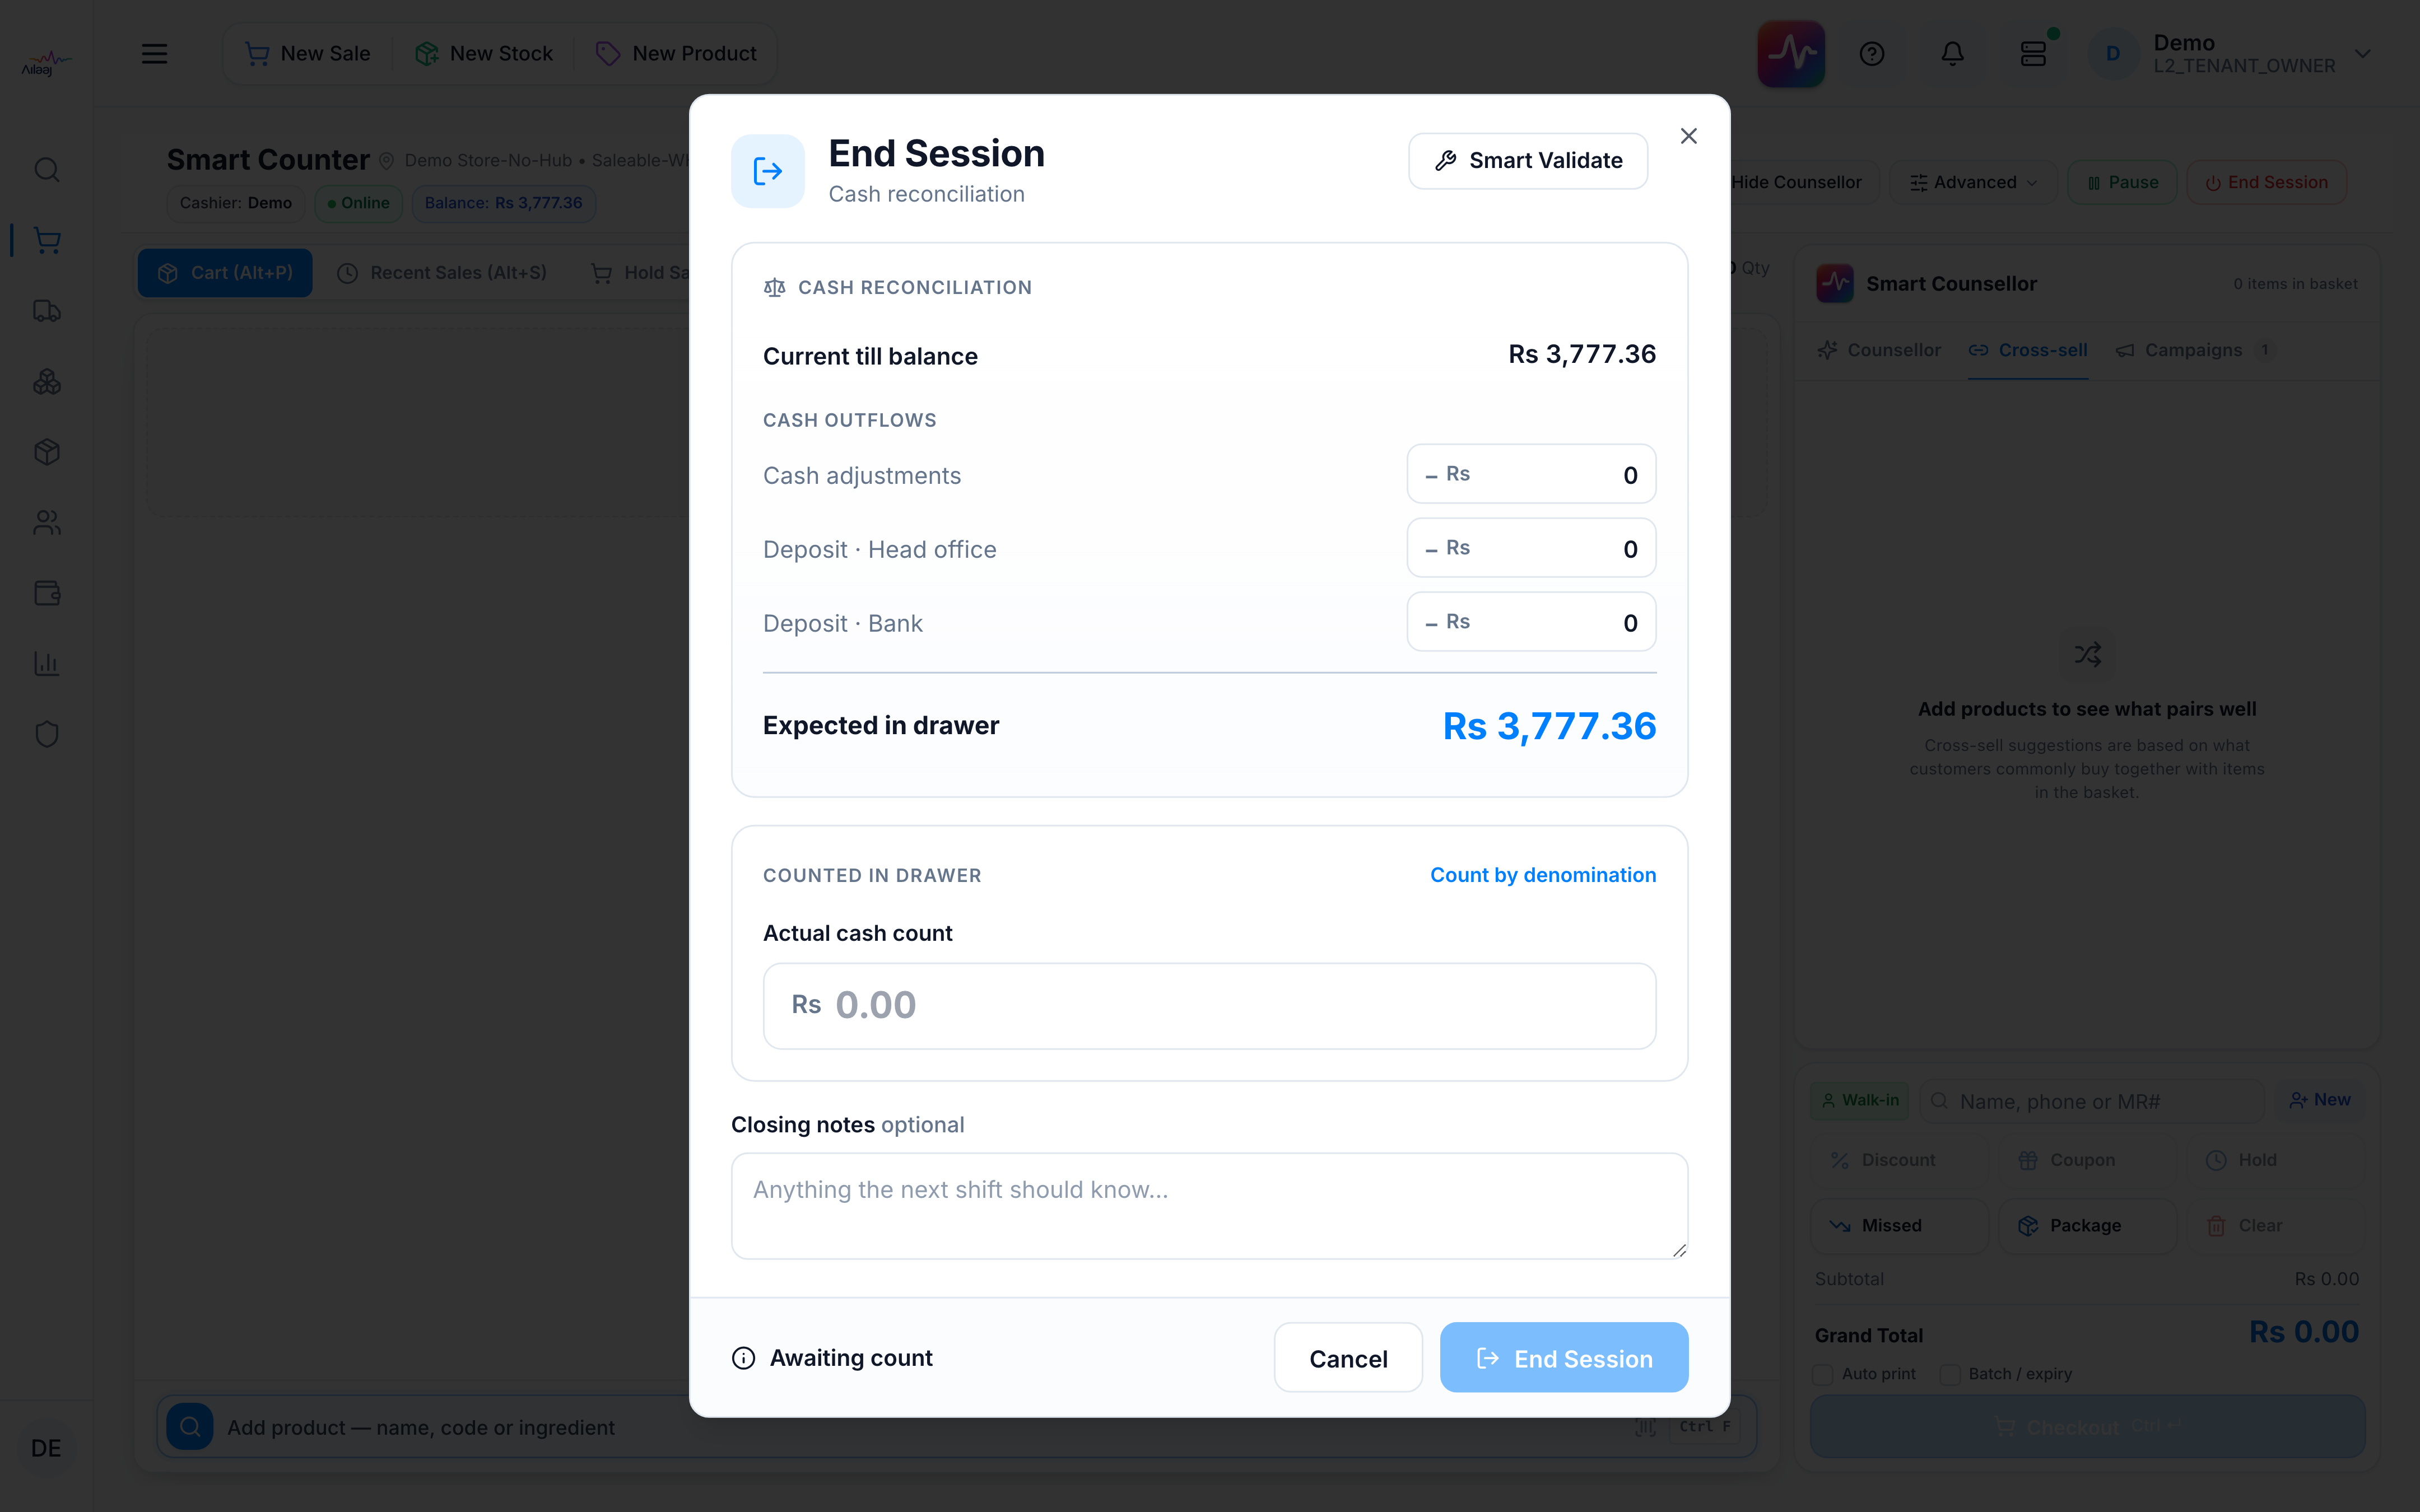
That’s a full shift: opened the till, sold and took payment, printed the receipt, and closed out. (Detail: Close the till.)
Where to go next: keep the how-to pages as your reference card, learn to run the counter without a mouse in Keyboard Navigation, and turn on the AI selling layer with Smart Counsellor.