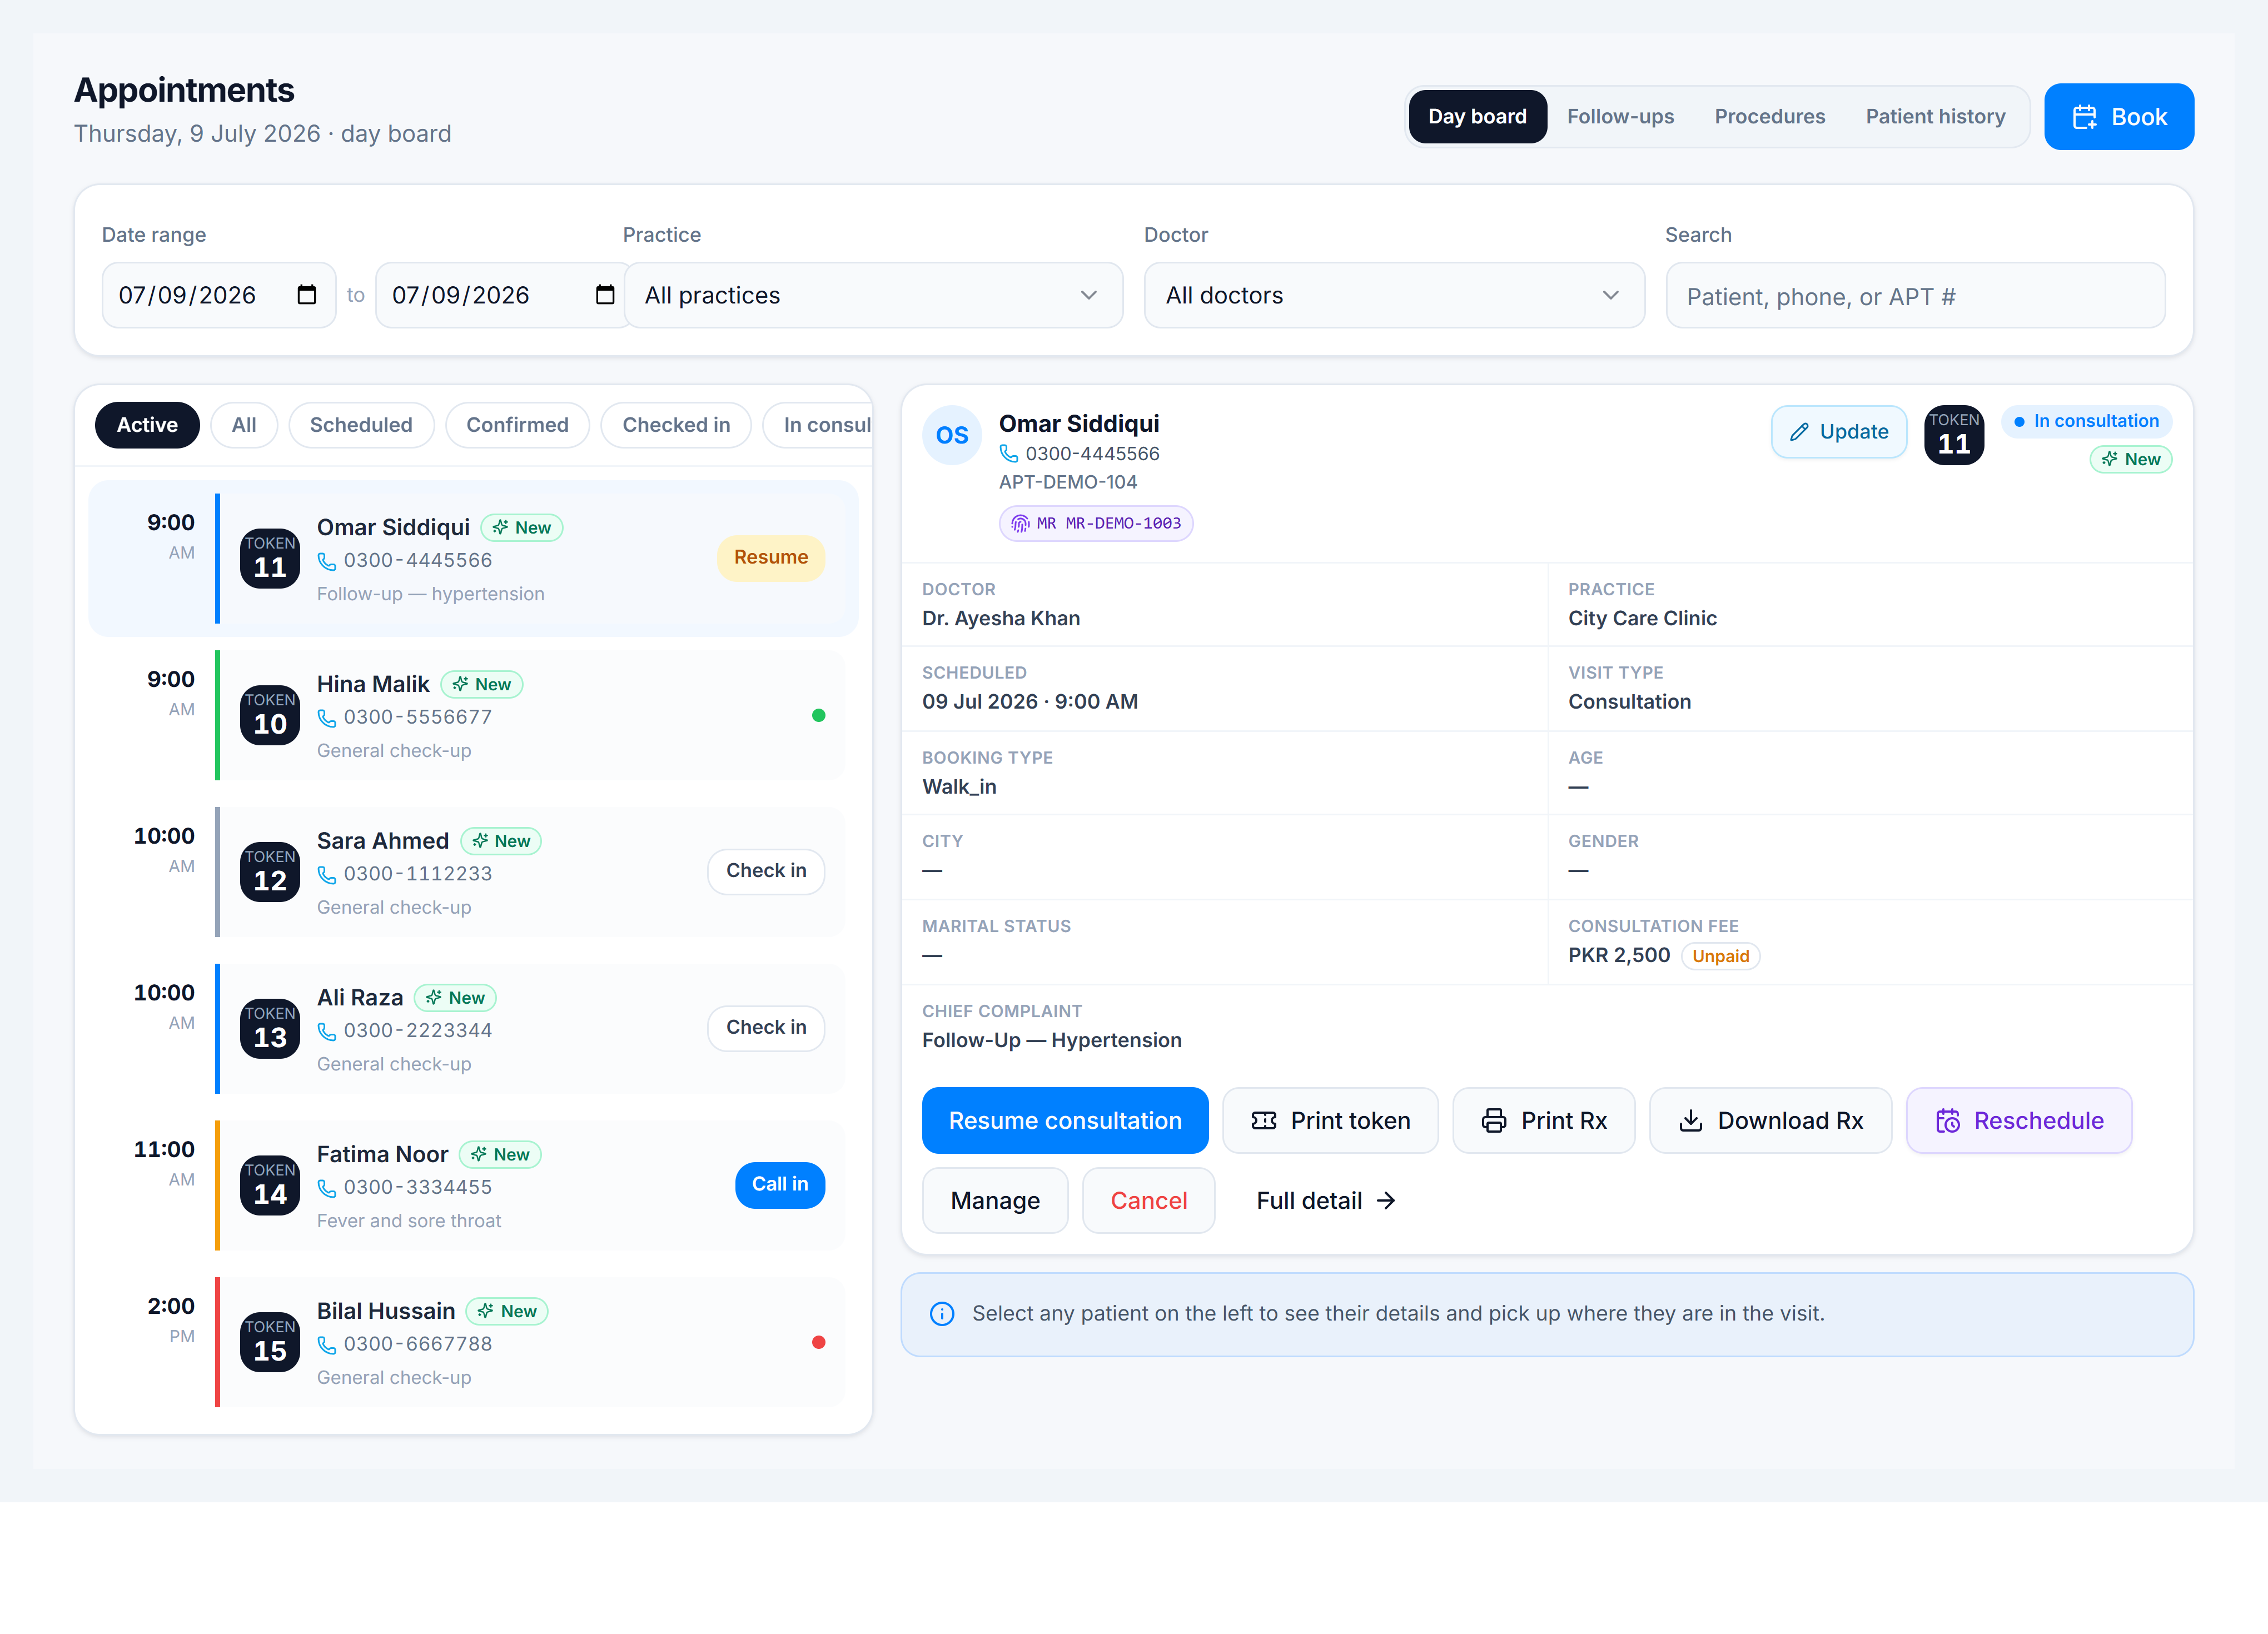
Check in from appointments
Steps
- Open Appointments and filter to Active or the specific status (
confirmed,scheduled). - Locate the patient’s row — note the token number and scheduled time.
- Click Check in (or open the row → Mark arrived) — status becomes Checked in.
- Optional: Collect vitals before the doctor sees the patient (weight, BP, temperature).
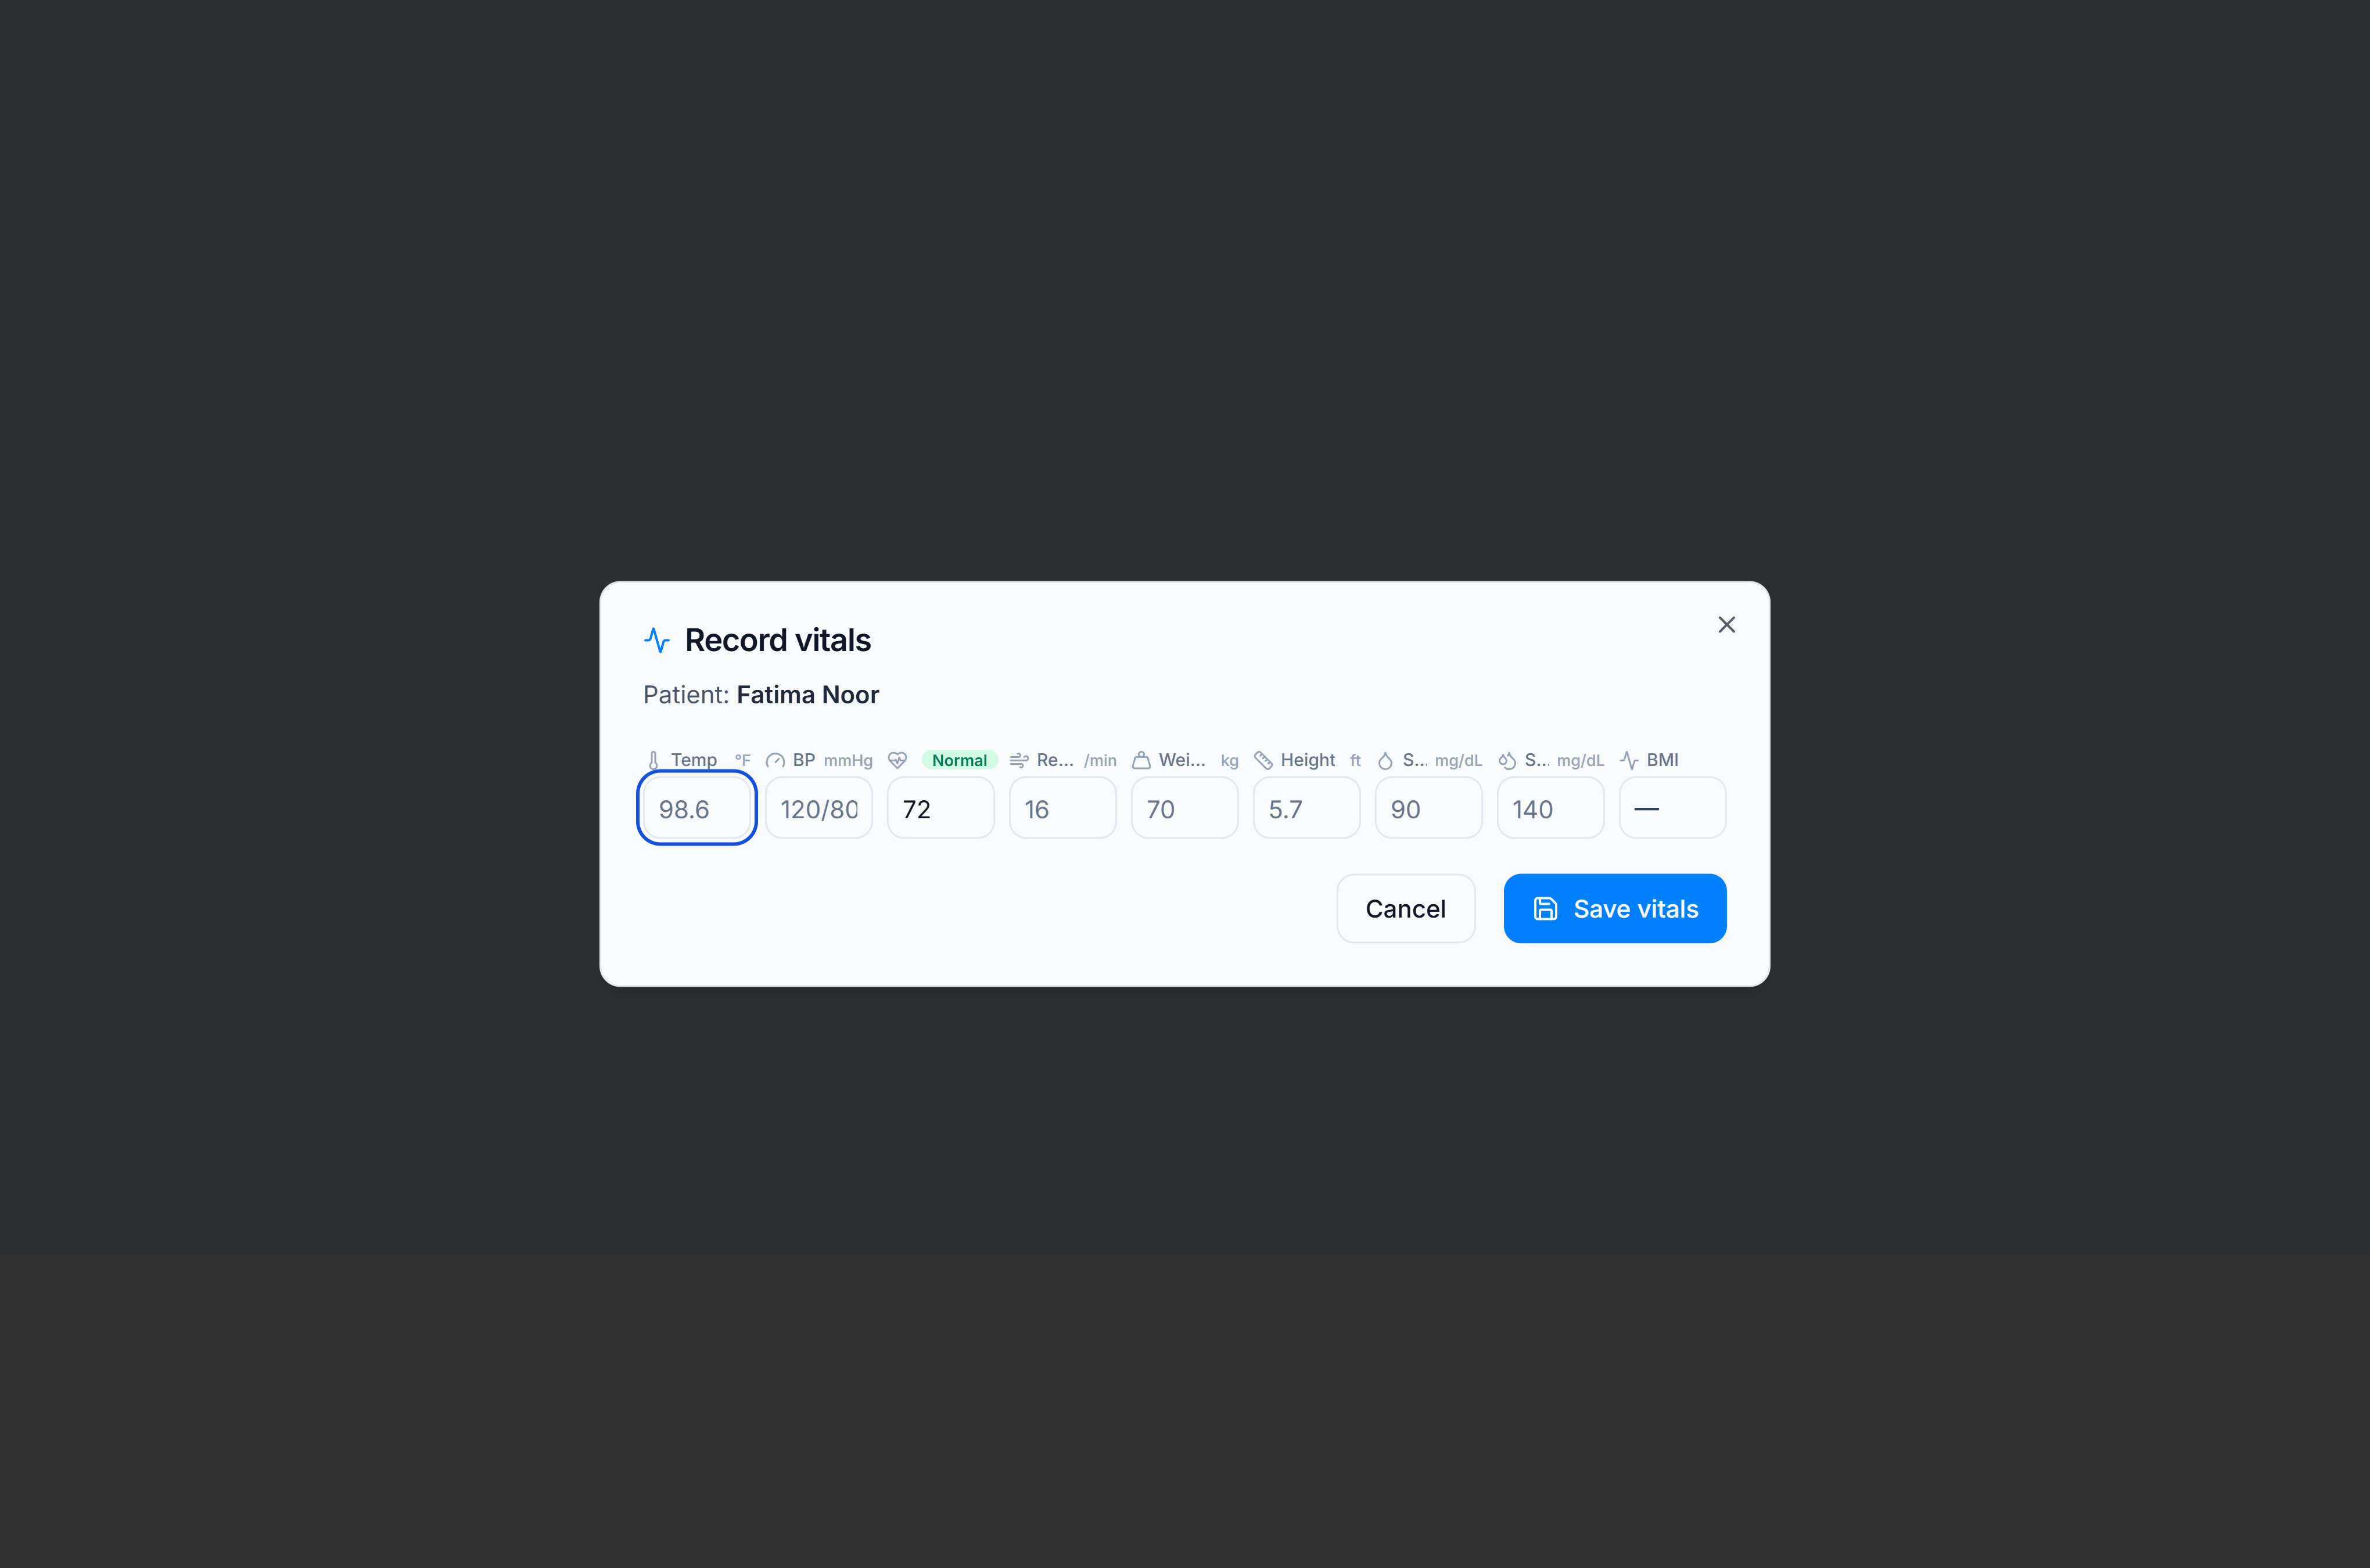
- Optional: Collect fee — consultation fee posts to the appointment metadata.
- Print token for the waiting room display.
Other appointment board tabs
The Appointments screen has four views — not only the day board:
| Tab | Guide |
|---|---|
| Day board | This guide (check-in, vitals, fee, token) |
| Follow-ups | Book expected follow-ups |
| Procedures | Follow up on procedures |
| Patient history | View patient history |