Run a clinic day
This tutorial walks a typical outpatient day: see what’s on, book a visit, check a patient in, move them through the queue, and open the consultation workspace.
Before you start
- Your tenant has the clinic module enabled.
- You can reach Clinical → Clinic CMS in the sidebar.
- At least one practice, location, and doctor are configured.
1. Read today’s dashboard
Open Dashboard. Note the date picker, practice/doctor filters, and the Today’s timeline tab. Each row shows token, patient, doctor, and quick actions (print token, open consultation).
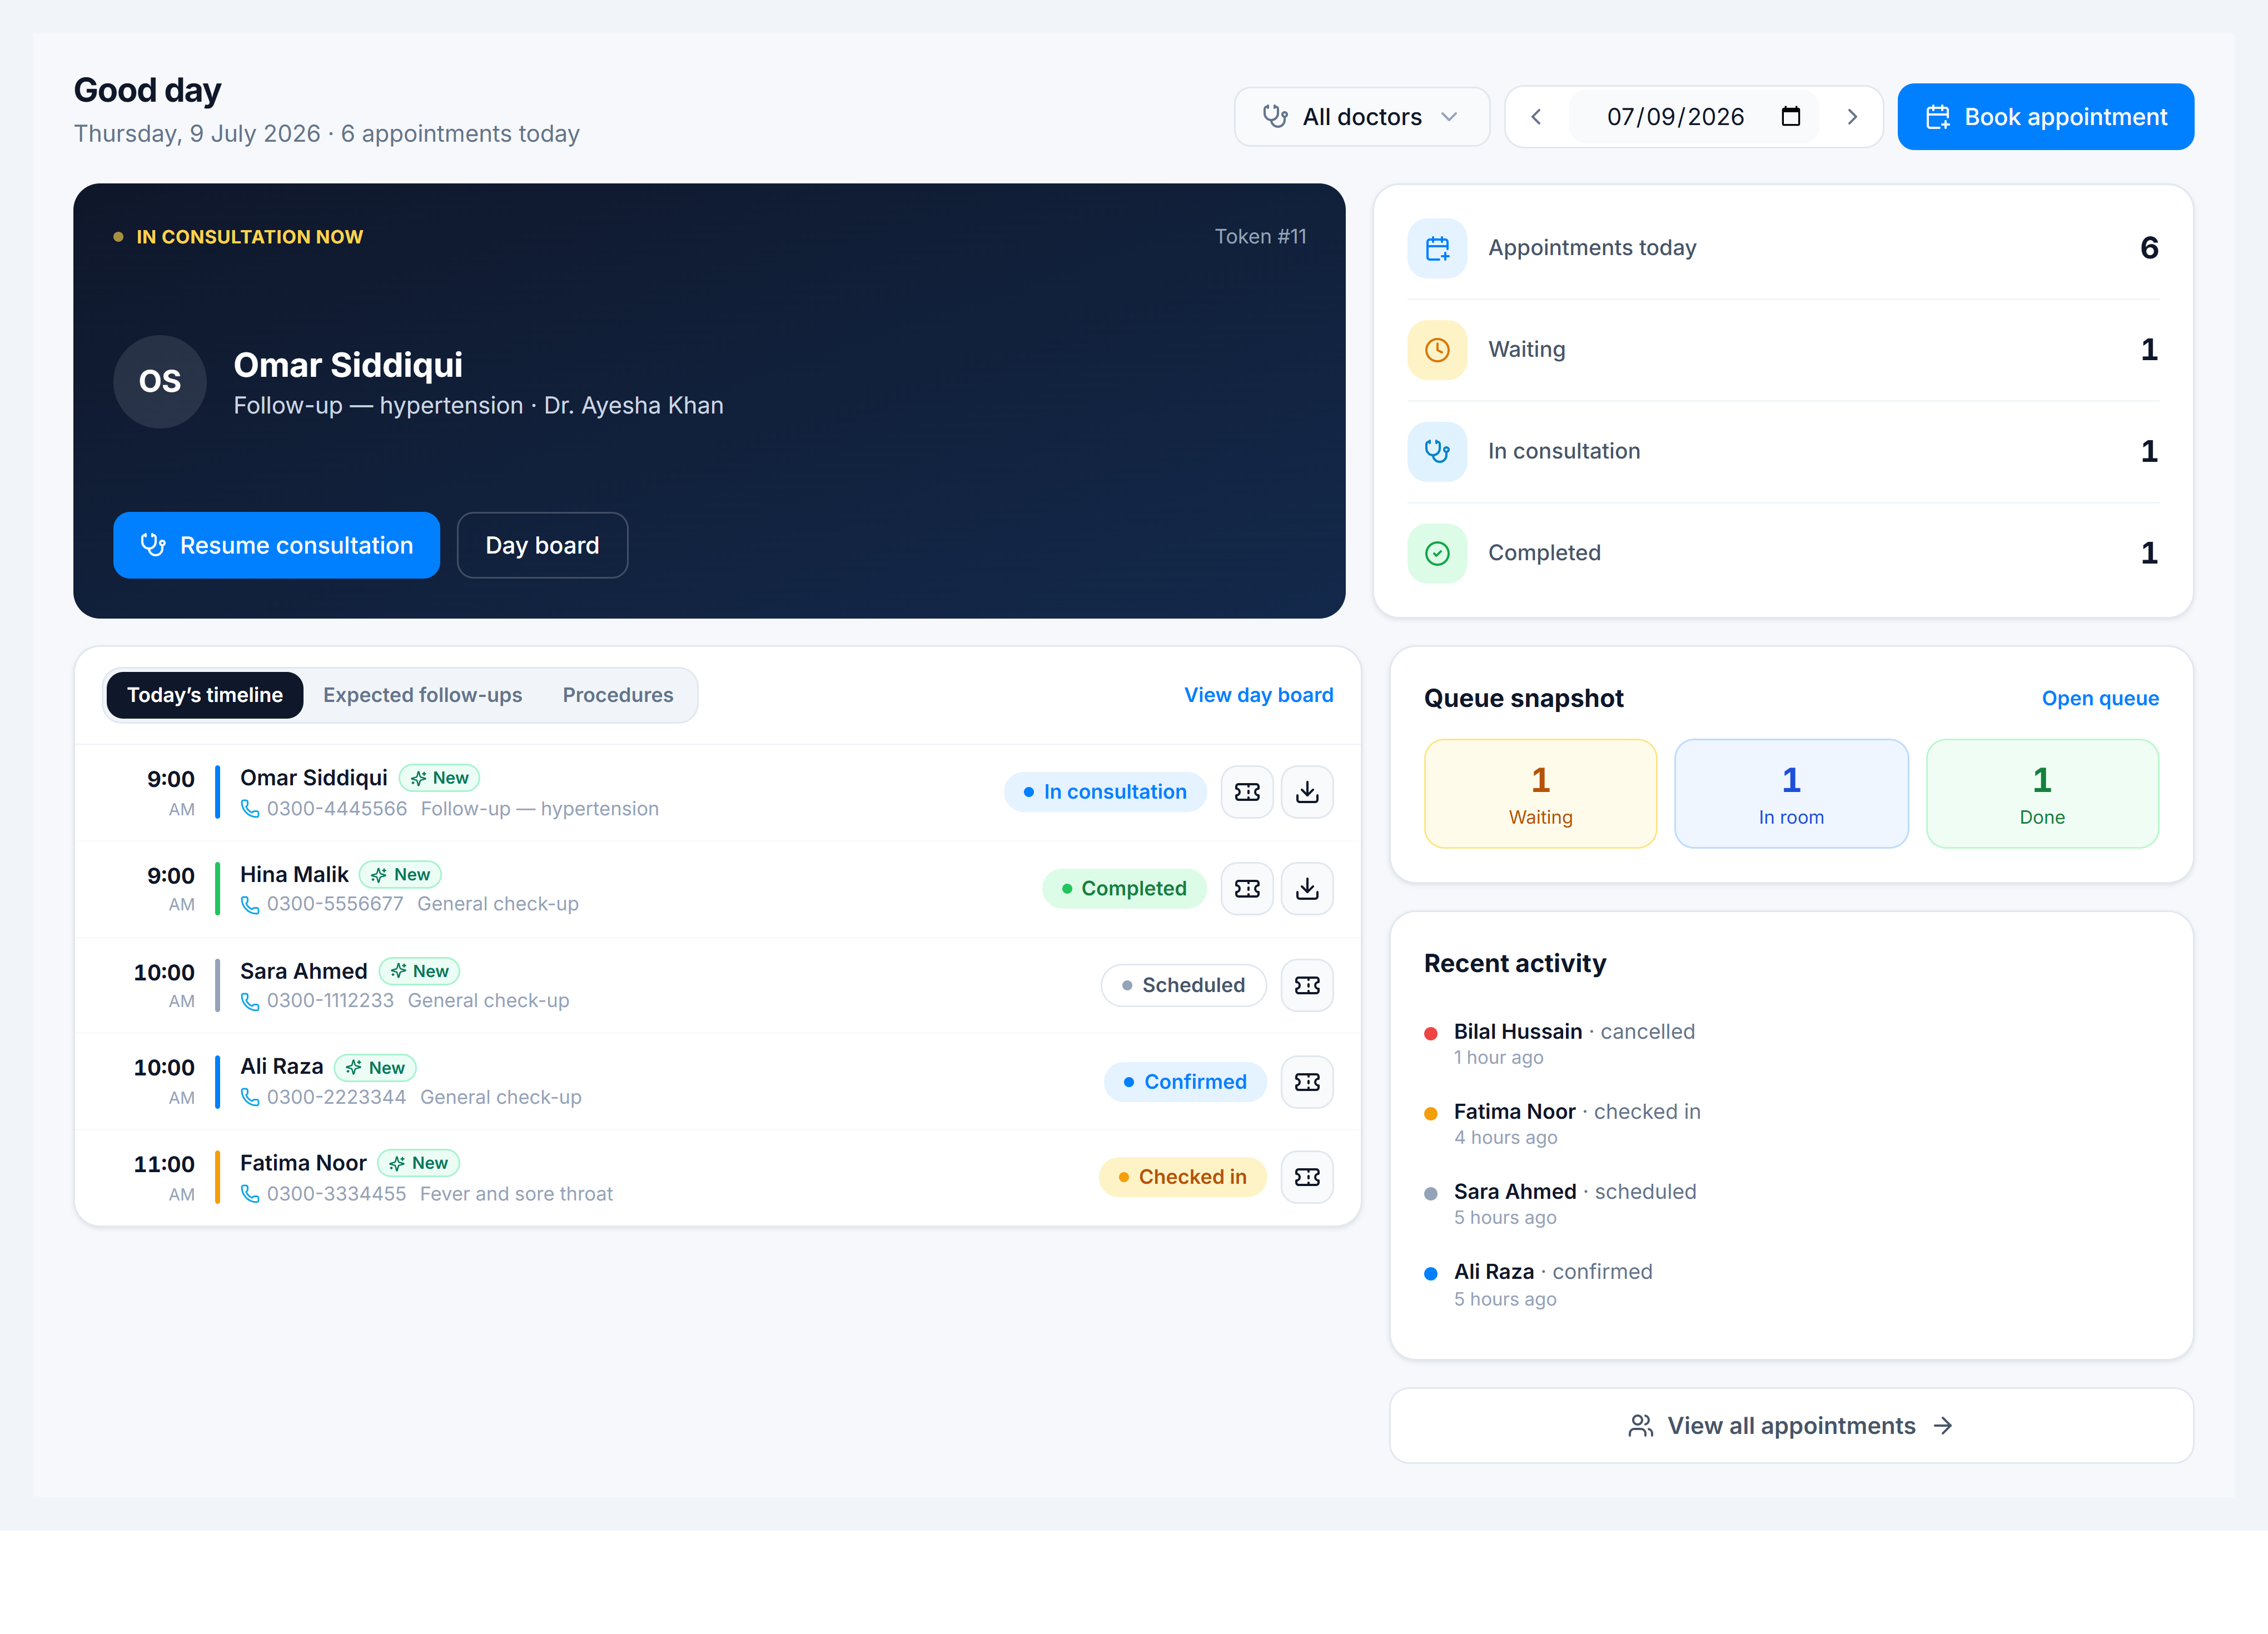
Switch to Expected follow-ups and Procedures to see upcoming work beyond today’s appointments.
2. Book a new appointment
Go to Appointments → New booking (or header New Booking). Pick practice, location, and doctor, then click an available slot on the calendar. Fill patient details and save.
3. Check in from the day board
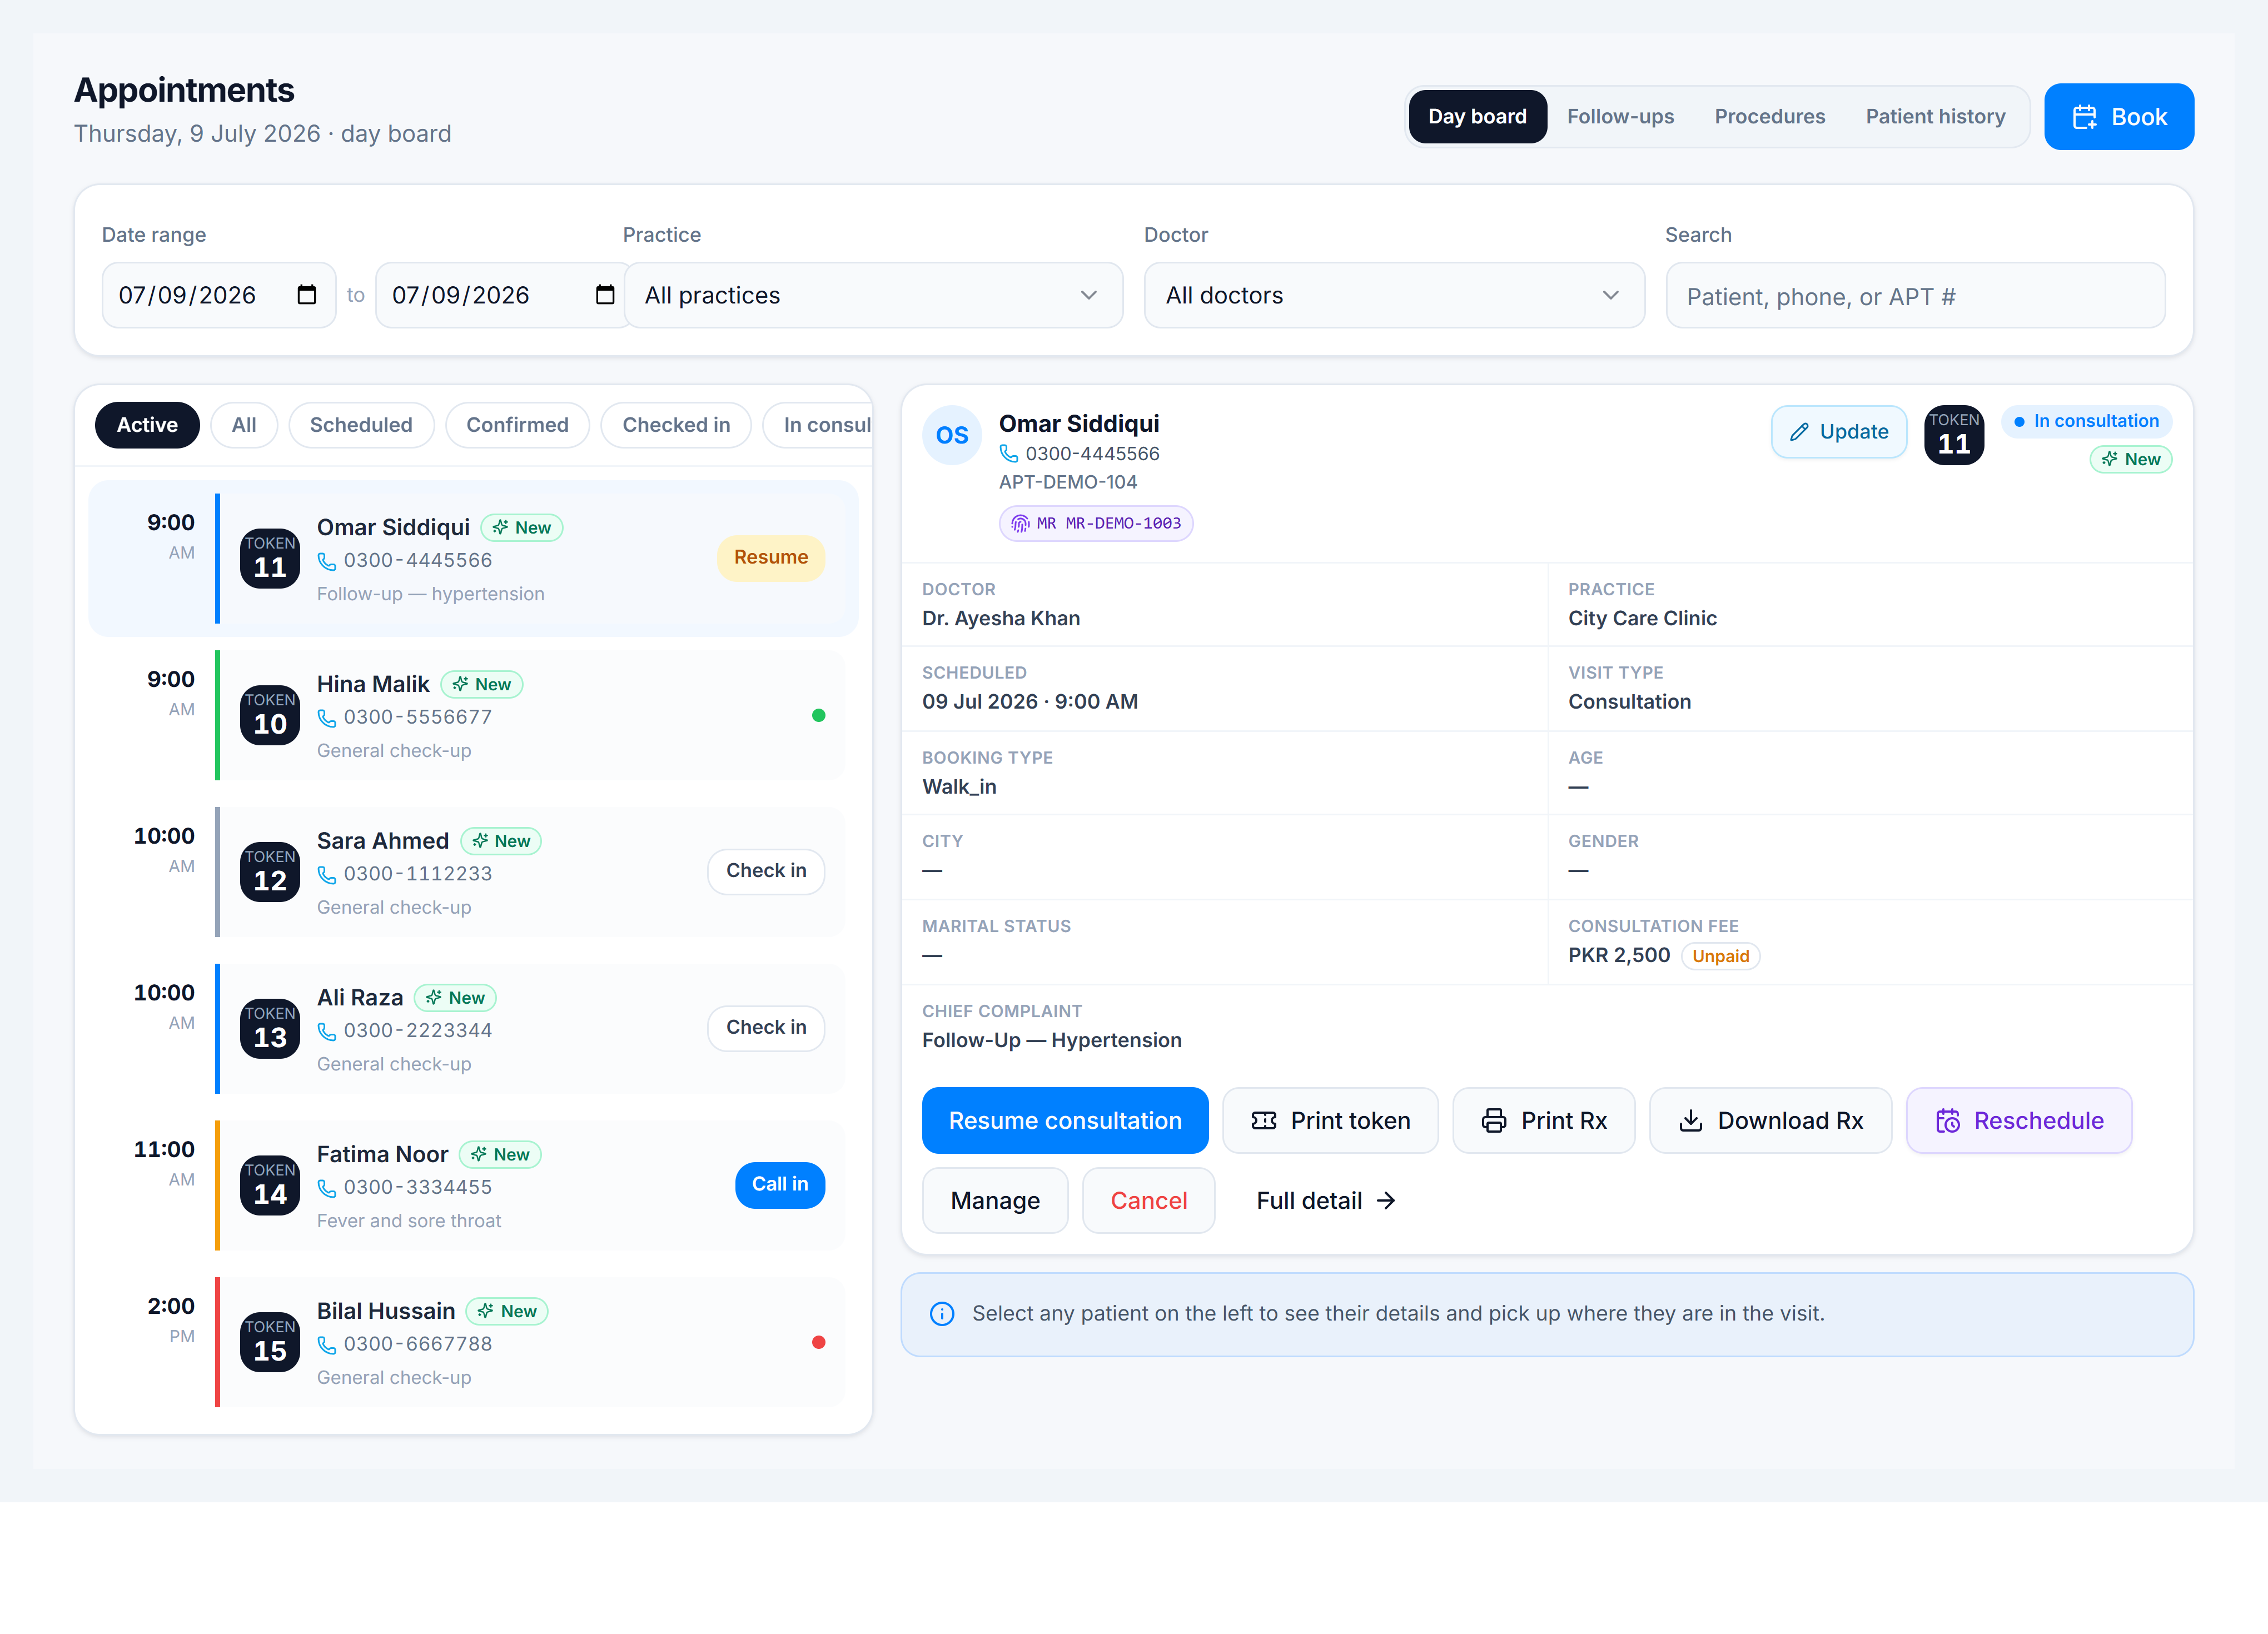
On Appointments, find a confirmed row and use Check in (or open the row and mark Arrived). Optionally collect vitals and print a token.
4. Move patients on the queue
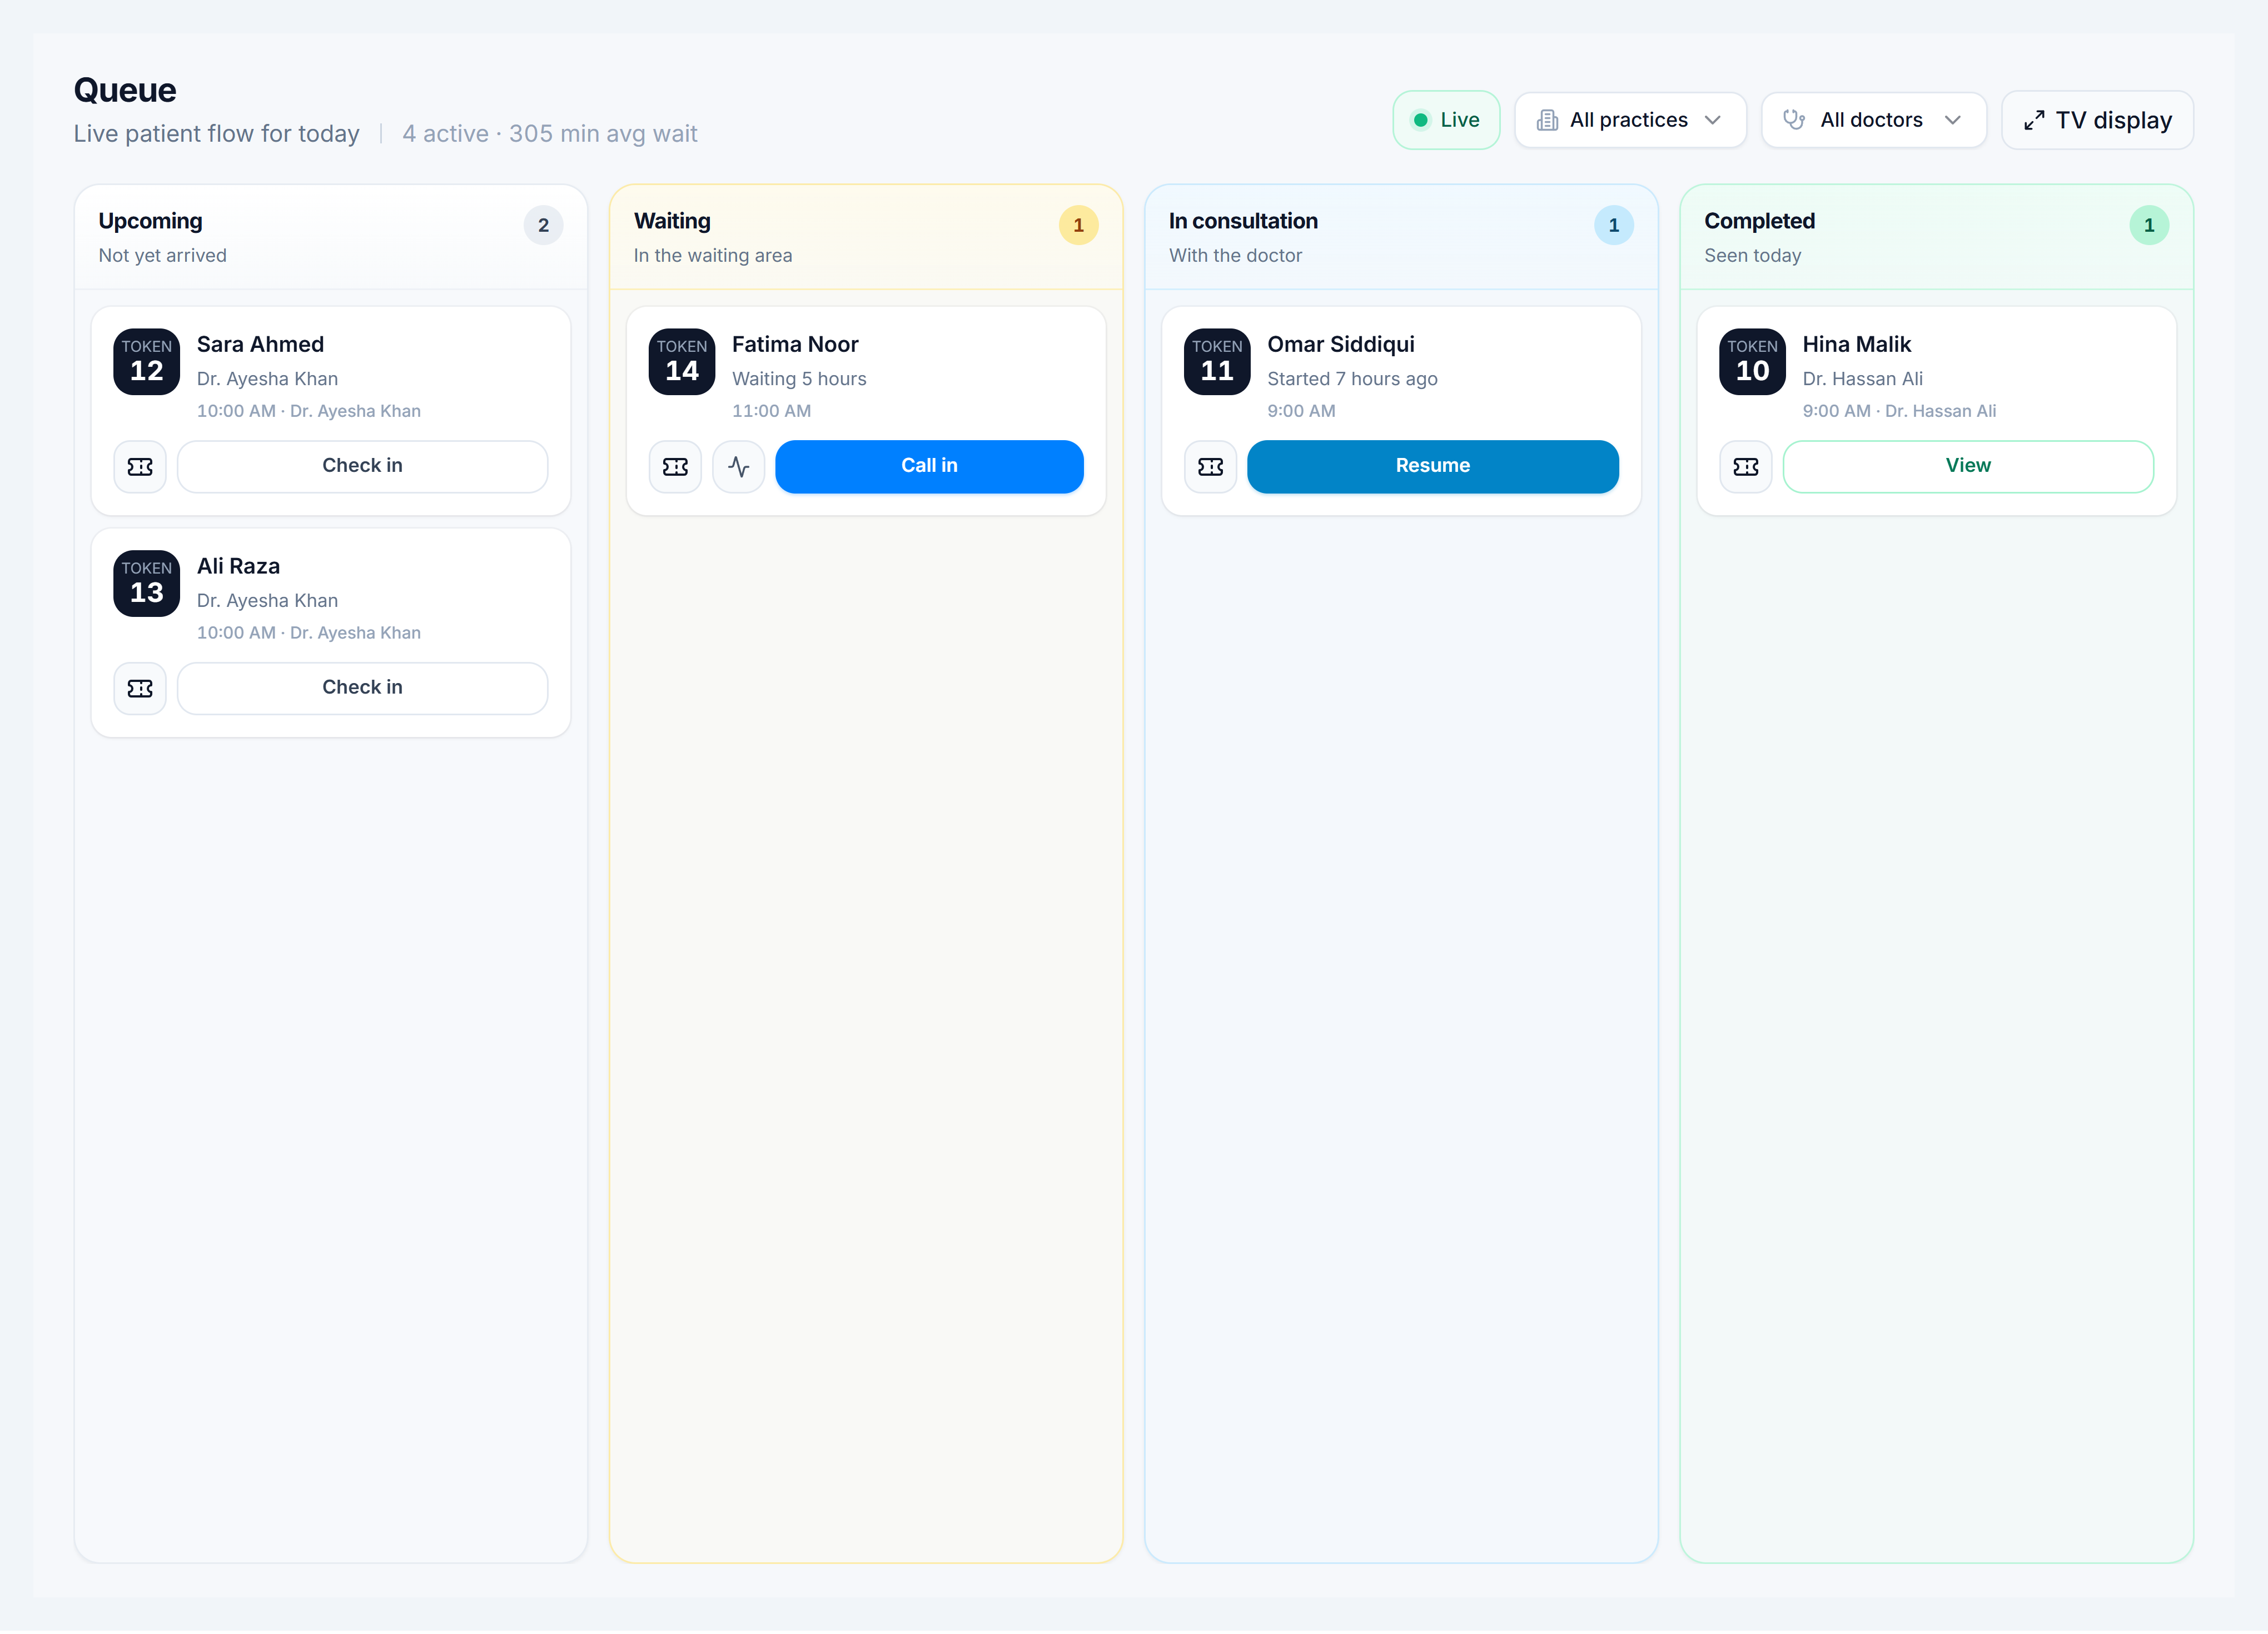
Open Queue. Patients appear in columns: Upcoming → Waiting → In room → Done. Use Check in, Call in, or Resume on each token tile.
5. Open the consultation
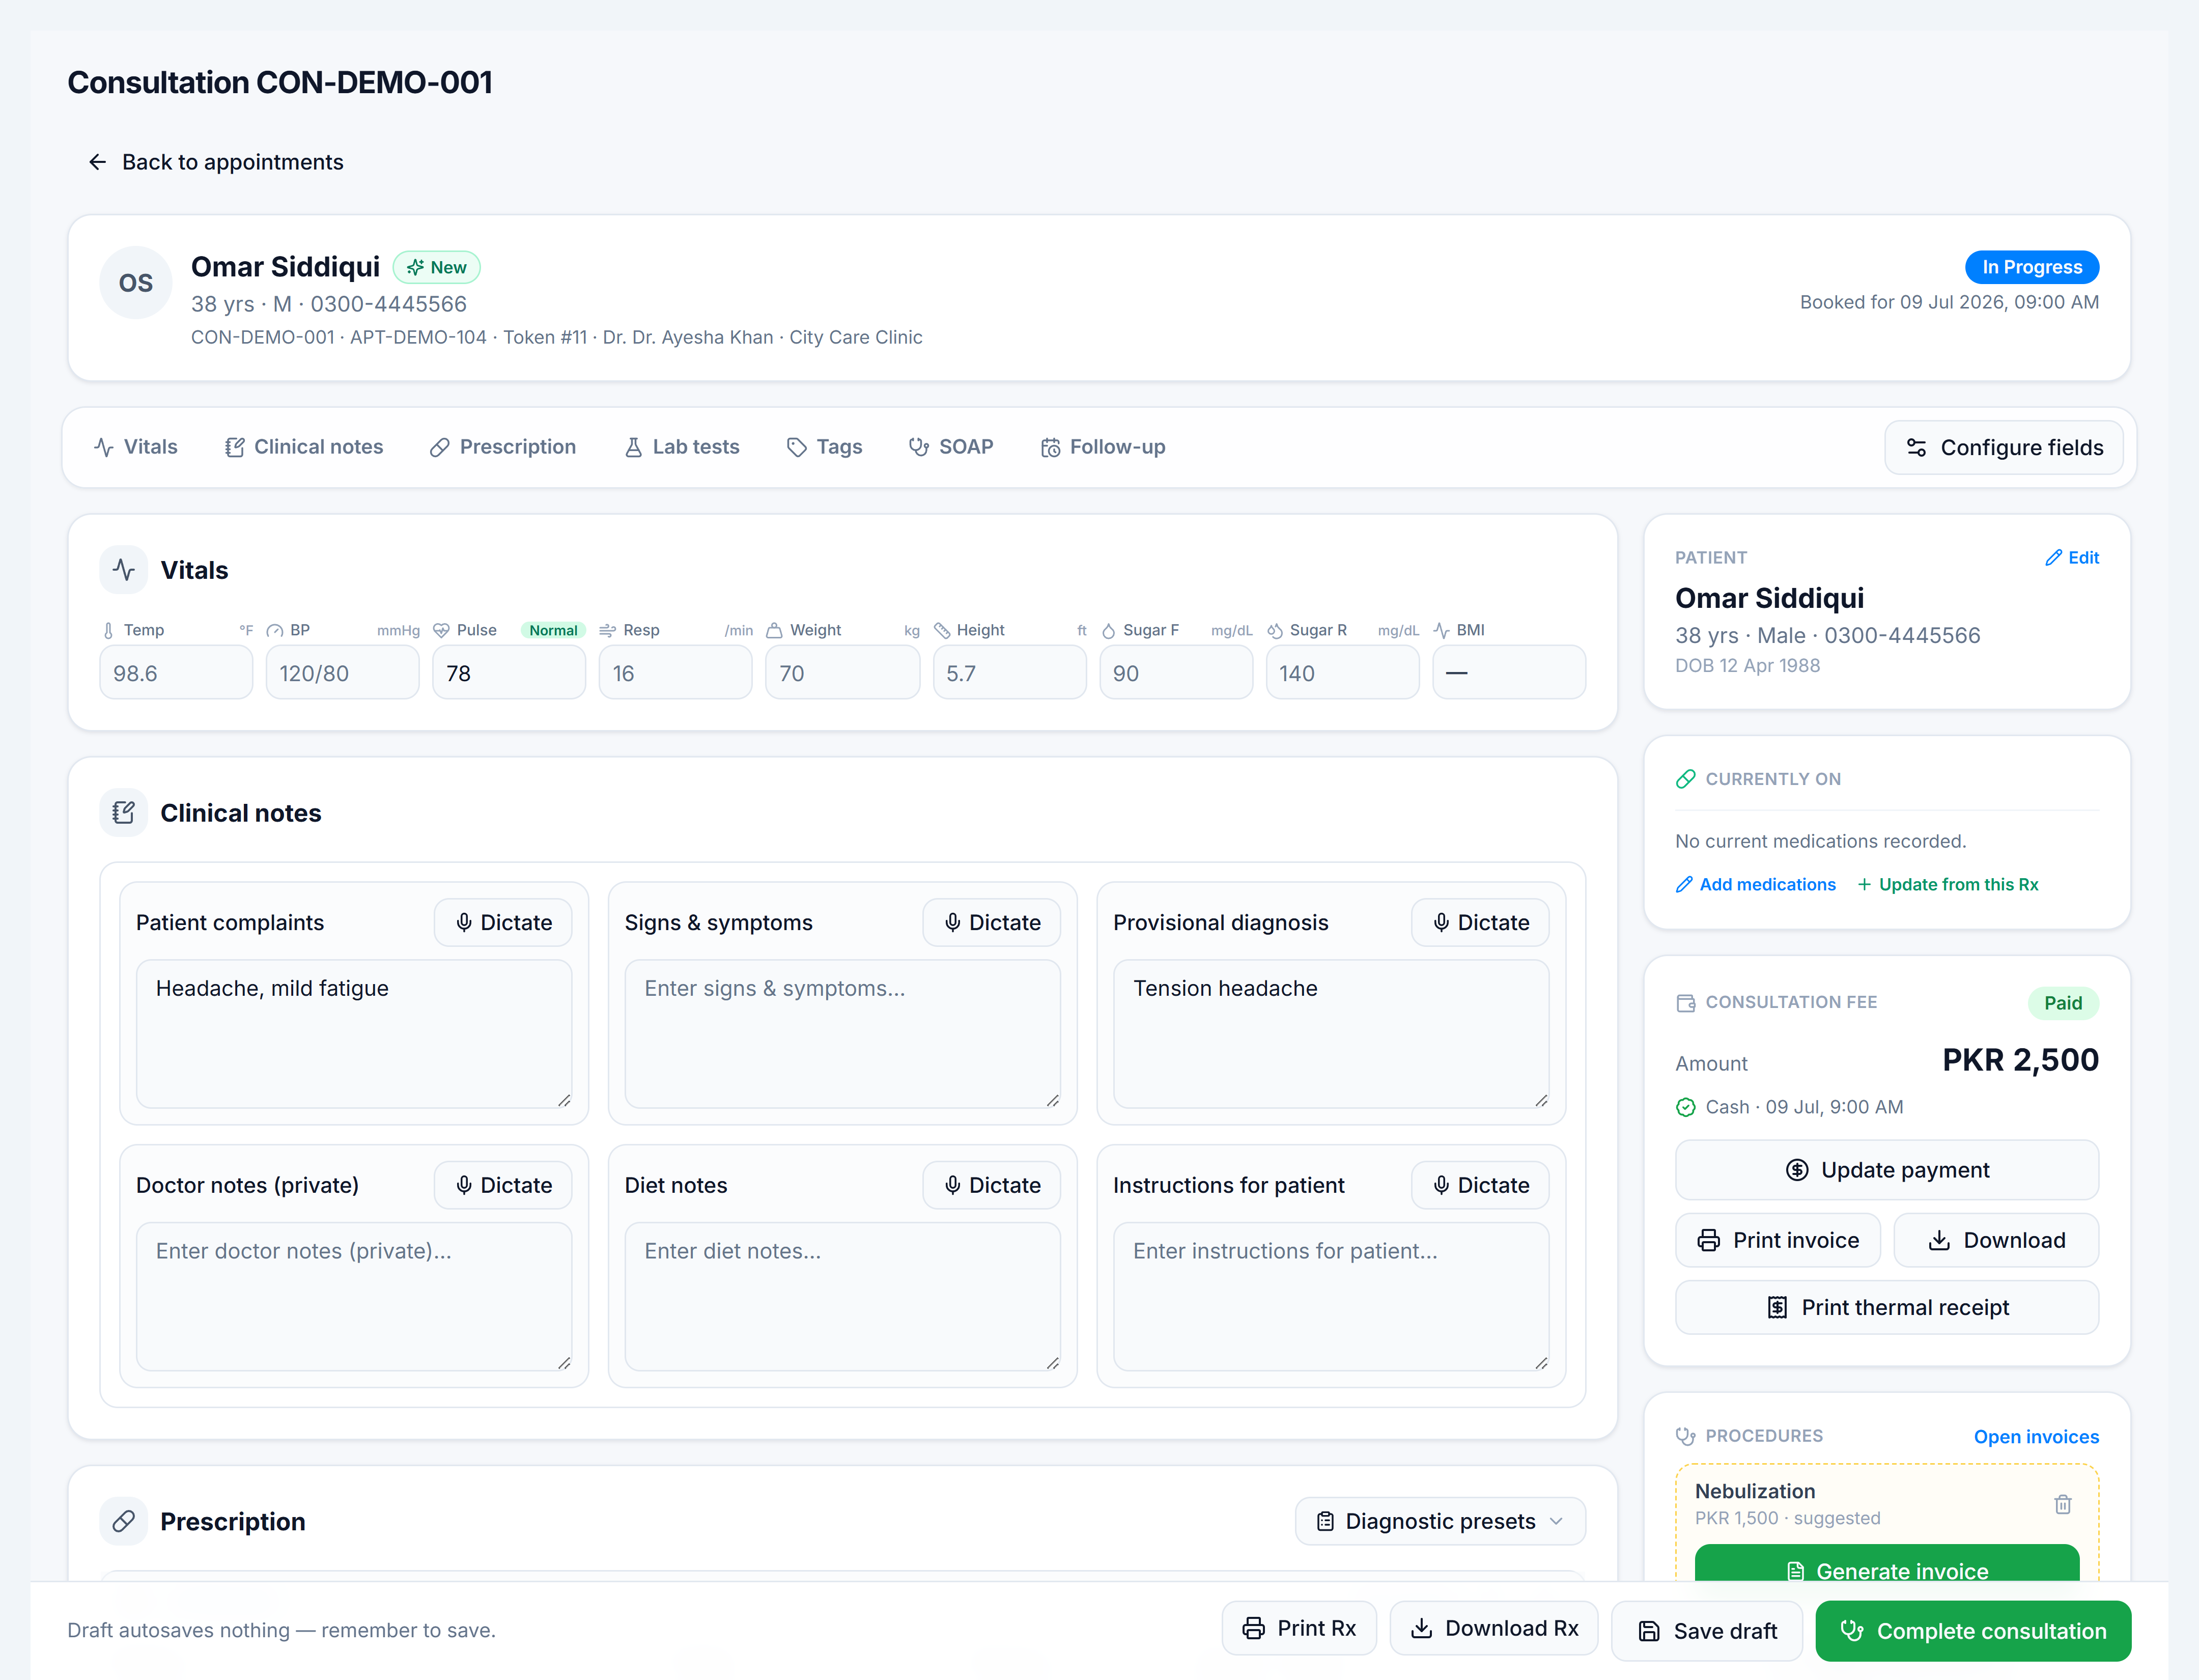
From a row in In room / In consultation, click Start or Resume to open the consultation workspace. Add SOAP notes, vitals, medicines, and labs. Save as you go.
What you learned
- How dashboard, appointments, queue, and consultation connect in one day.
- Where reception acts (book, check-in, queue) vs where the doctor consults.
- That consultation fees can be collected at check-in or inside the consult.