Find & filter inventory
When to use this: whenever the table is longer than a screen and you need one product, one warehouse, or one batch.
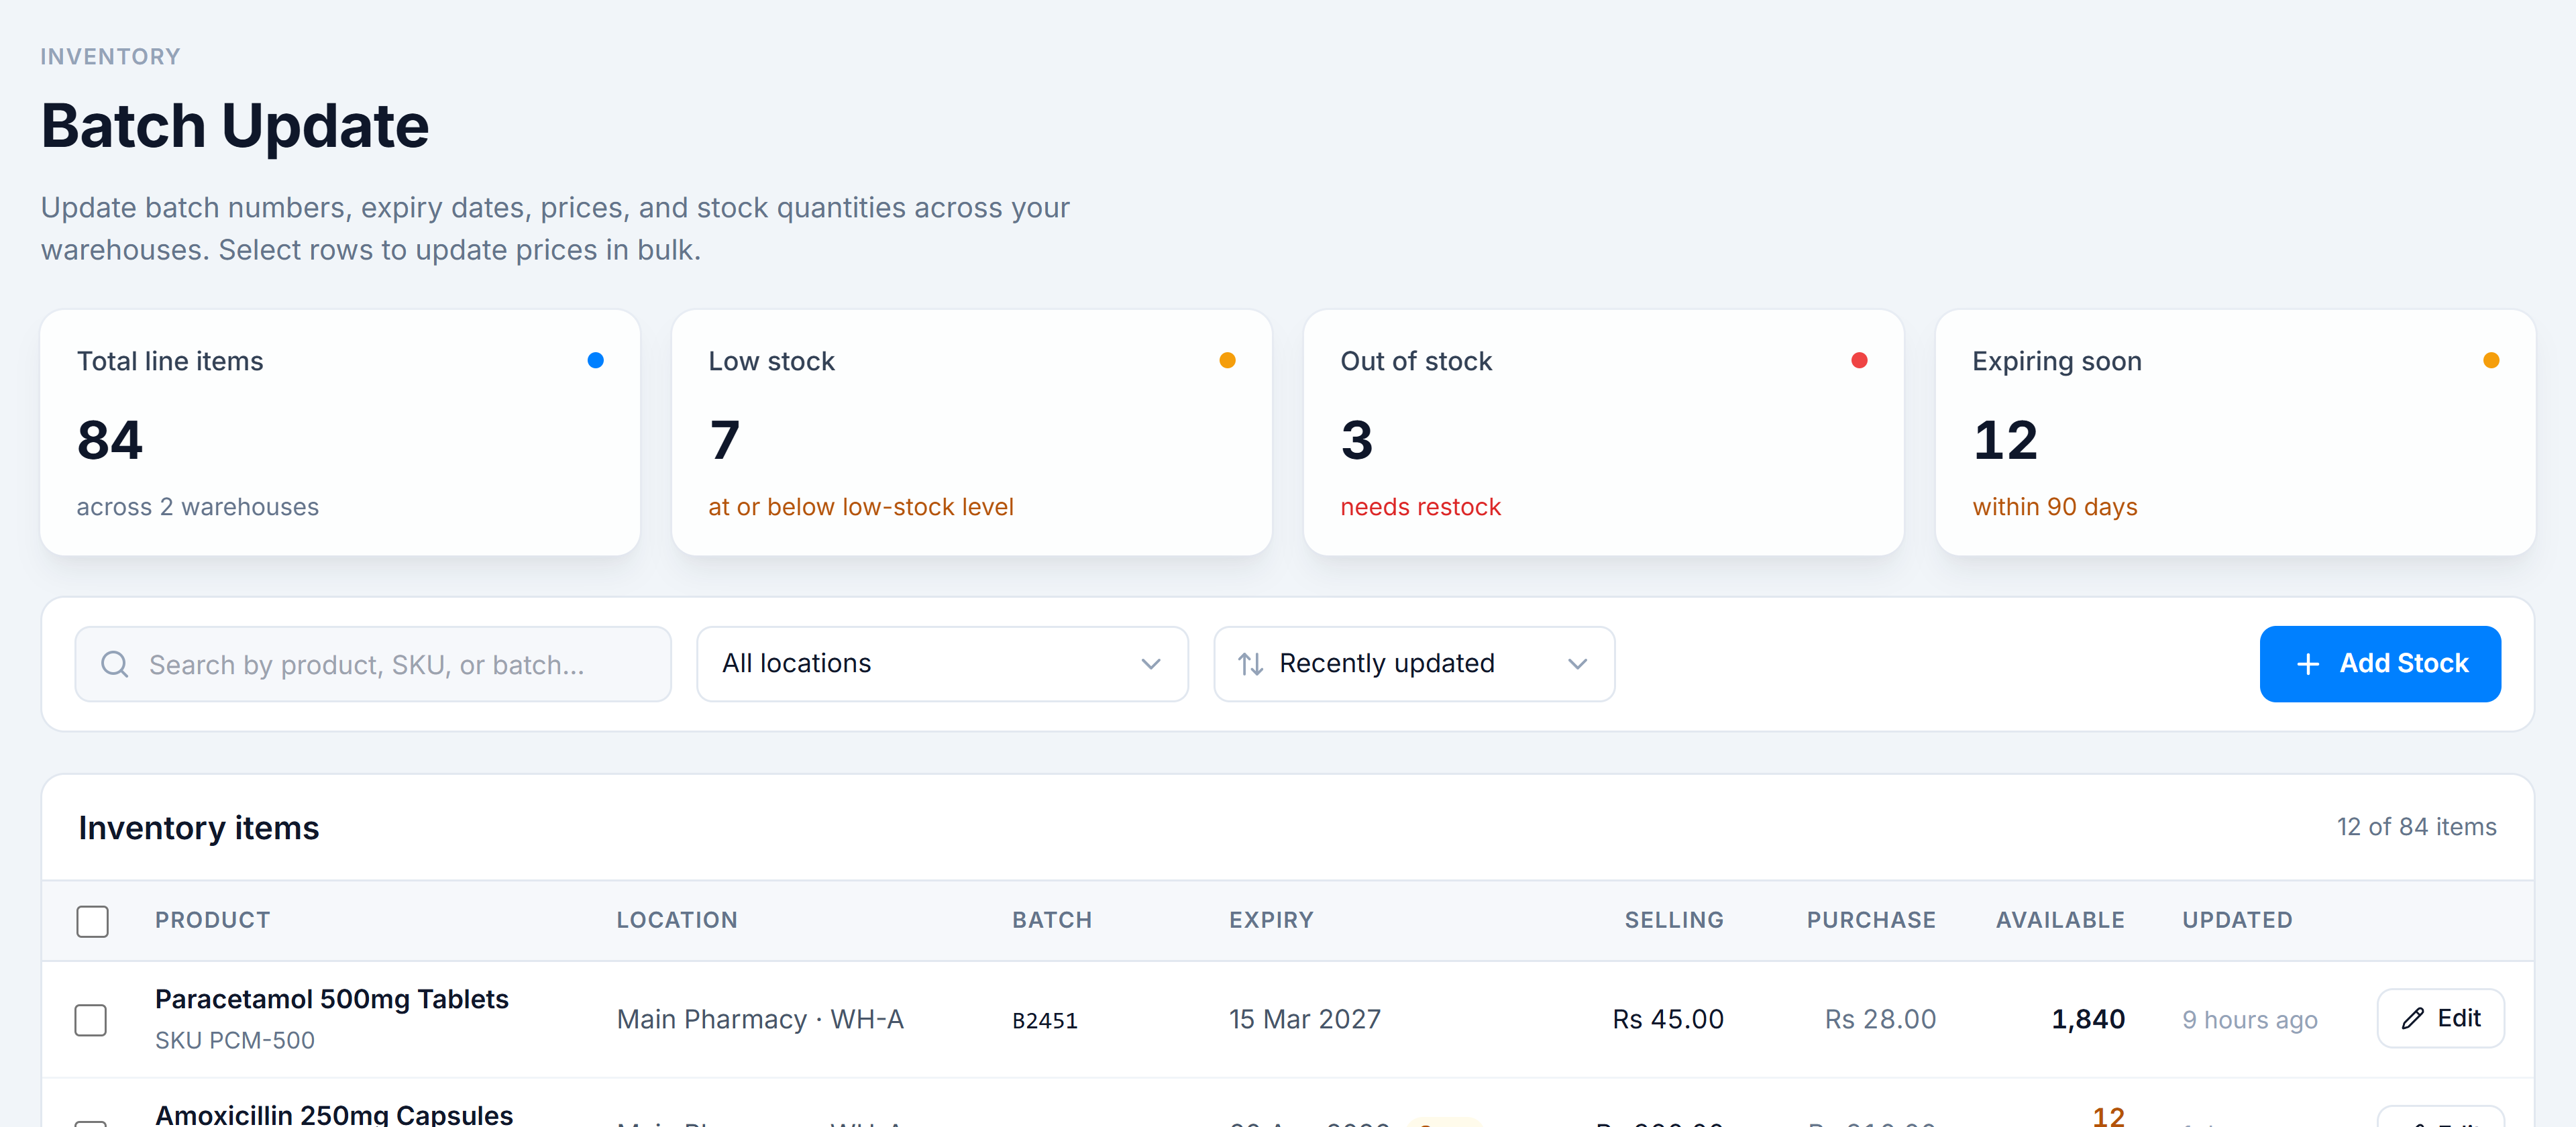
Steps
- Search. Type a product name, SKU, or batch number in the search box and press Enter. One box searches all three fields.
- Filter by location. Open the location dropdown and pick a store · warehouse to show only that location. Choose All locations to clear it.
- Sort. Open the sort dropdown — for example, Recently updated, Product: A → Z, Quantity: Low → High, or Selling: High → Low.
- Clear the search. When a search is active, a Clear button appears next to the sort dropdown — click it to reset the box.
- Set rows per page at the bottom (10 / 25 / 50 / 100), and use Prev / Next to page through results.
You’re done when
The table shows the rows you expected, and the header count (“N of M items”) reflects your filter.
Good to know
- Search runs on the server and matches product, SKU, or batch in a single query — you don’t need a separate field for each.
- The KPI strip reflects the selected location, not the search text, so the portfolio numbers stay stable while you look for one item.
- Sorting and paging keep any rows you’ve already selected — selection persists across pages.
If it goes wrong
- No results after a search — check the location filter isn’t also set to a warehouse that doesn’t hold the item. Clear the search and the location, then narrow again.