Adjust stock quantity
When to use this: when a physical count disagrees with the system, or you’re writing stock up or down for a known reason.
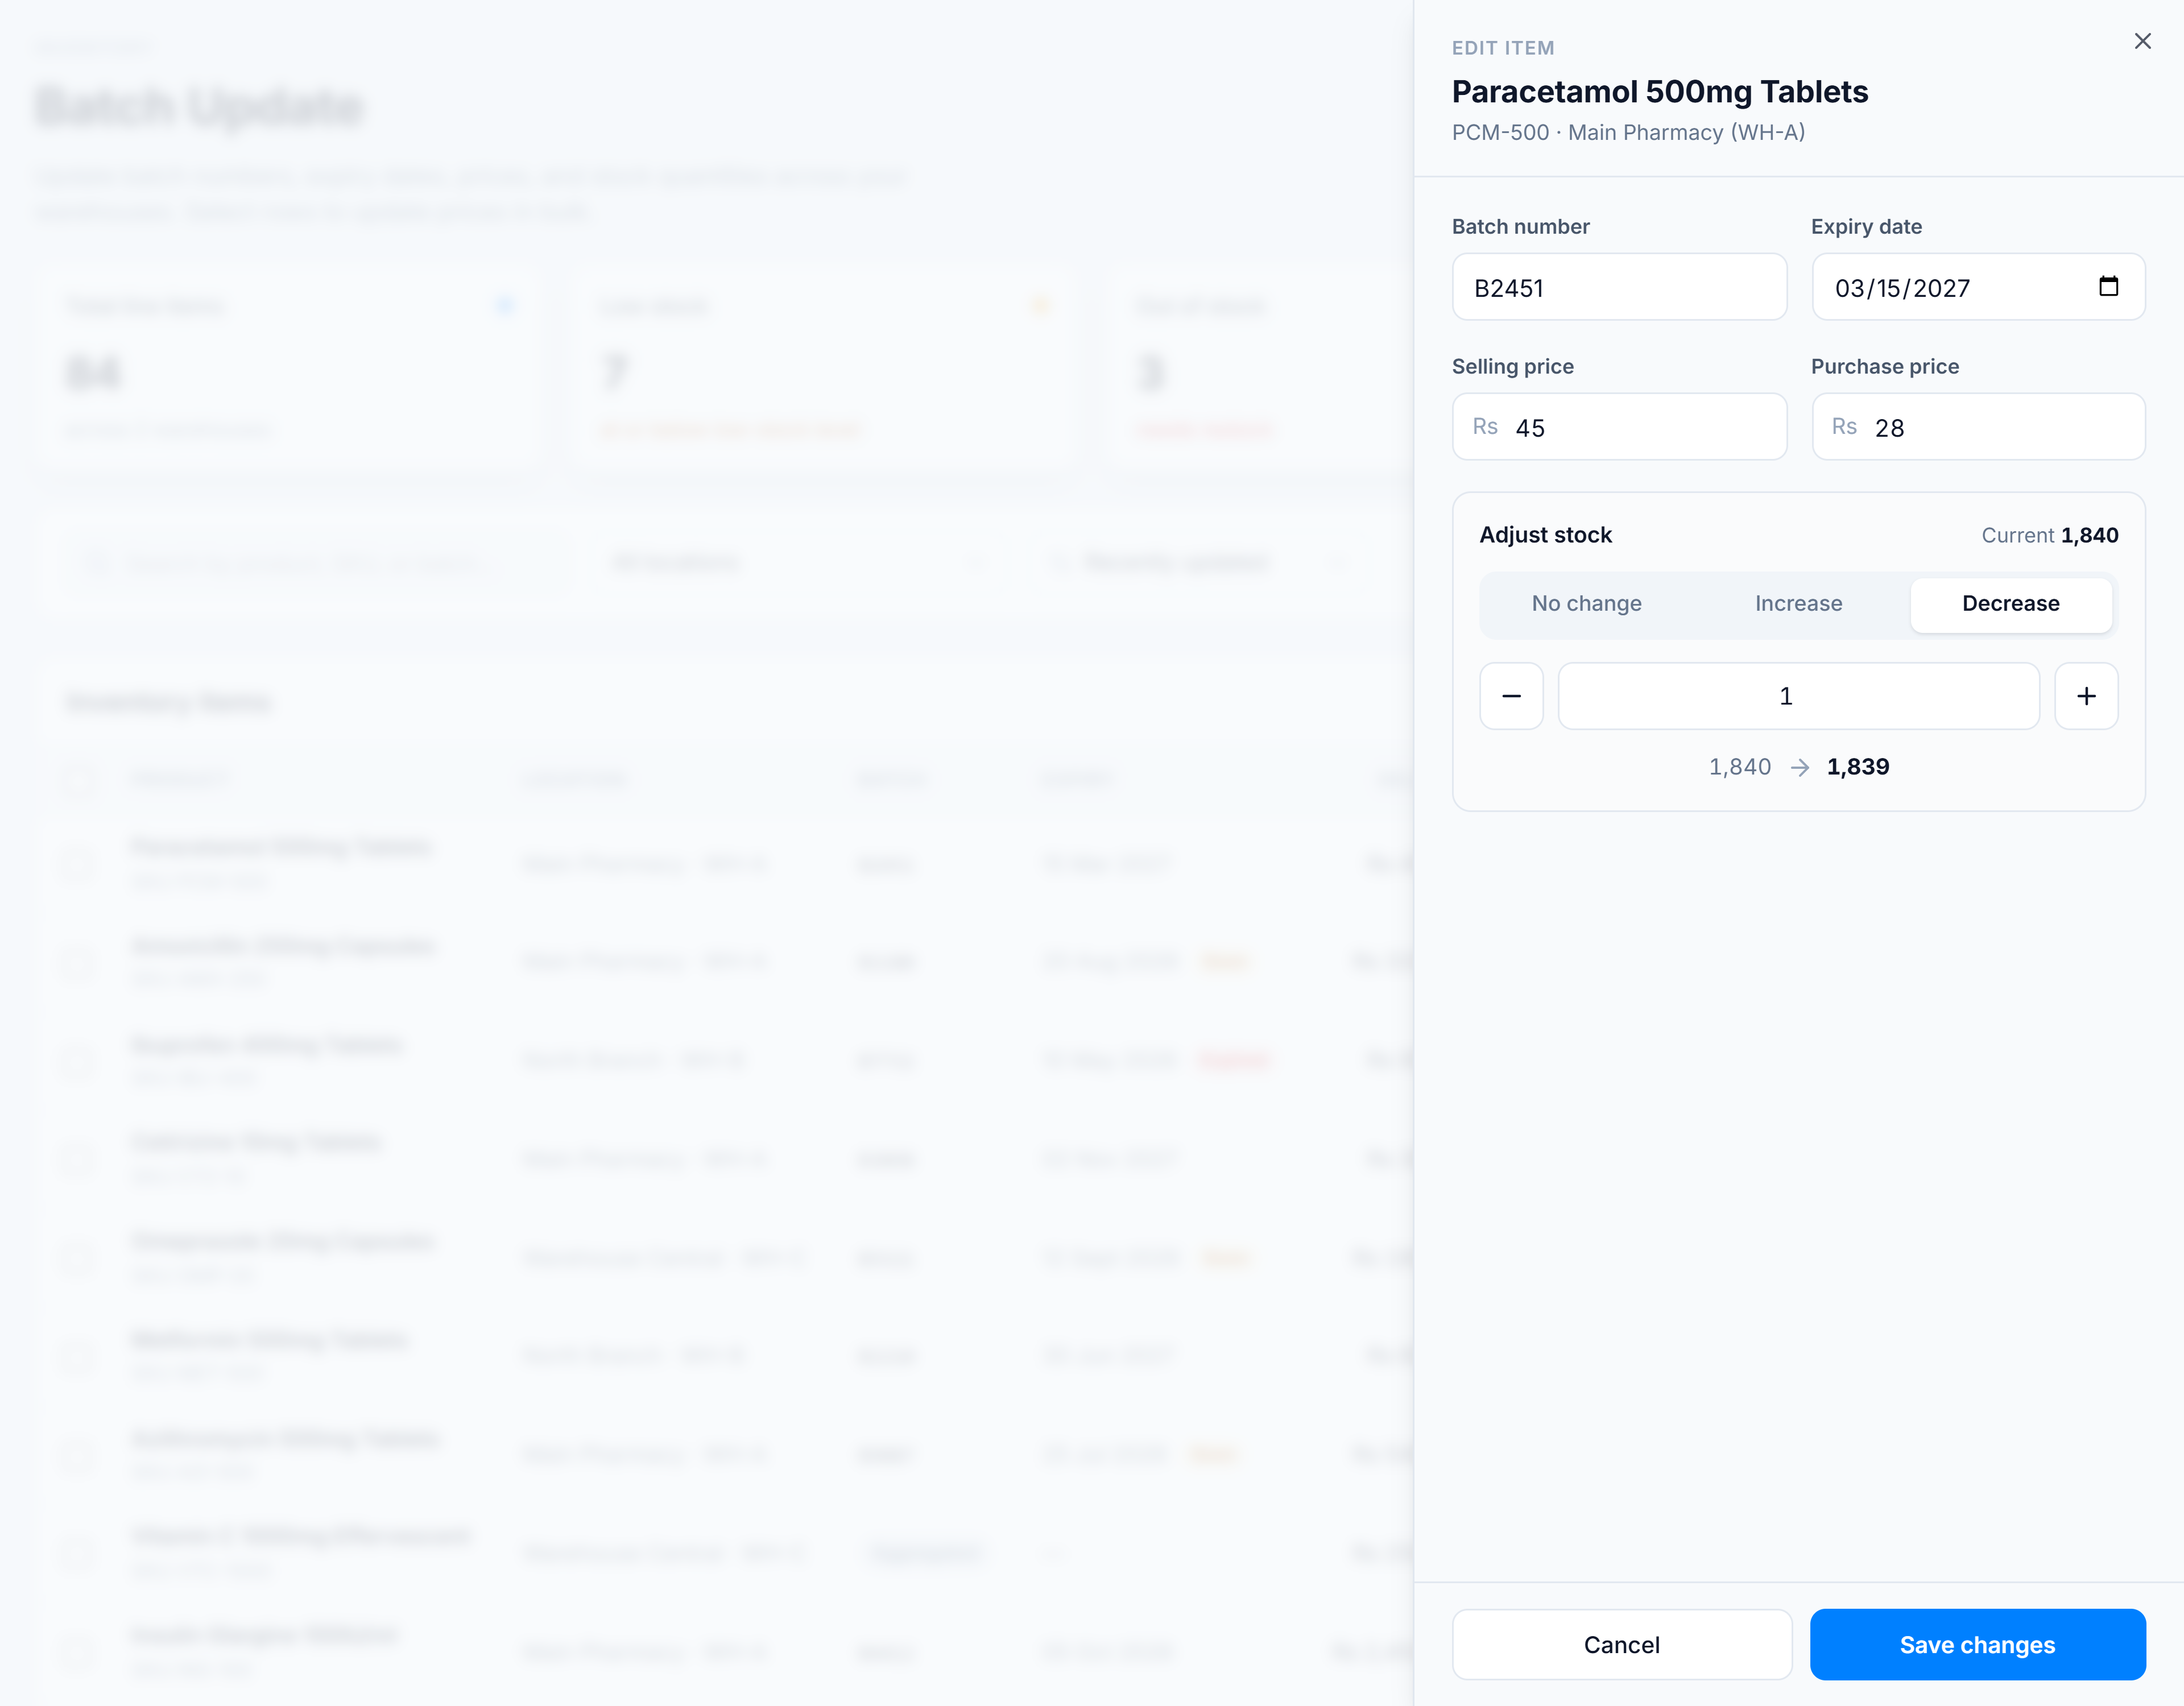
Steps
- Open the row’s edit drawer (click Edit).
- In the Adjust stock panel, choose Increase or Decrease (the default is No change).
- Set the amount with the − / + stepper or by typing a number.
- Read the current → new preview under the stepper — it shows the on-hand quantity you’ll end up with, coloured green for an increase and amber/red when a decrease takes you into low or zero stock.
- Click Save changes.
You’re done when
The drawer closes, a toast confirms the update, and the row’s Available column shows the new quantity.
Good to know
- Increase and Decrease are separate permissions — you may see only one of them. See Permissions.
- Every adjustment is written with a reason (“Manual adjustment from Inventory Update page”) so it’s auditable.
- On an Aggregated row, a decrease is spread across the underlying batch records automatically (largest first).
If it goes wrong
- “Cannot decrease by N — only M available” — you asked to remove more than is on hand. Lower the amount to at most the available quantity.
- The Increase/Decrease buttons are greyed out — your role doesn’t include that adjustment permission.