Run a claims day
Goal
By the end of this tutorial you will have cleared at least one pending claim from the queue using the real Claims Management screens.
1. Open the dashboard
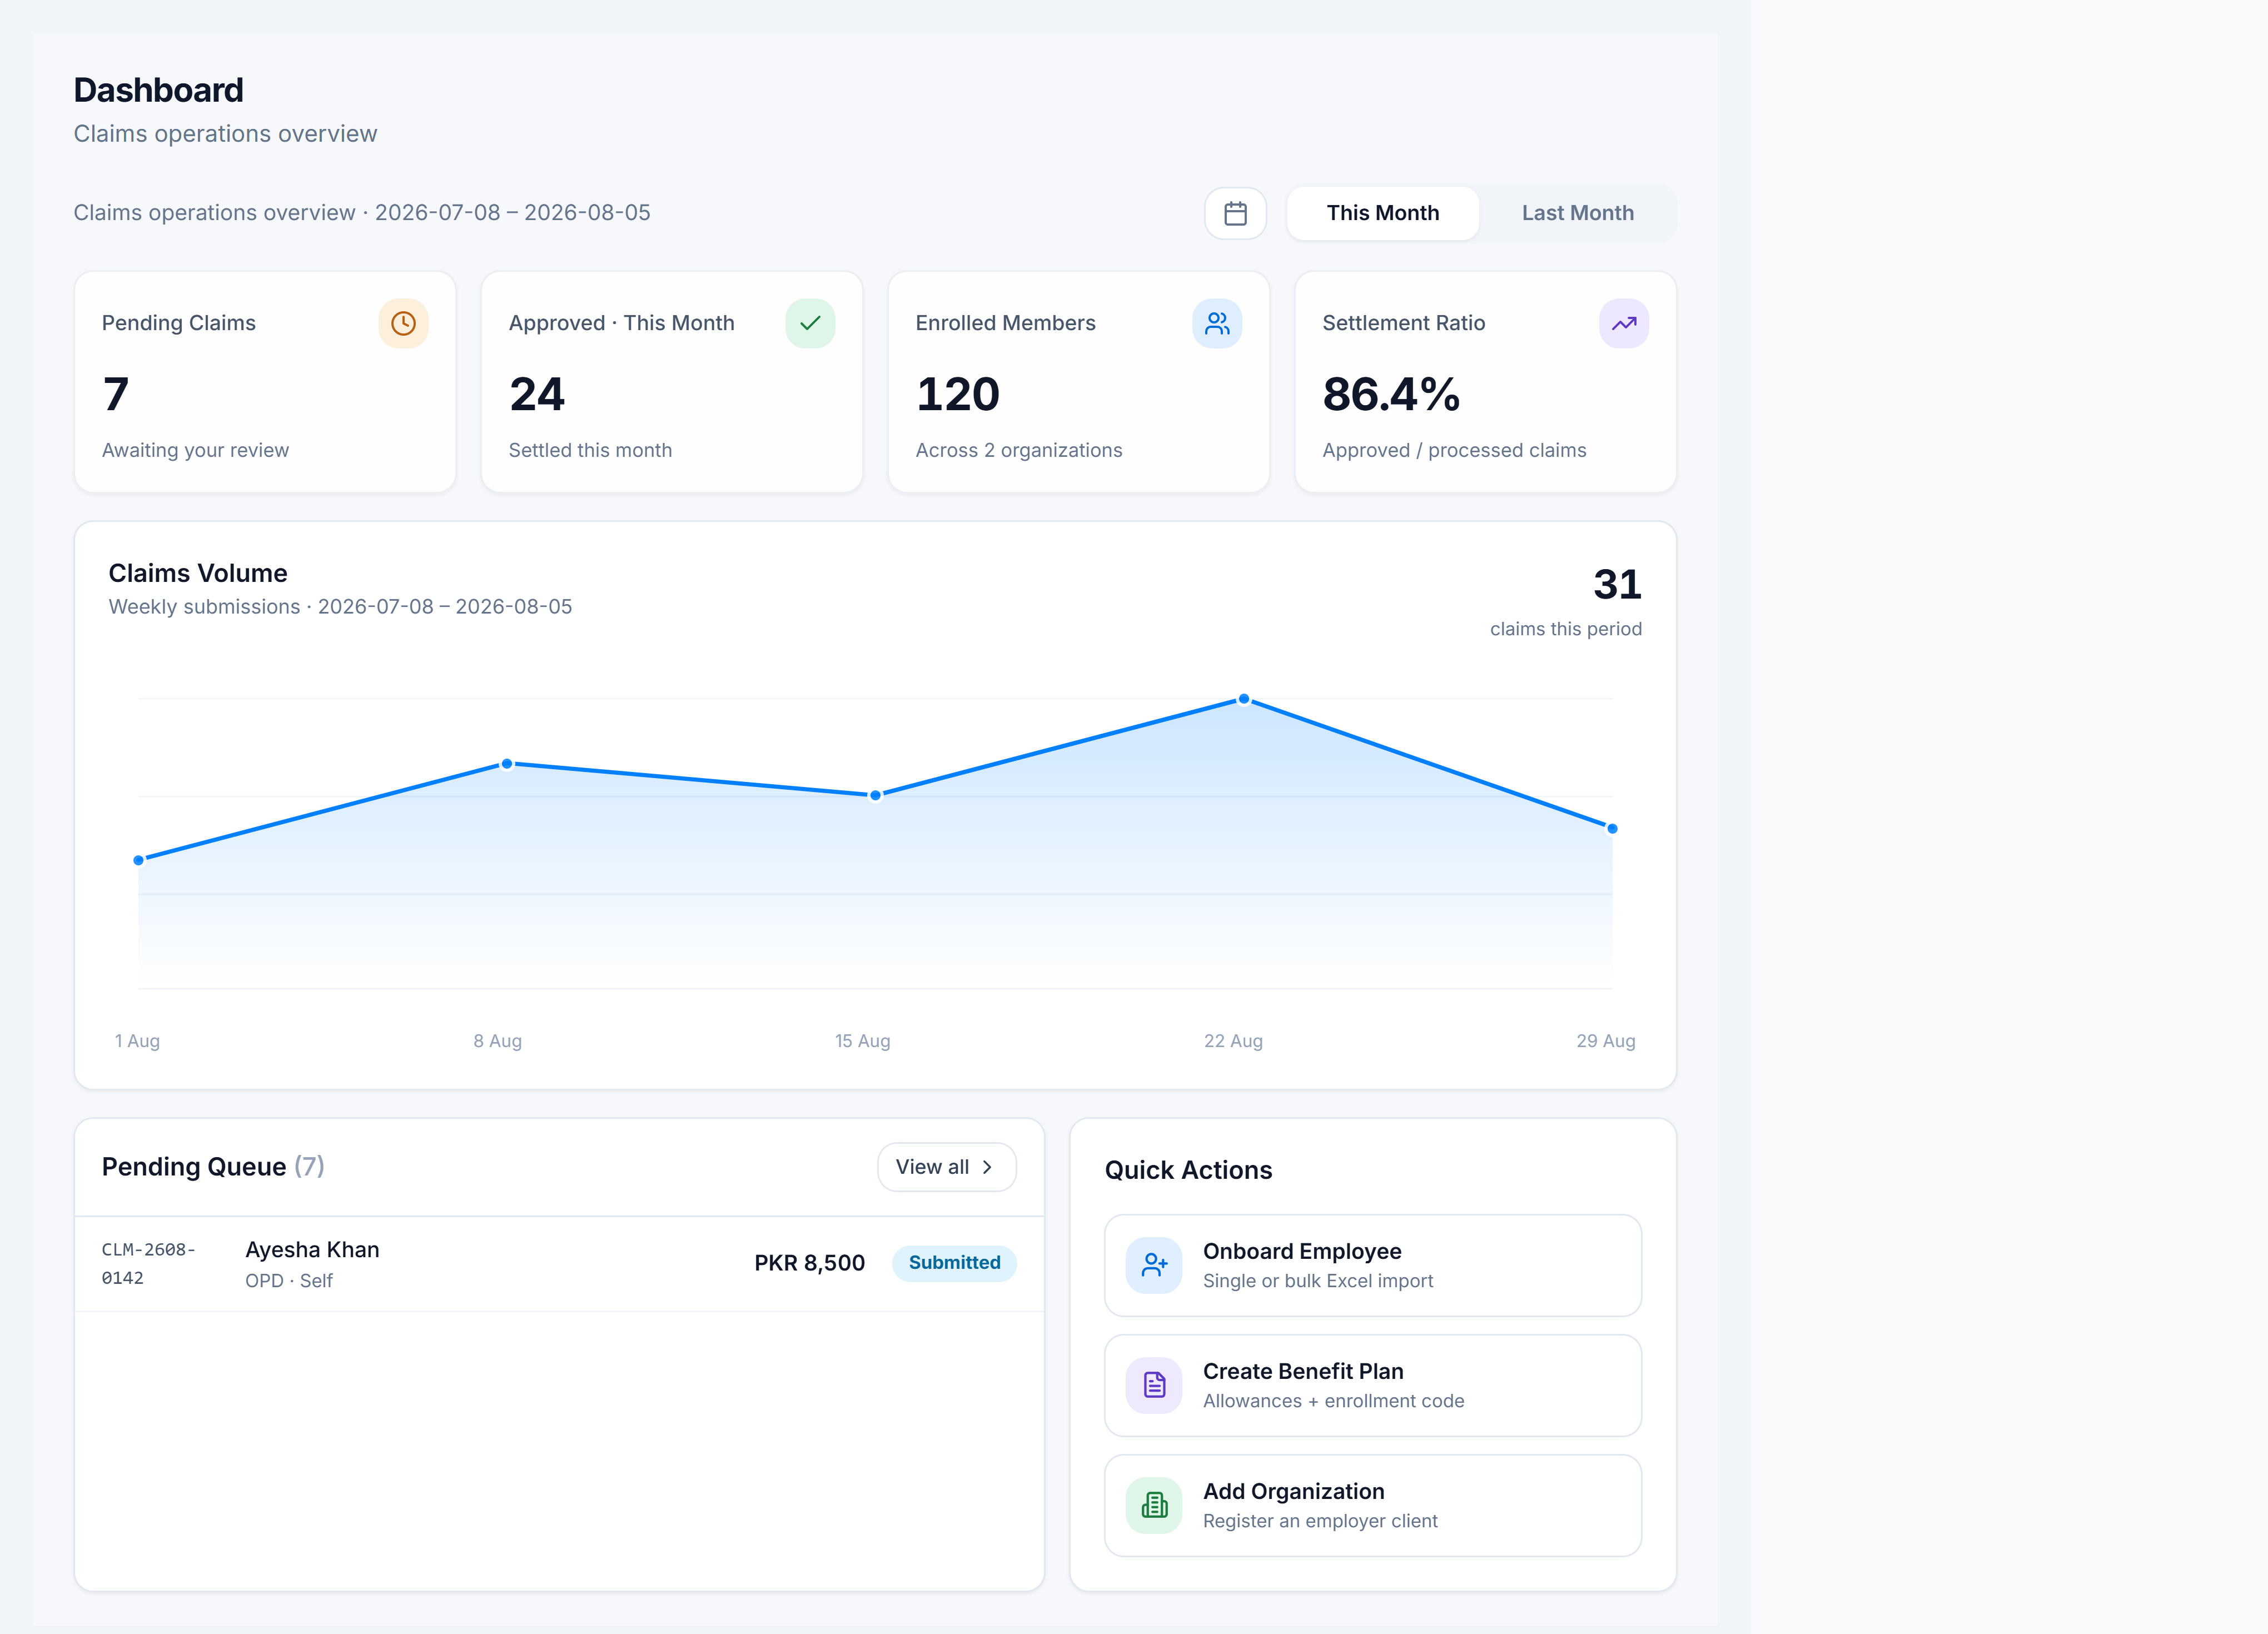
Go to Claims Management → Dashboard. Check Pending Claims and skim the Pending Queue.
2. Open the full claims list
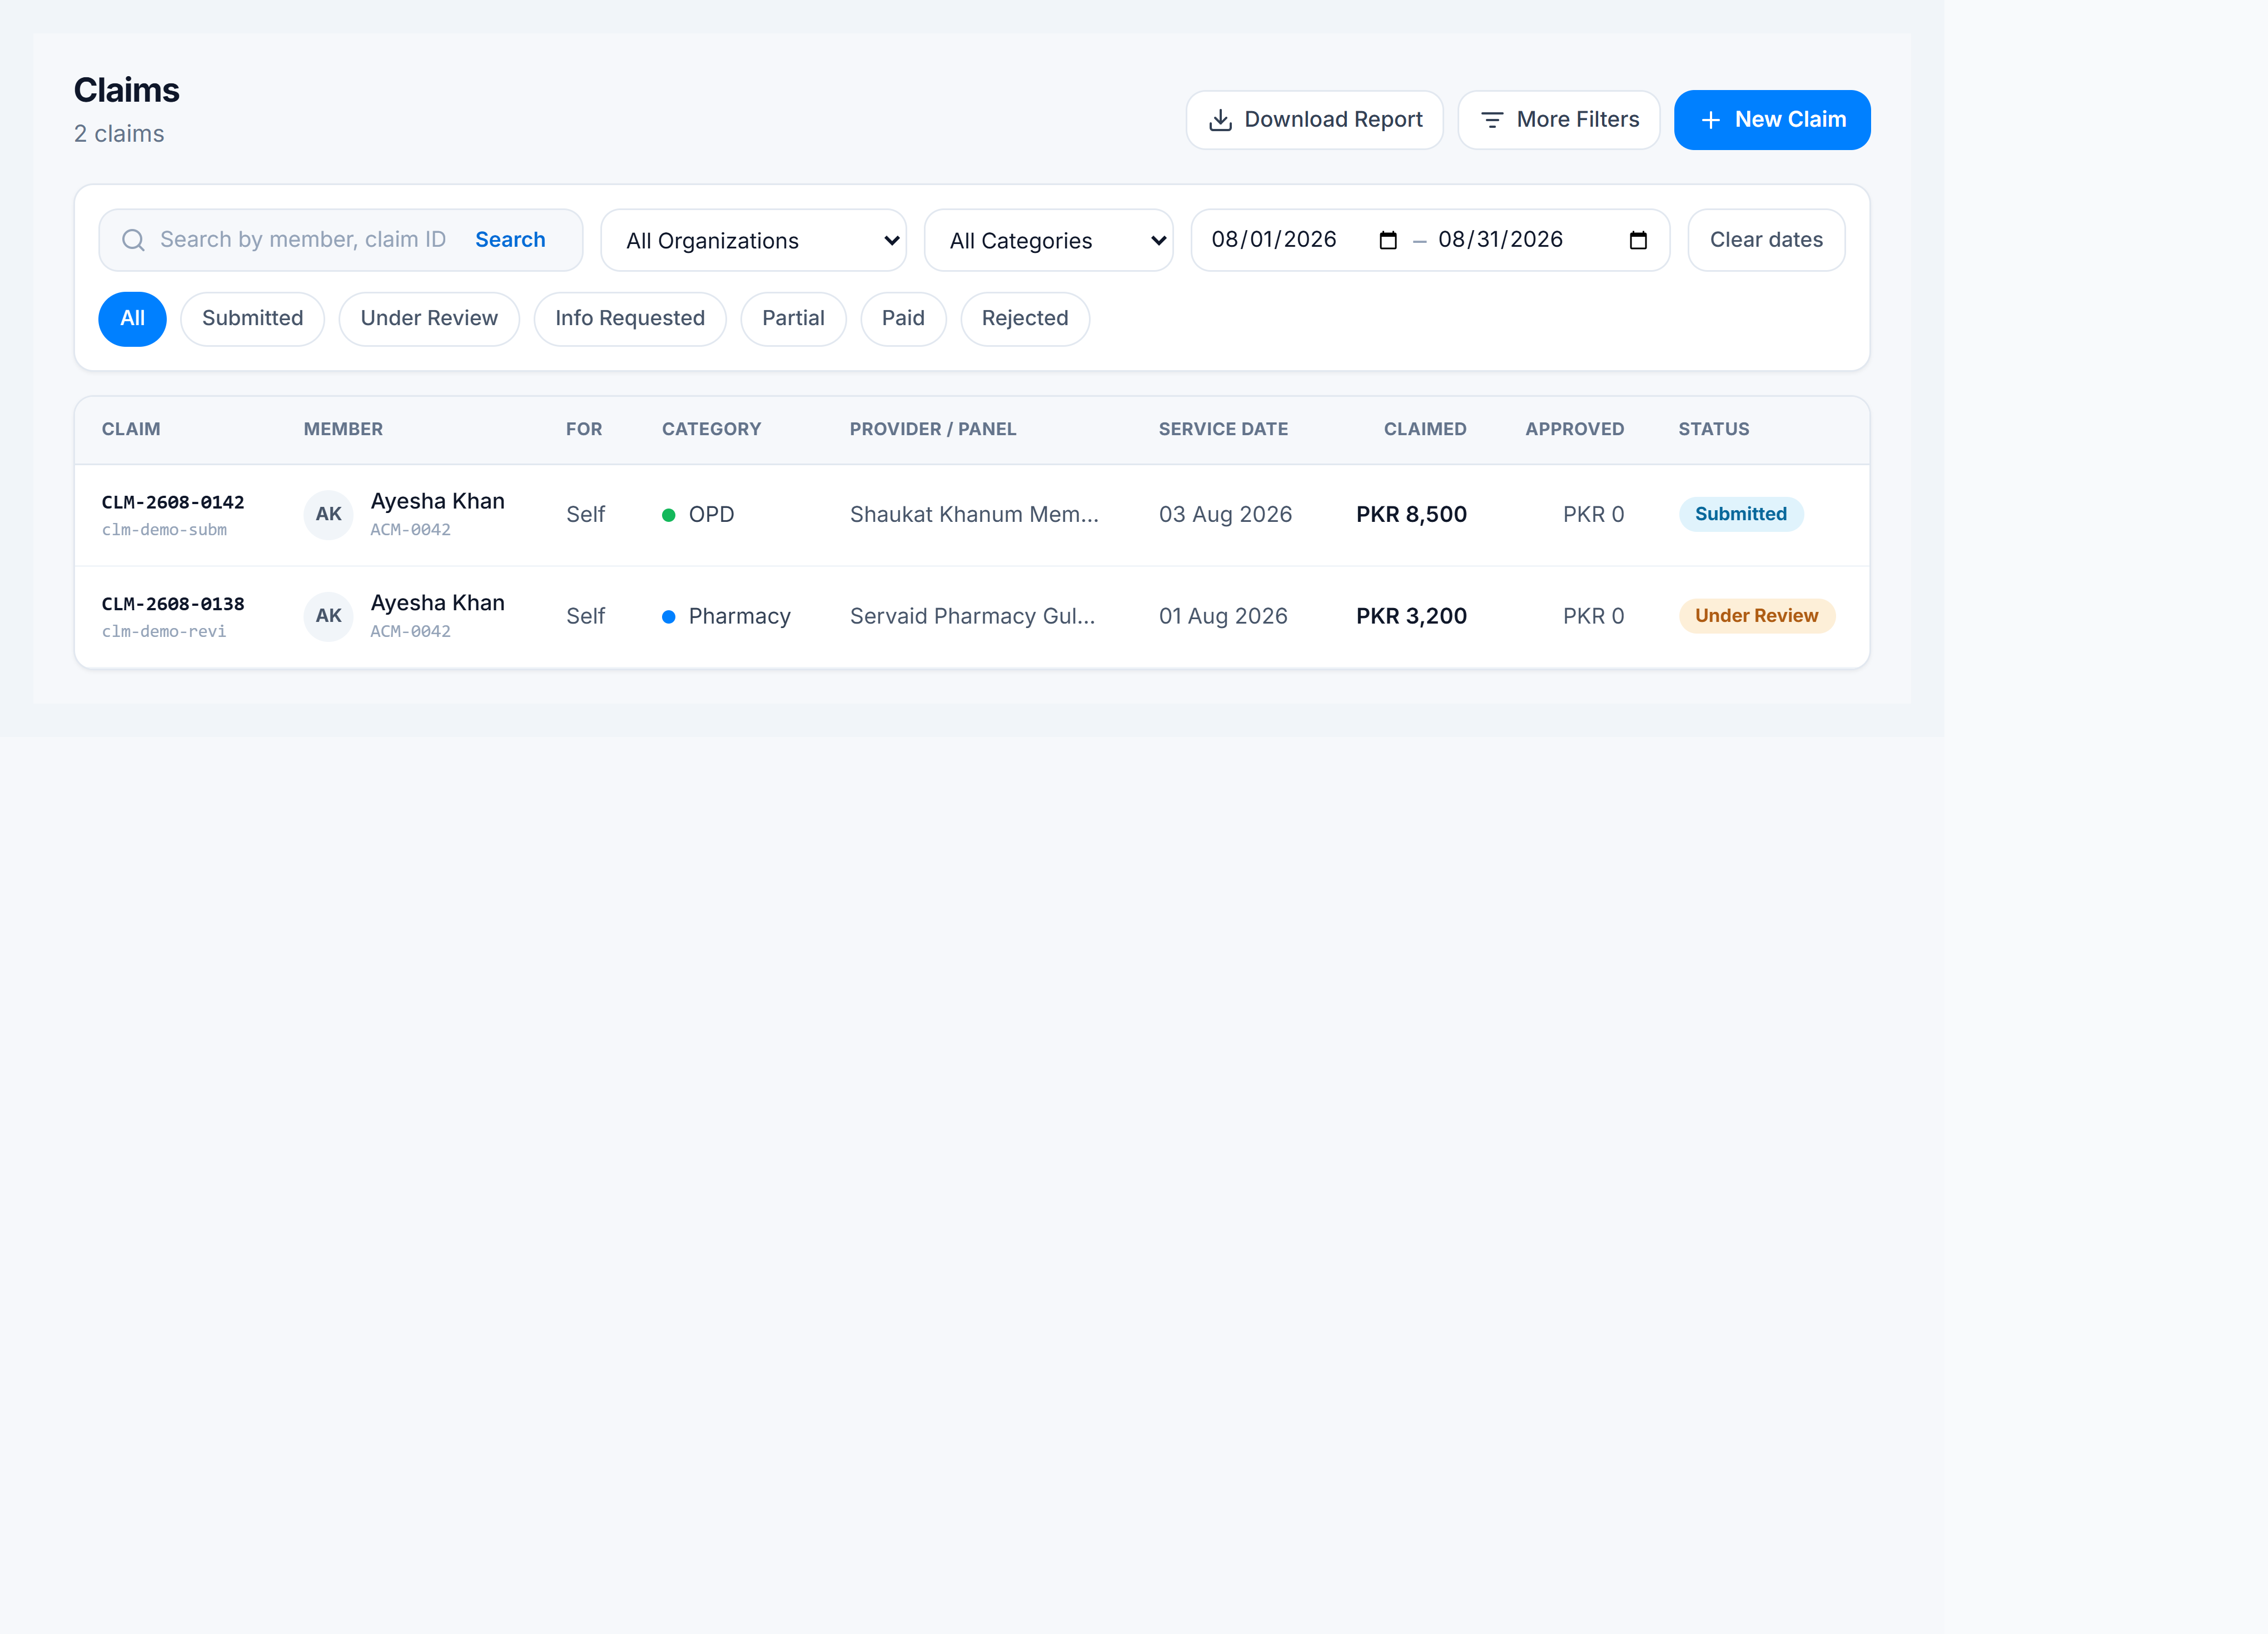
Click View all on the pending queue, or go to Claims Management → Claims. Filter to Submitted if you only want new work.
3. Open a claim
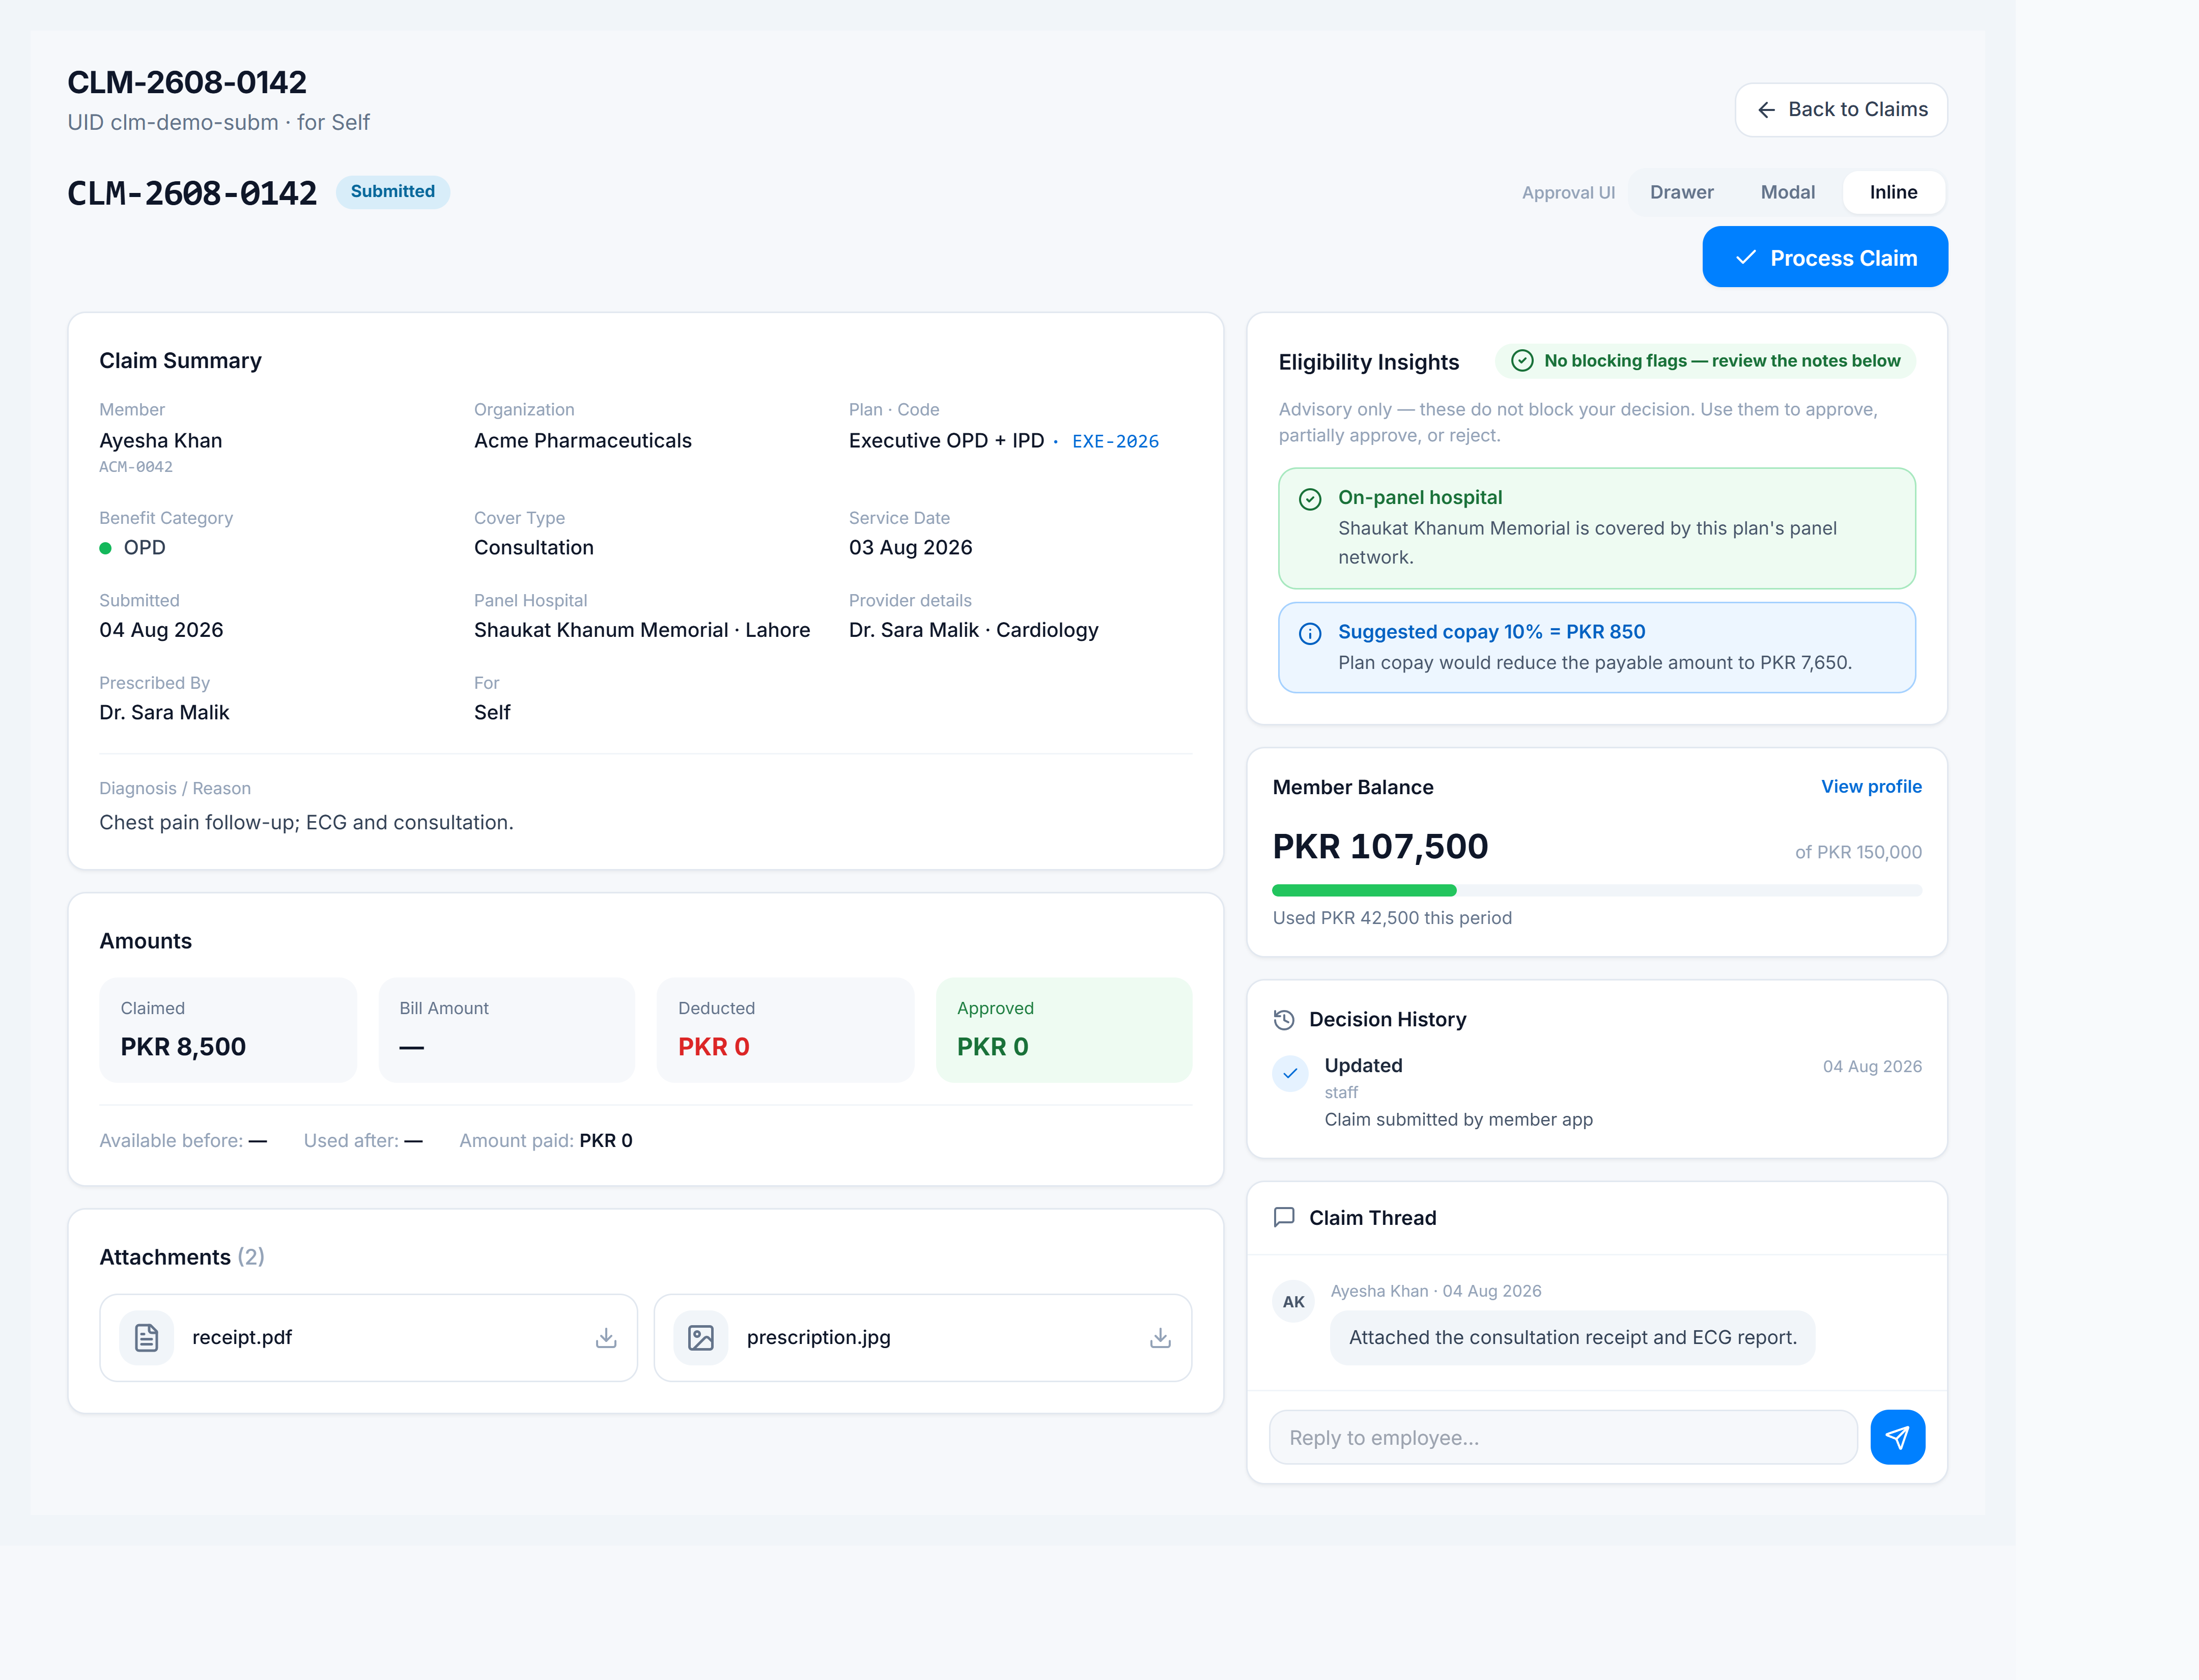
Click a row. Review the summary, attachments, advisories, and available allowance.
4. Process the claim
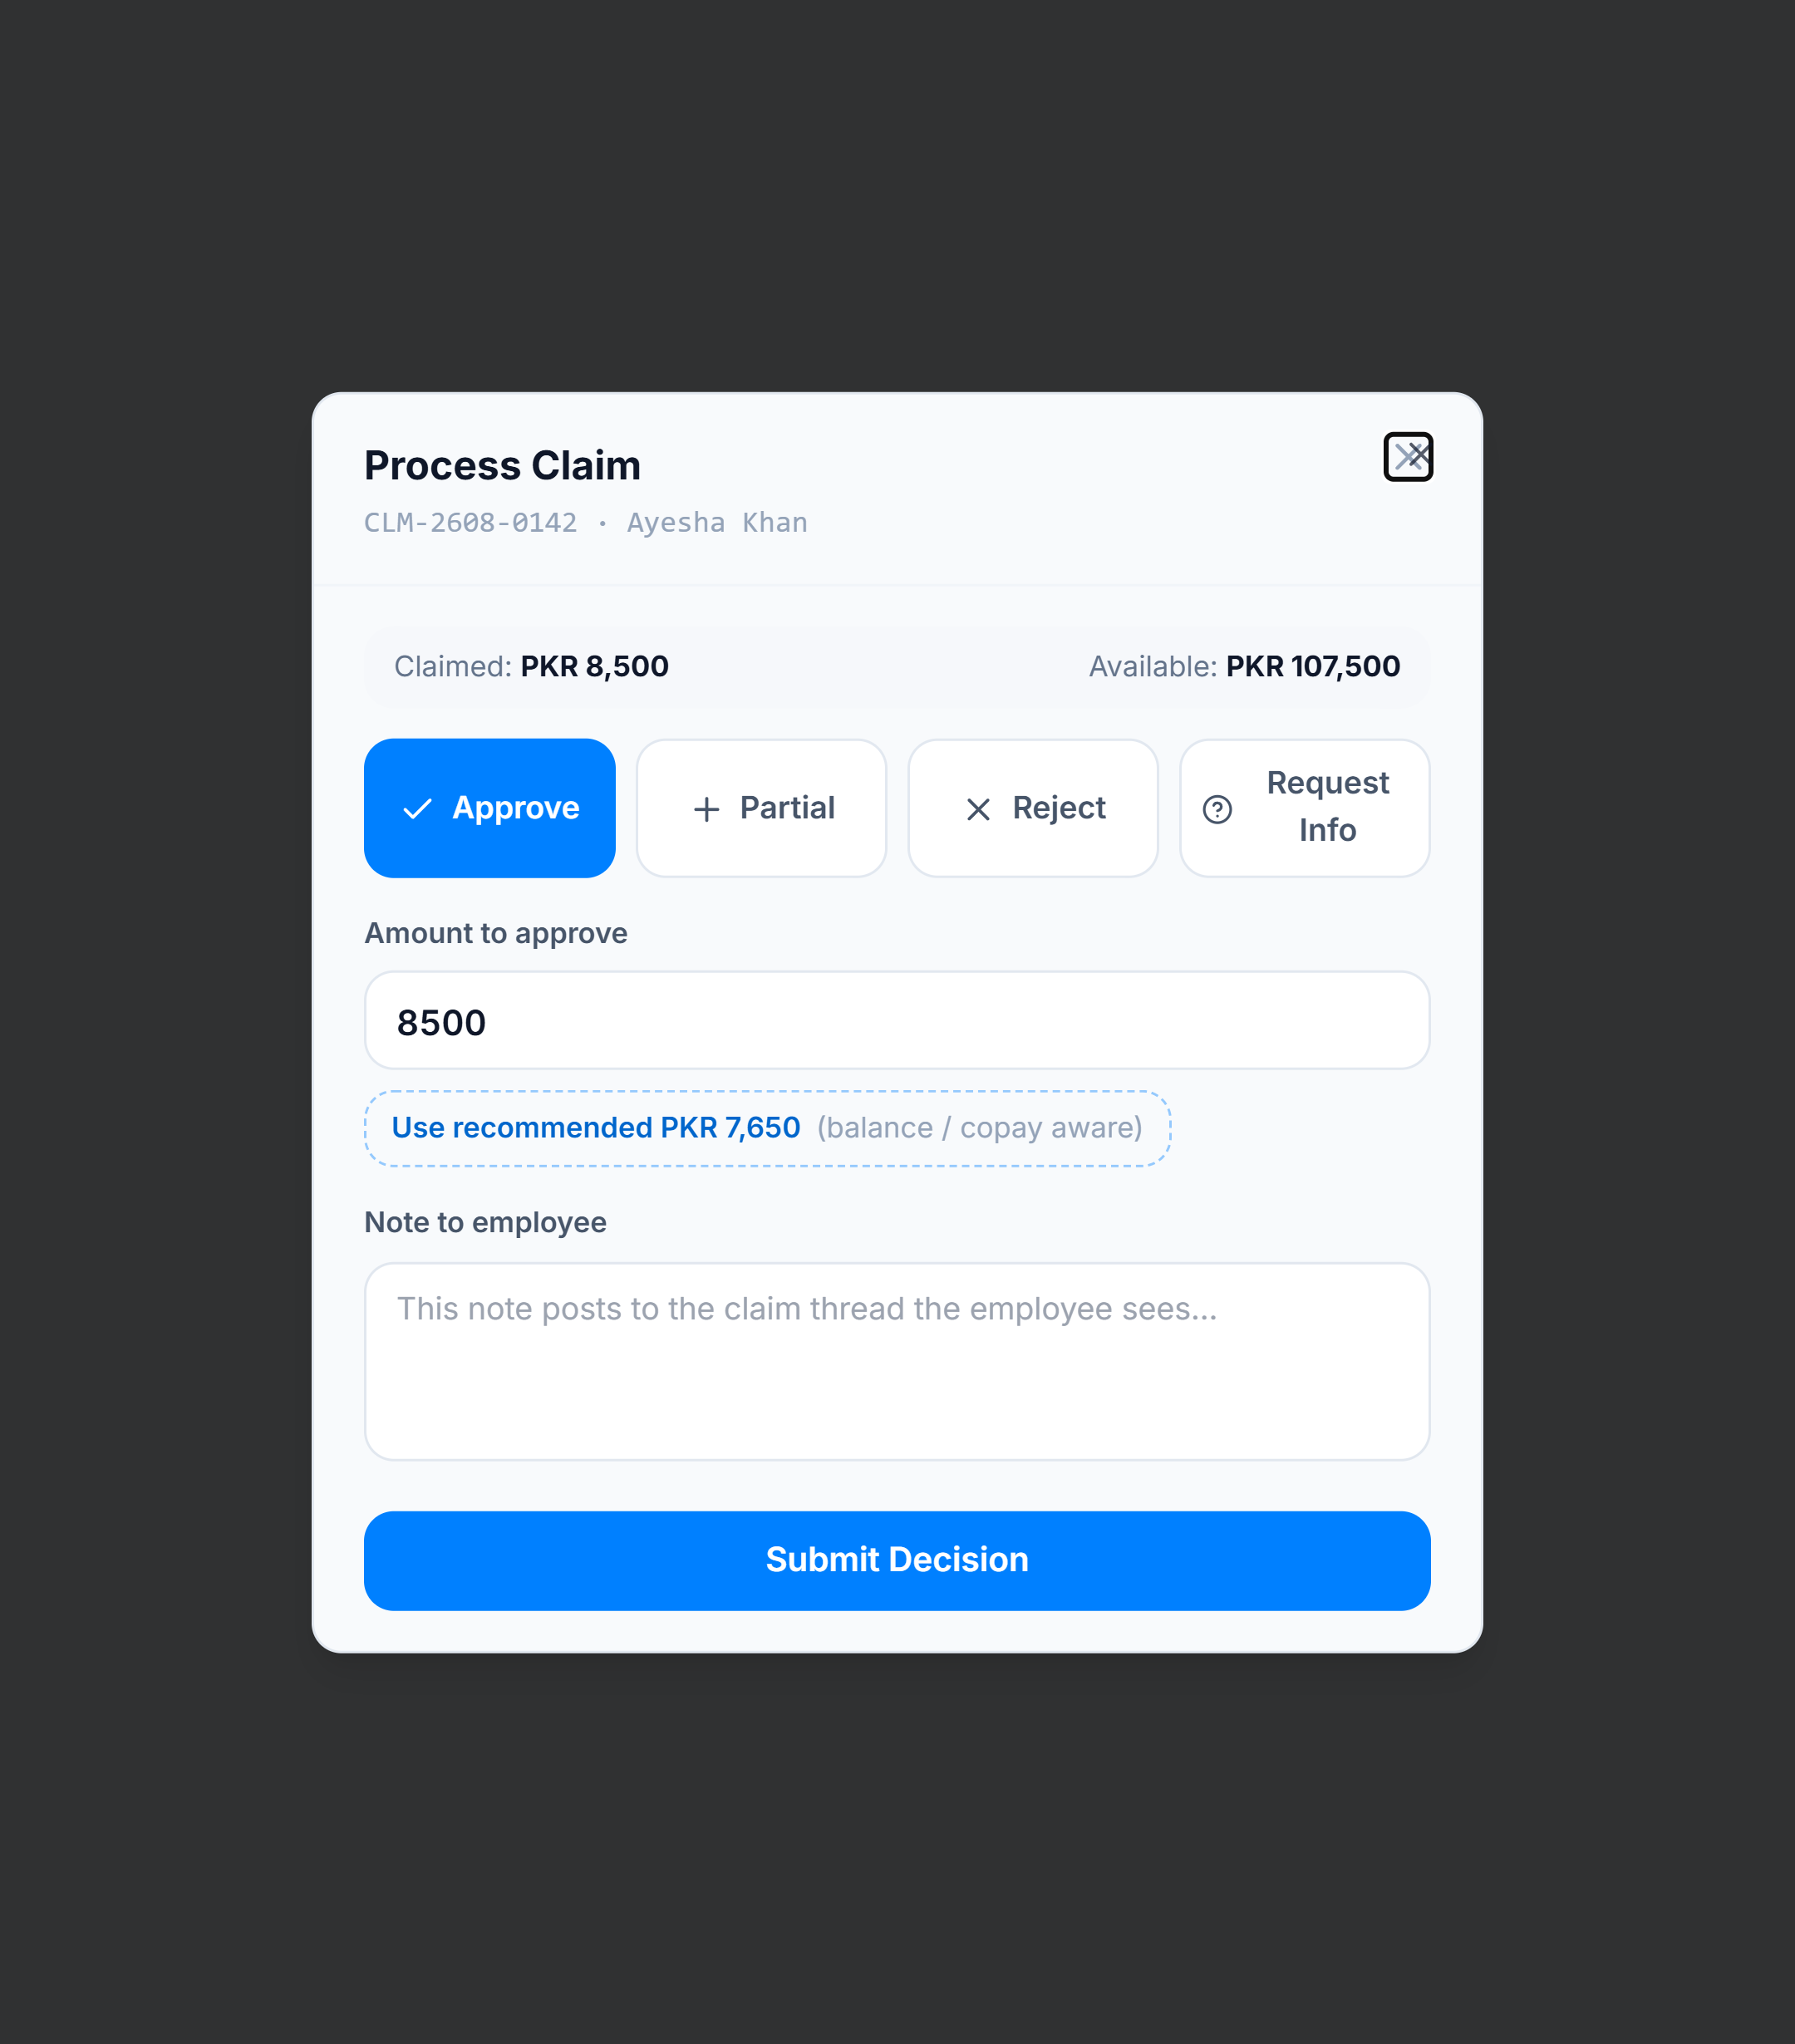
Click Process Claim. Choose Approve, Partial, Reject, or Request Info. Confirm the amount (and a note if advisories warn you), then Submit Decision.
5. Confirm
The claim status updates, member balance adjusts when you approve/partial, and the audit history records your decision. Return to the list — the row should leave the pending chips.