Set prescription print template
When to use this: printed prescriptions need your clinic letterhead, PMDC line, margins, or layout adjusted for A4/thermal printers.
Who can do this: Tenant owner via the practice hub. This page controls print layout only — not medicine line presets (those are saved during consultations or under Clinical fields).
Where to go
- Clinical → Clinic CMS → Practices → select a practice
- Open Prescription Templates (
/clinic/practices/:practiceId/prescription-templates)
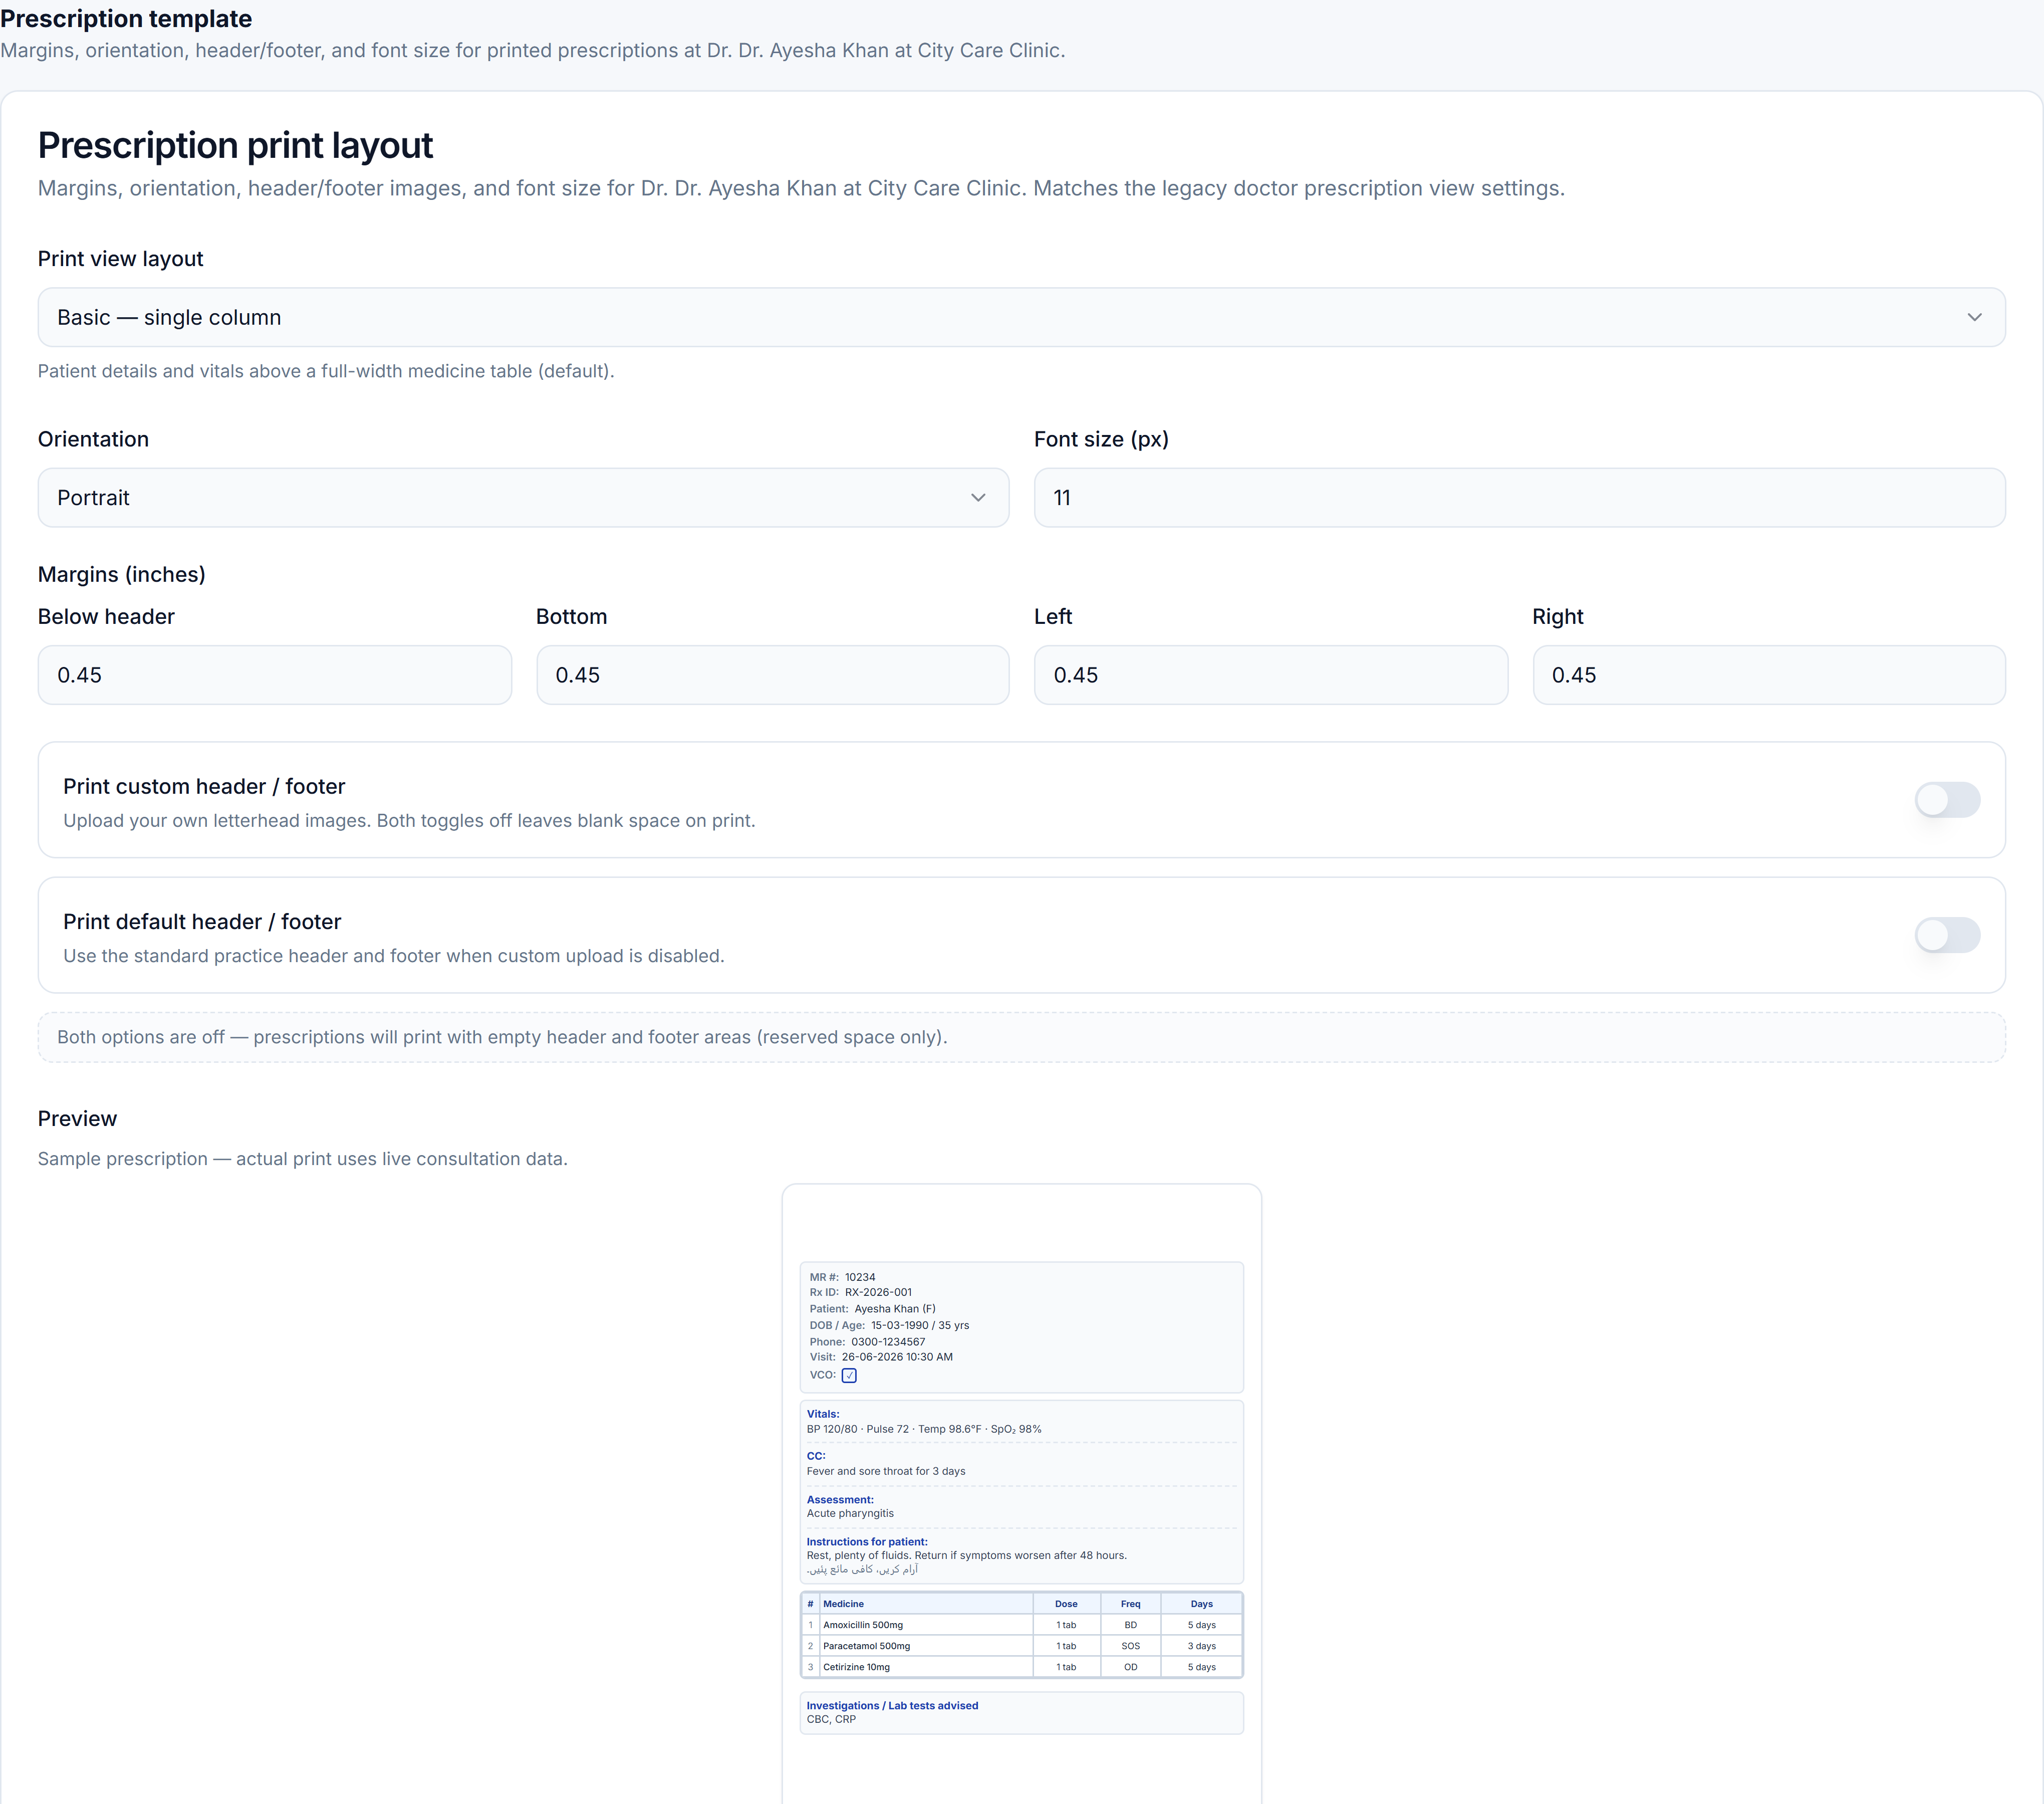
What you configure
The Prescription print layout editor includes:
| Control | Purpose |
|---|---|
| Print view layout | Page structure for PDF/print |
| Orientation | Portrait or landscape |
| Margins | Top, bottom, left, right |
| Header / footer images | Clinic logo or footer artwork |
| Font size | Readability on print |
Practice-level Prescription tab under Settings also holds text defaults (header/footer copy, PMDC display rules, whether reception may edit Rx).
Per-doctor layouts
If a logged-in user has a doctor profile, the editor may scope layout to that doctor at the selected practice. Tenant owners typically configure the practice-wide default.
Test your layout
- Complete or open a consultation with a draft prescription.
- Use Download or Print from the consultation workspace.
- Adjust the template and re-print until margins and header fit your paper.
Related
- Update practice settings (Prescription tab) · Run a consultation