Update your first batch
This tutorial walks one inventory correction end to end. You’ll fix a record’s price and expiry, adjust its quantity, and watch the KPI strip respond. It takes about five minutes and is safe to run on the demo tenant — nothing is checked out or shipped.
Before you start
- You’re signed in and can reach Inventory → Controls → Inventory - Batch Update.
- Your role can edit price, expiry, and stock (a tenant owner can do all of this).
1. Open the screen and read the numbers
Go to Inventory → Controls → Inventory - Batch Update. Take in the layout: the KPI strip up top, the filter toolbar, and the inventory table.
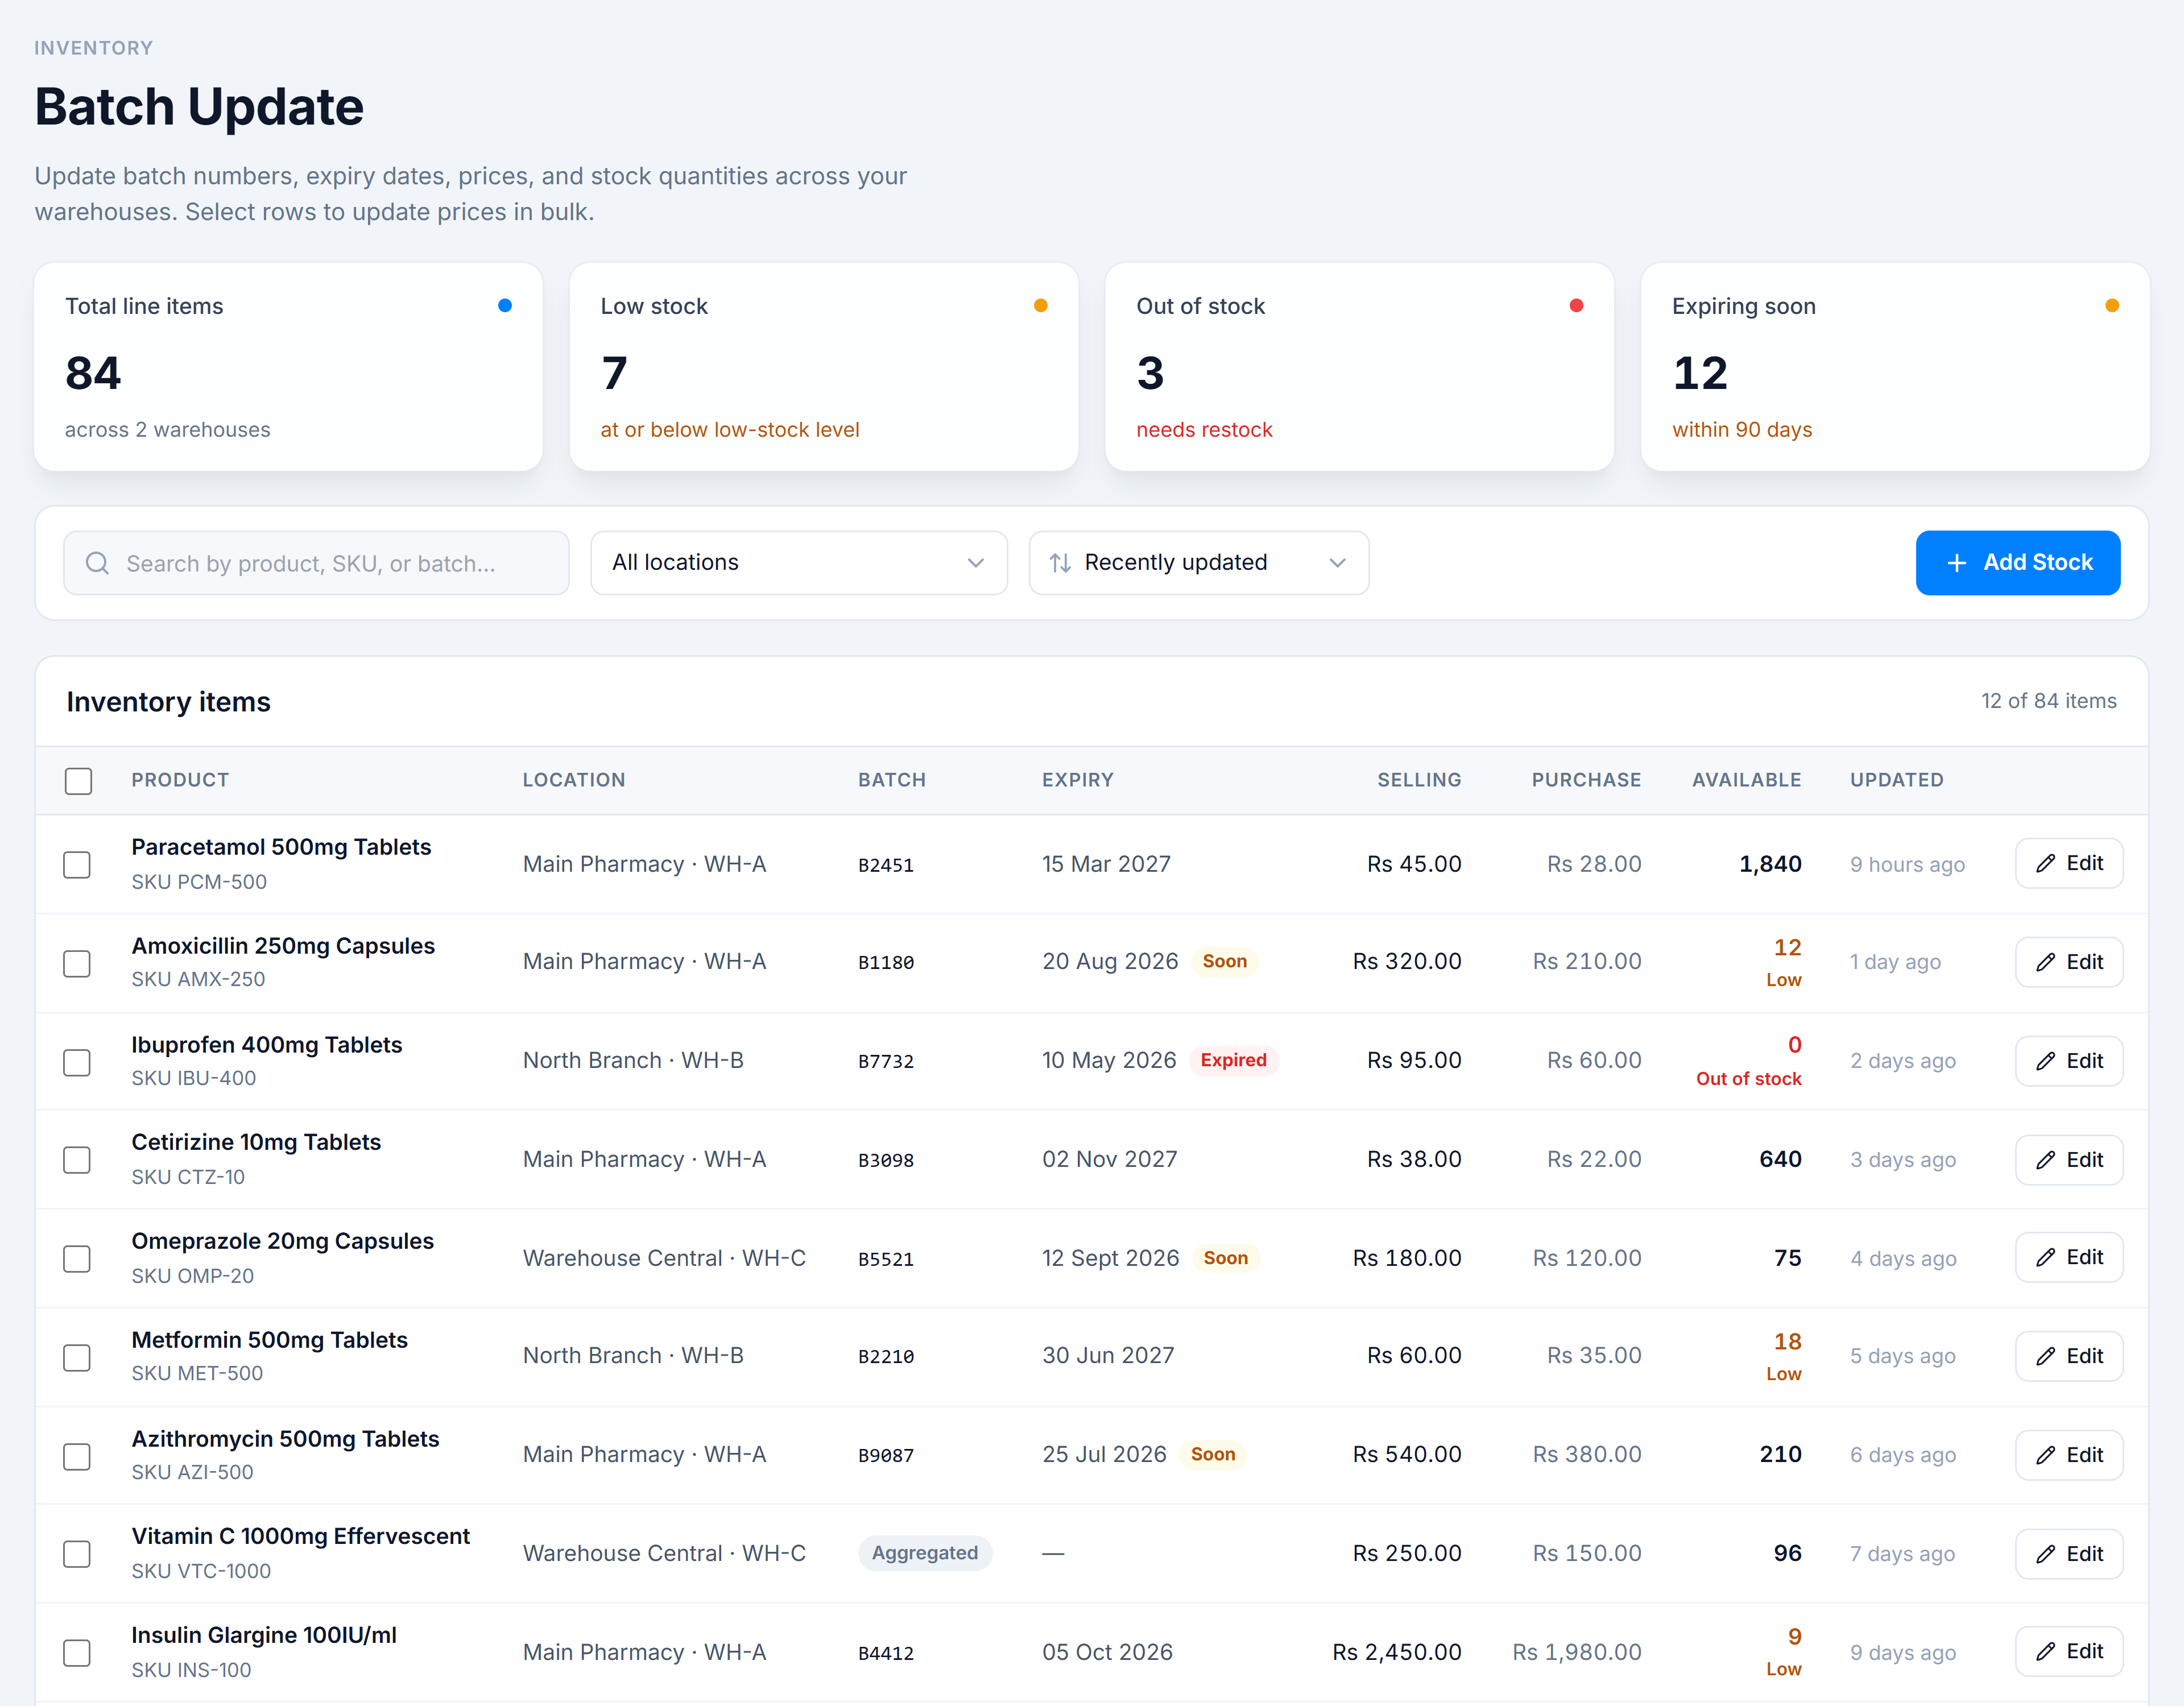
Glance at Low stock and Expiring soon — you’ll check them again at the end.
2. Find an item
In the search box, type part of a product name and press Enter. If your table is long, also pick a location from the dropdown to narrow it. Pick any batch-tracked row to work on.
3. Fix its expiry and price
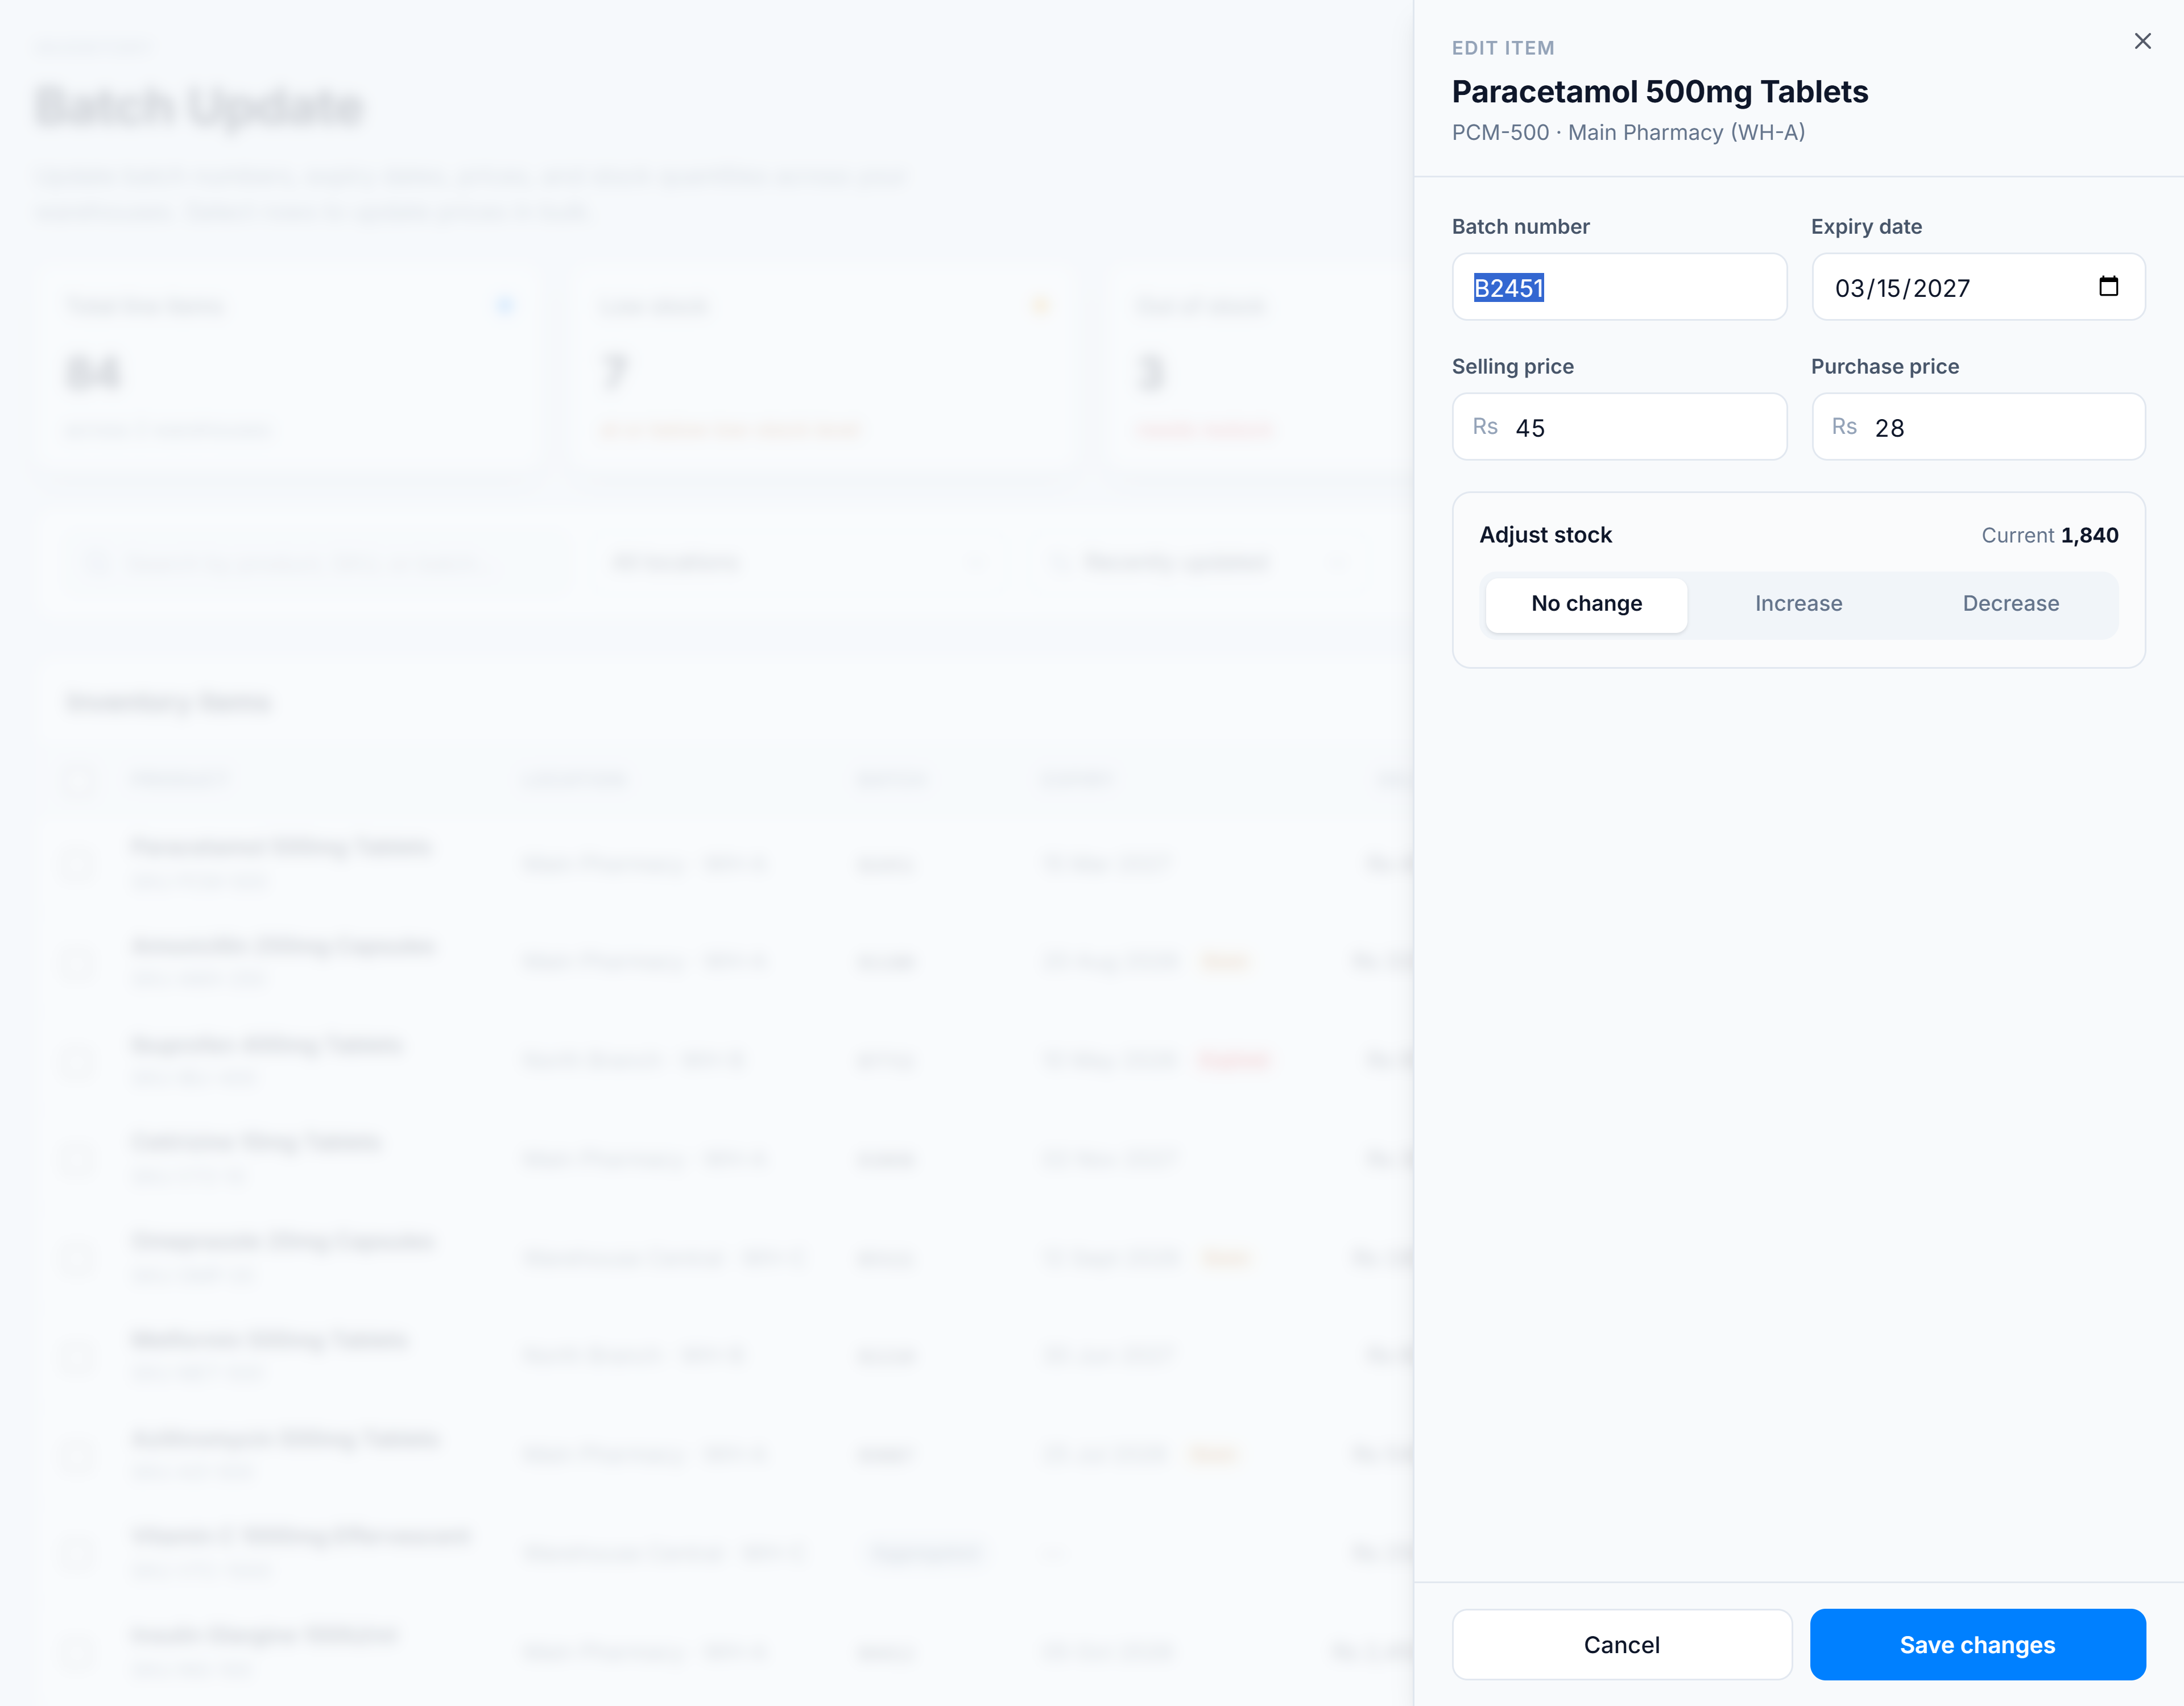
Click Edit on the row. In the drawer, change the Expiry date to a date within the next 90 days, and nudge the Selling price up by a few rupees.
4. Adjust the quantity
Still in the drawer, open Adjust stock, choose Decrease, and set a small amount. Watch the current → new preview update live.
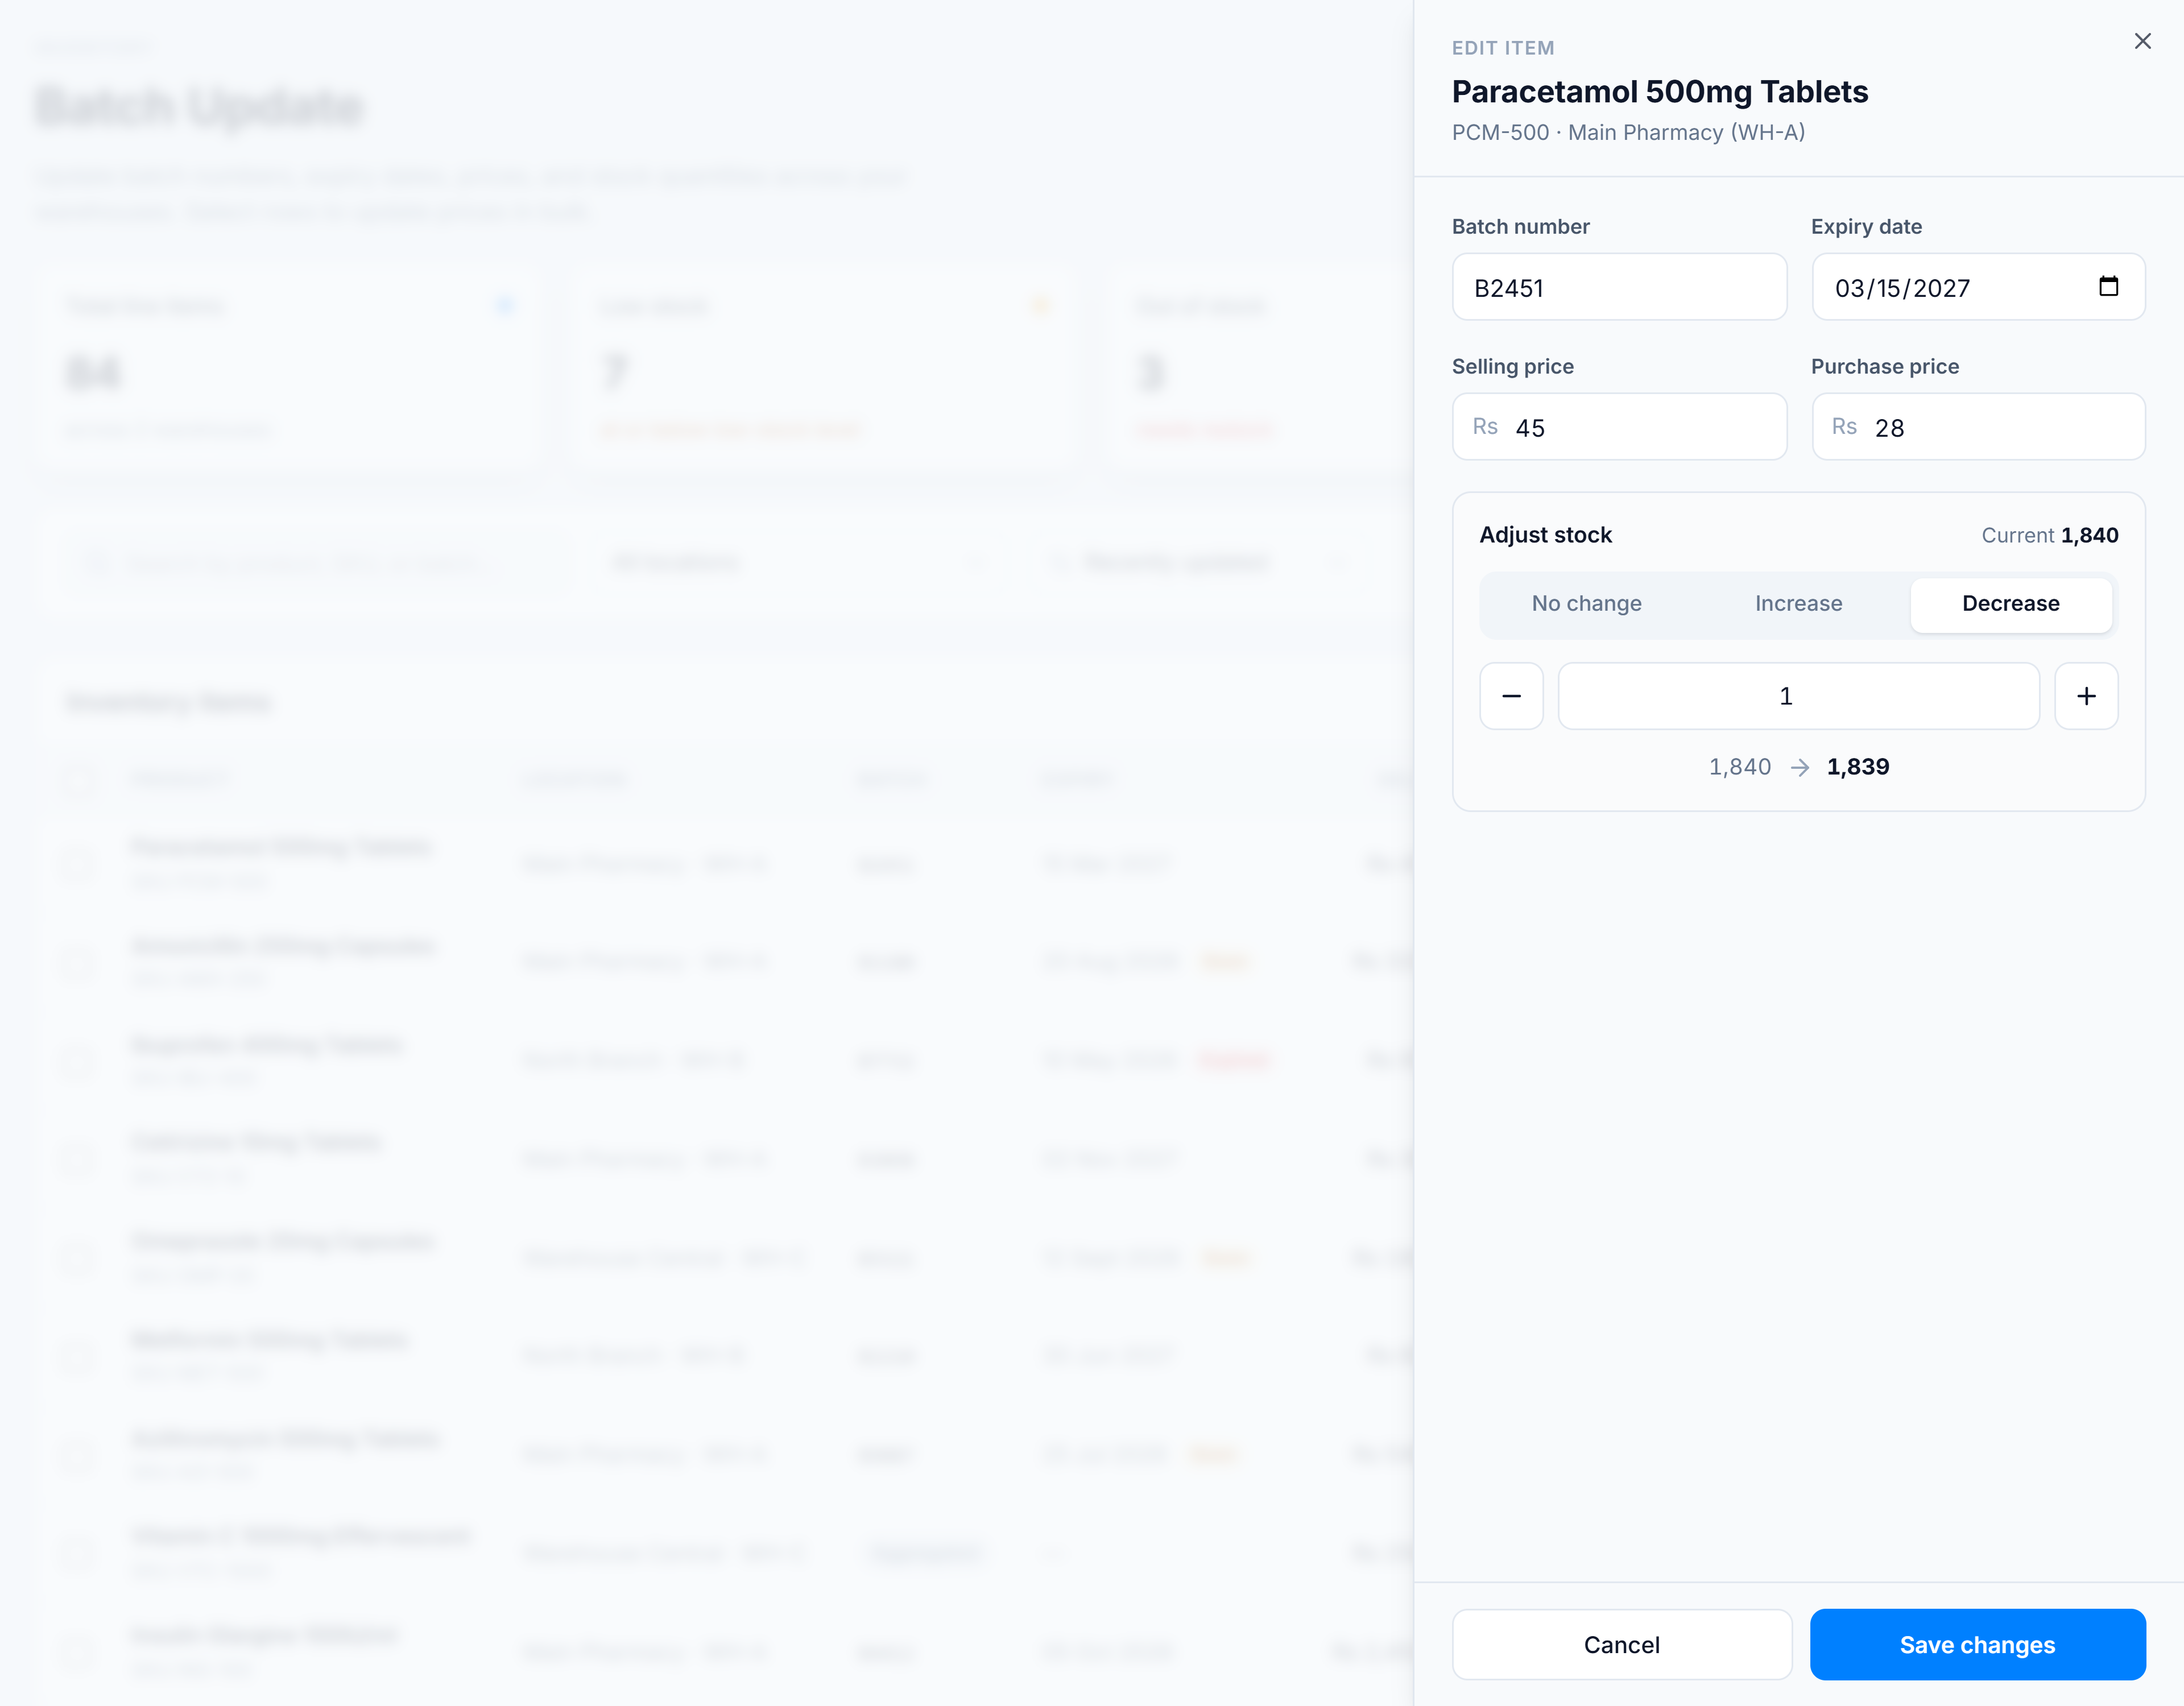
Click Save changes. A toast confirms the update and the drawer closes.
5. See the numbers move
Look back at the KPI strip. Because you set an expiry inside 90 days, Expiring soon should tick up; if your decrease crossed the low-stock line, Low stock moves too. The row’s Updated column now reads just now, and an expiry Soon badge appears.
What you learned
- How to find an item and open its edit drawer.
- How to change reference data, price, and quantity in one place — and preview the quantity change before saving.
- How the KPI strip and badges reflect your edits immediately.
Where to next
- Change prices across many products at once: Bulk-update prices.
- Add stock that never had a purchase order: Add adjustment stock.
- Understand the Aggregated rows: Aggregated vs tracked batches.