Process and save a GRN
Goal: complete a GRN’s line items and invoice, then post it. Where: Goods Received Notes → open a GRN → Process GRN.
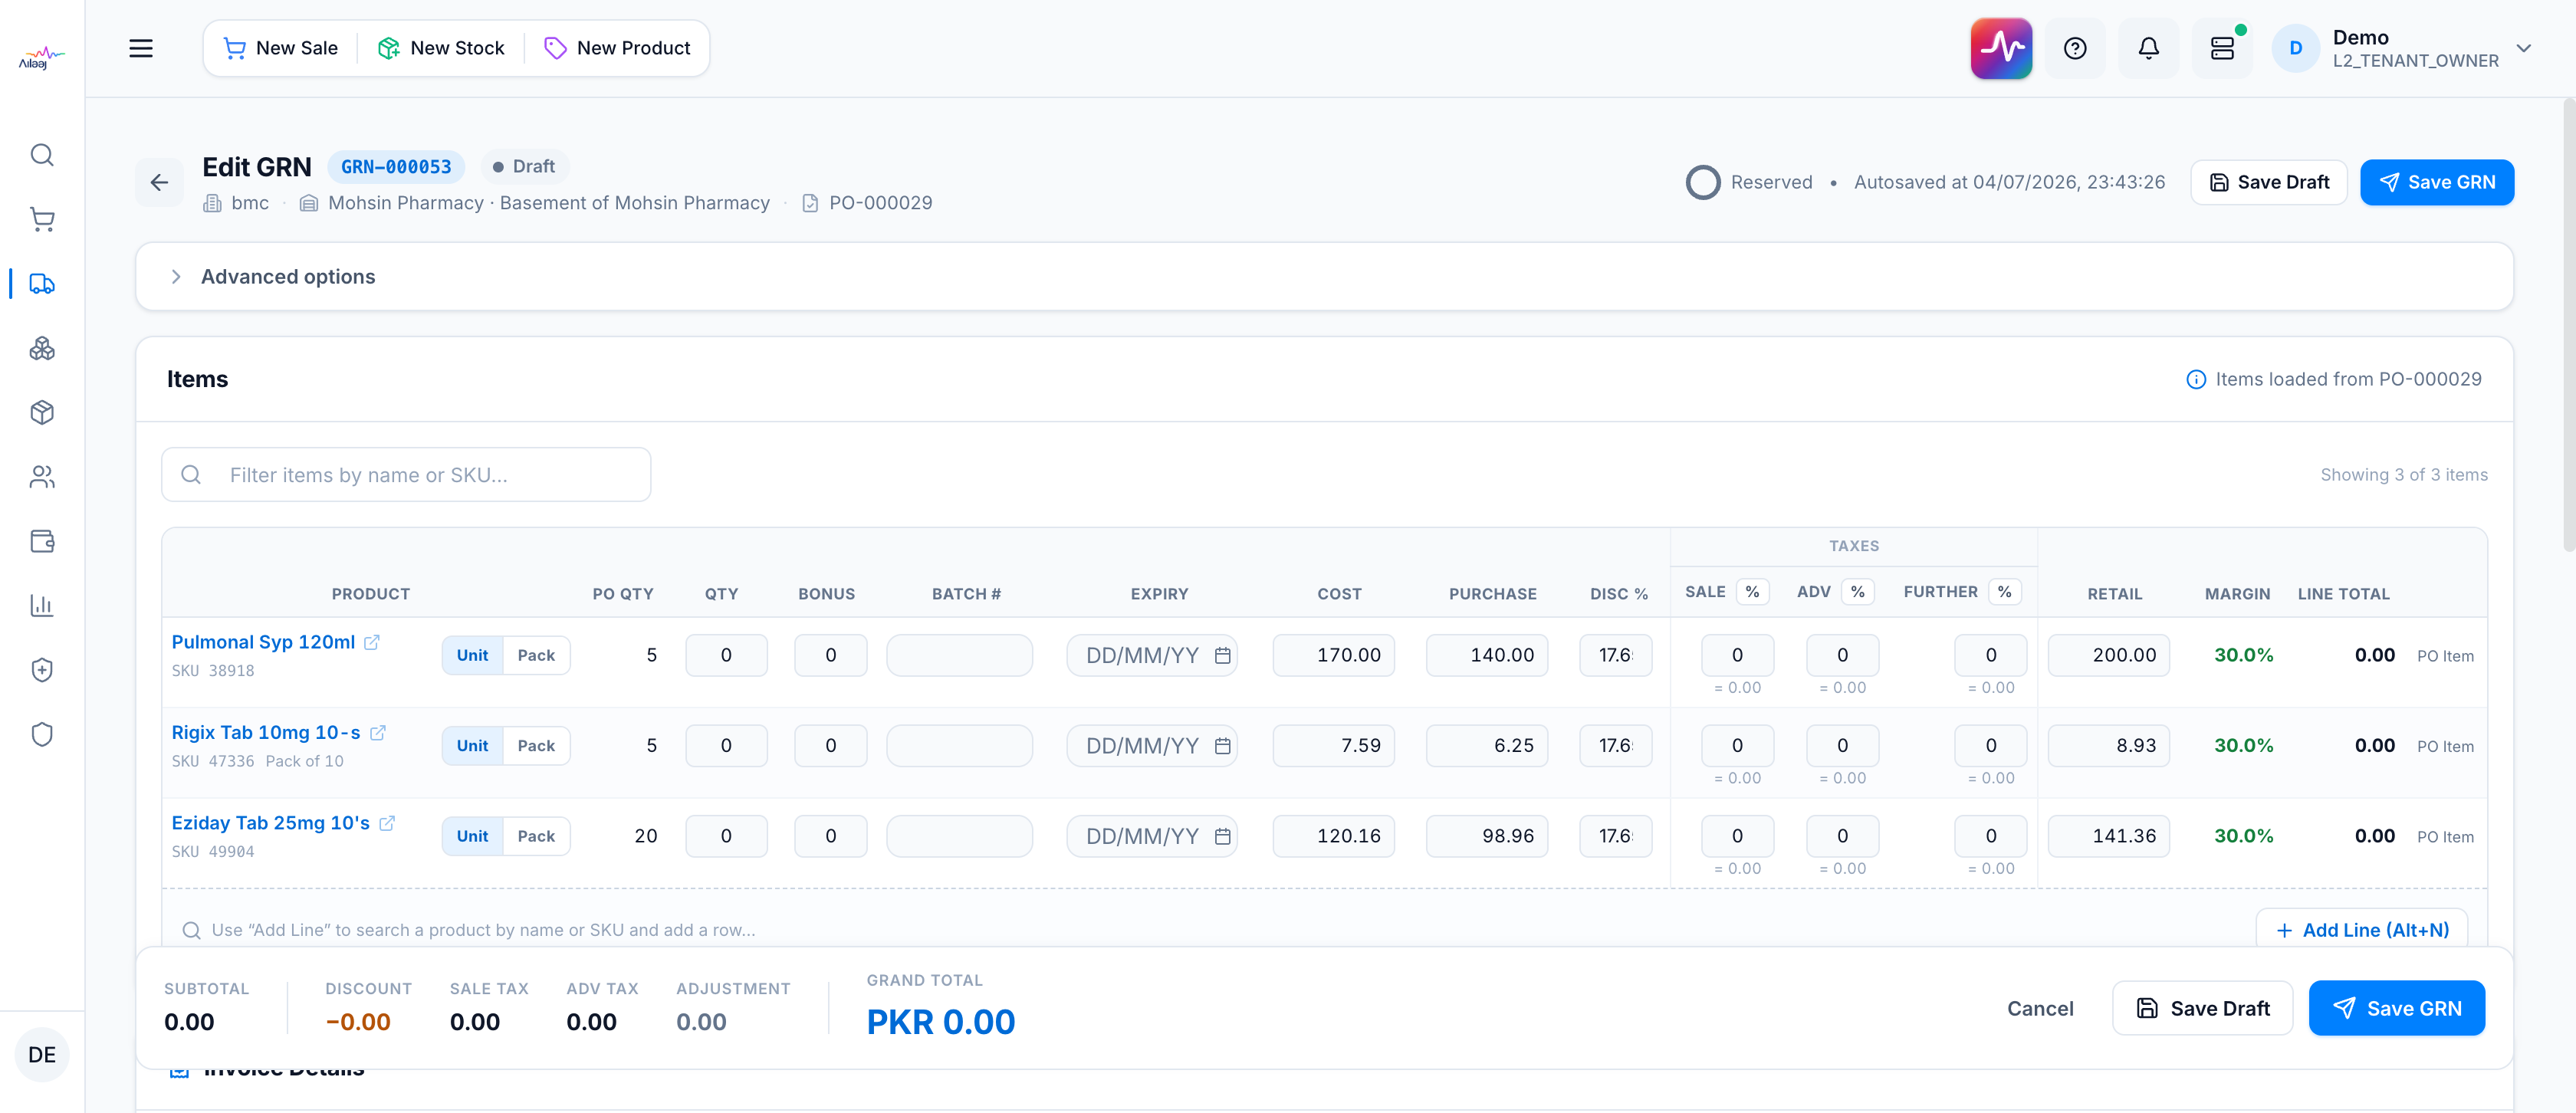
The processing screen has four parts: a header strip (GRN #, status, supplier · warehouse · PO), the item table, the invoice details (with payment nested) and notes cards, and a sticky totals bar with the save actions. The GRN auto-saves as a draft every 30s.
Steps
- Set each line’s quantity mode — every row has a Unit / Pack toggle beside the product name. In Pack mode the number you type is packs and the unit total shows under Qty (e.g. = 400 units); switching a line’s mode keeps the number you typed and re-reads it in the new unit. Quantities must be whole units.
- Fill each line:
- Qty and Bonus received.
- Batch # and Expiry — required when the warehouse tracks batch/expiry. A line missing either shows a red border and a Batch required / Expiry required hint, and a banner tells you how many lines still need them.
- Cost, Disc %, and the three taxes — Sale %, Adv %, Further % (grouped under Taxes; each shows its computed amount below in % mode). Retail, Margin (color-coded), and Line Total are computed for you.
- Click a product name to open its detail; use the row × to remove a line.
- Advanced options (optional) — expand Advanced options above the table to Apply discount % or advance tax % to every line, or to hide the Bonus column.
- Add more lines — use the Add Line search at the foot of the table to find a product by name or SKU. See Add and edit a product line for every line field, pack-vs-unit mode, and entering a tax as a % or a fixed amount.
- Fill the invoice card — Invoice #, Invoice Date, Invoice Amount (auto-totals), Delivery Challan #, and the Invoice Type (Genuine / Proforma / Duplicate). Toggle Official receipt if it counts toward FBR tax reporting, set the Payment mode (with credit days / due date on credit) just below it, and drop the invoice file in the Invoice document zone. See Attach an invoice.
- Add notes — any receiving notes (short shipments, damaged cartons, temperature excursions) in the Notes card.
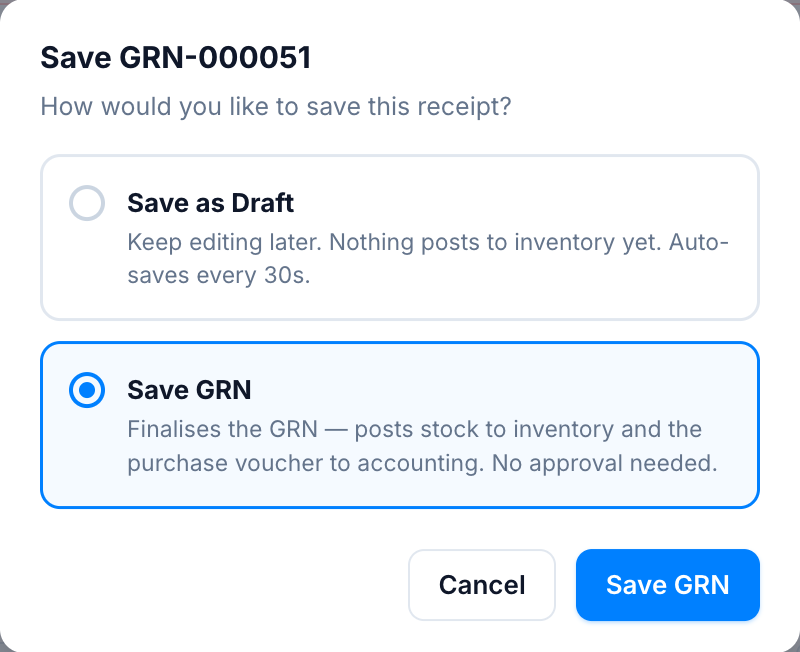
- Save:
- Save Draft — keeps it editable; nothing posts yet.
- Save GRN — submits the receipt. The GRN moves to Pending, stock posts to inventory, and the purchase voucher posts to accounting. A second person then Approves & Completes it (verification).

Notes
- Save GRN runs strict validation — every line needs a product, a quantity, and (where required) batch + expiry. Save Draft is lenient and preserves partial data.
- A completed GRN is locked. After Approve & Complete, the adjustment and pricing can no longer be edited — see GRN statuses.
- What posts, and when is explained in What saving a GRN actually posts.