Add and edit a product line
Goal: add a product to a GRN and understand what each line field does. Where: Goods Received Notes → open a GRN → the item table.
Add a line
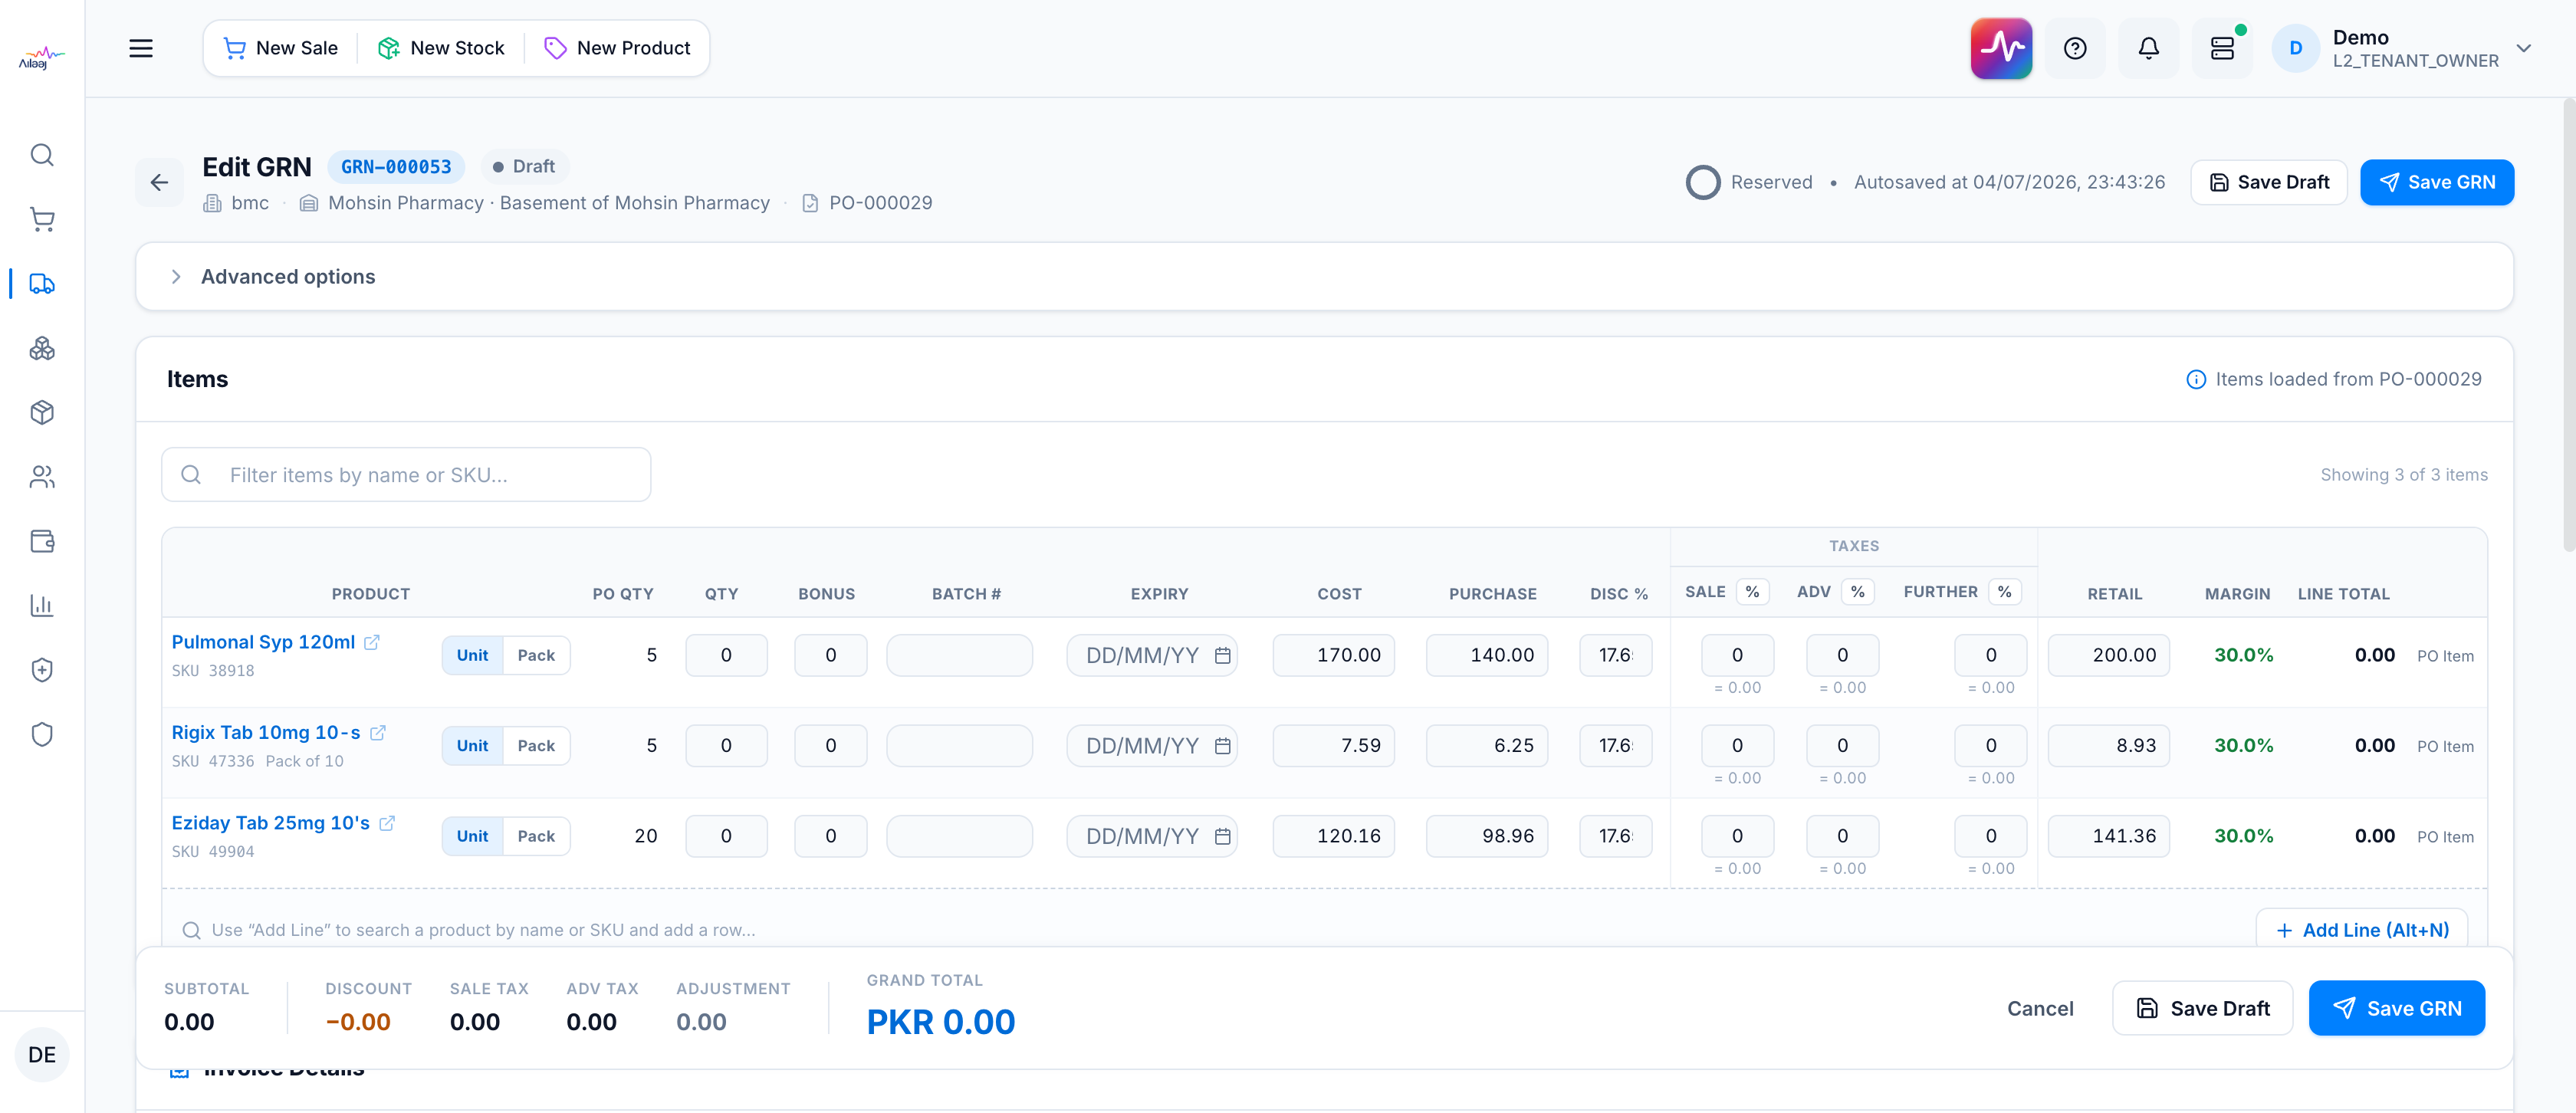
At the foot of the item table, use Add Line:
- Type in the “search a product by name or SKU” box to find the product, or click Add Line (shortcut Alt+N) to drop in a blank row, then search within it.
- The new row appears with the product name, SKU, and pack size (“Pack of N”); fill in its fields (below).
- On a PO-based GRN the ordered lines are already there — Add Line is for adding extra products received that weren’t on the PO.
To remove a line, click the × (Remove line) at the end of the row.
Quantity: pack vs unit
Each row has its own Unit / Pack toggle, beside the product name, deciding how that line’s Qty and Bonus are read:
- Pack — the number you type is packs; the system multiplies by the product’s pack size (e.g. 4 packs of 100 = 400 units to stock). The unit total is shown under Qty so you can see the multiplier result.
- Unit — the number is individual units, ignoring pack size.
Switching a line’s mode keeps the number you typed and re-reads it in the new unit —
100 entered as units becomes 100 packs when you switch to Pack (not 10). Quantities
must be whole units; a decimal is flagged with a red border.
The line fields, left to right
| Field | What it does |
|---|---|
| Qty | Quantity received, read as packs or units per the row’s toggle above. |
| Bonus | Free units the supplier added; they go into stock but don’t add to cost. Can be hidden via Advanced options. |
| Batch # | Supplier batch number. Required where the warehouse tracks batches. |
| Expiry | Batch expiry — type DD/MM/YYYY or use the date picker. Required where tracked. |
| Cost | The per-unit list cost (before discount). |
| Purchase | The per-unit price you actually pay (after discount). Cost, Purchase, and Disc % stay in sync — edit any one and the others re-derive. |
| Disc % | Line discount percentage. |
| Sale % / Adv % / Further % | The three taxes, grouped under Taxes. See the %↔amount toggle below. |
| Retail | Per-unit selling price — drives the margin. |
| Margin | The computed net margin %, color-coded (green healthy / amber thin / red negative). It’s also a button — click it to type a target margin %, and the retail price is back-calculated for you. |
| Line Total | The line’s value after discount and taxes (computed). |
Enter a tax as a % or a fixed amount
Each tax column header (Sale, Adv, Further) has a small % / Rs toggle:
- Default is % mode — you enter a rate and the tax amount is computed and shown beneath the field.
- Click the toggle (% → Rs) to switch that tax to amount mode, where you type the exact tax value for the line instead of a rate.
Use amount mode when the supplier invoice states a fixed tax figure that doesn’t divide cleanly into a percentage. The toggle is per-tax, so you can mix (e.g. Sale tax as %, Further tax as a fixed amount).
Apply one value to every line
To set the same discount or advance tax across all lines, expand Advanced options above the table and use Apply discount to all / Apply advance tax to all — type the value once and click Apply. The same panel has a Show bonus column toggle to hide the Bonus field.