Create a GRN
Goal: open a new GRN and choose its source, ready to process. Where: Goods Received Notes → Create GRN.
Steps
- Click Create GRN.
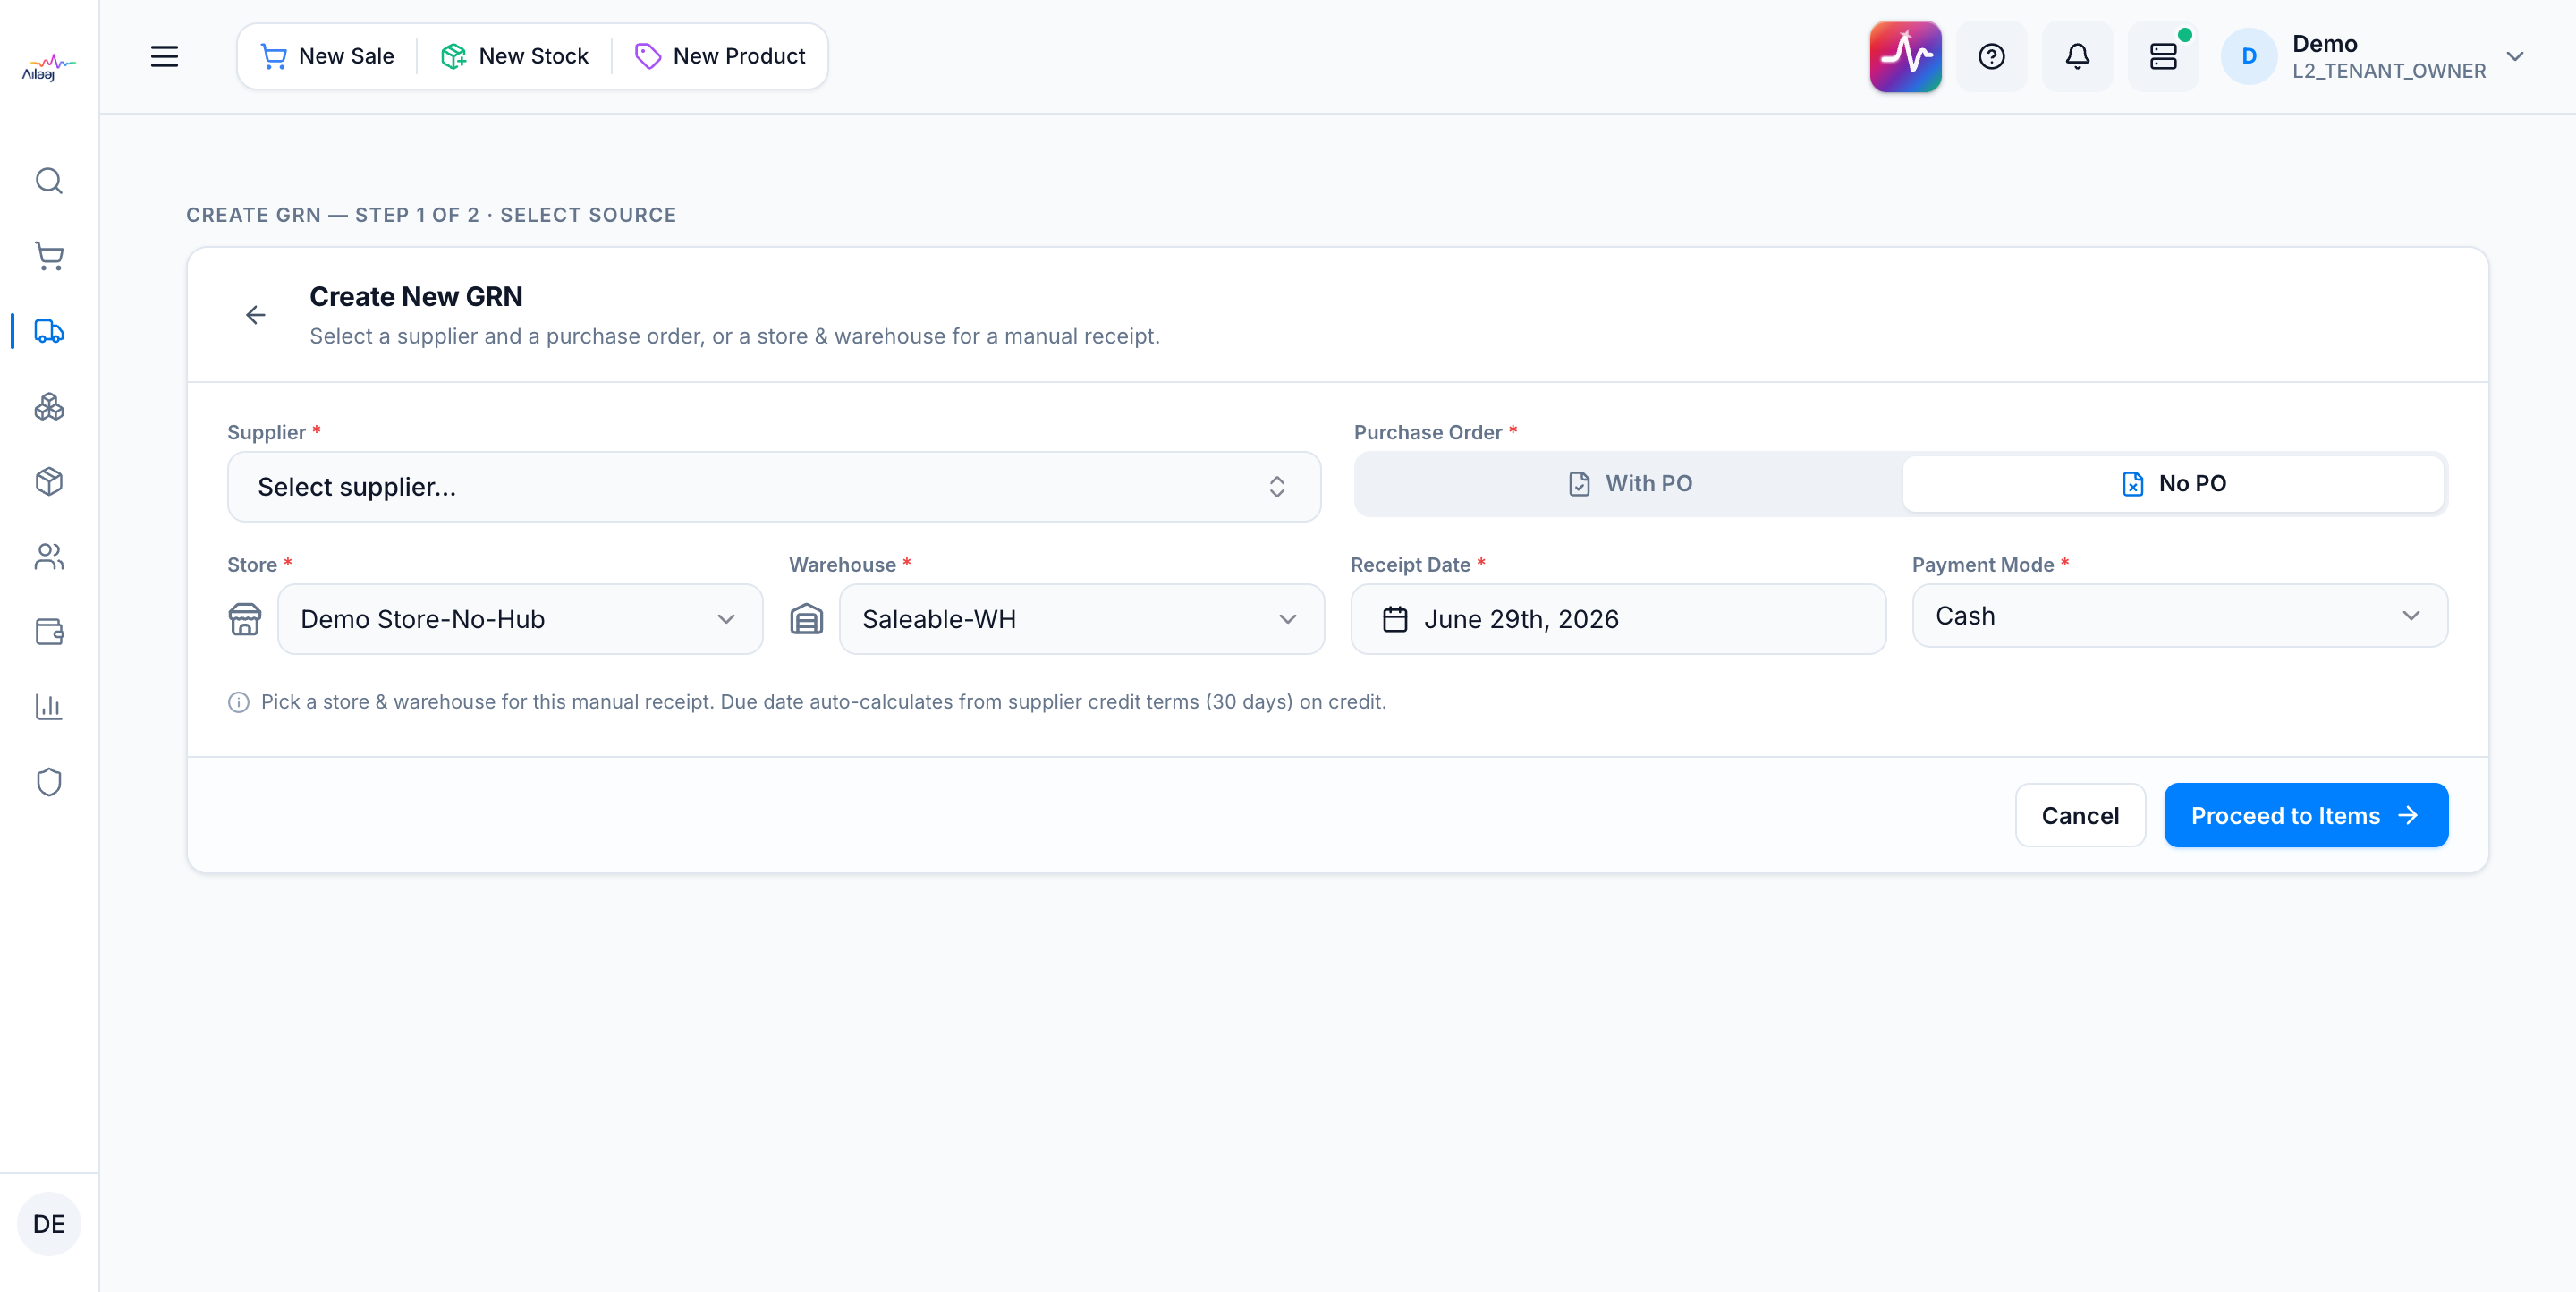
- Choose the source:
- With PO — pick the Supplier (required), then Select Purchase Order (required). Store and Warehouse lock to the PO (shown with a lock icon).
- No PO — switch the toggle to No PO, then pick Store (required) and Warehouse (required) yourself. See Receive without a purchase order.
- Set the Receipt Date (required, defaults to today) and the Payment Mode (required). On credit, the due date auto-calculates from the supplier’s credit terms.
- Click Proceed to Items to open the processing screen.
Notes
- Only Approved or Partially-Received POs are receivable. Draft, Pending Approval, and closed POs do not appear in the PO picker — approve the PO first.
- One draft per PO. If a PO already has a draft GRN, the app opens that existing draft instead of creating a duplicate (you’ll see a “Draft GRN found” toast).
- Store and warehouse are locked in With-PO mode because the receipt math is tied to the PO; they’re editable only in No-PO mode.