Tutorial: Create & publish a campaign
This walks you through building one campaign from scratch and publishing it live. Follow it once and you’ll know the whole flow; for any single step on its own, jump to its how-to page.
1. Open Rack Campaigns and start a draft
Go to Admin → Operations → Rack Campaigns. The screen is two panes — a campaign list on the left, the editor on the right.
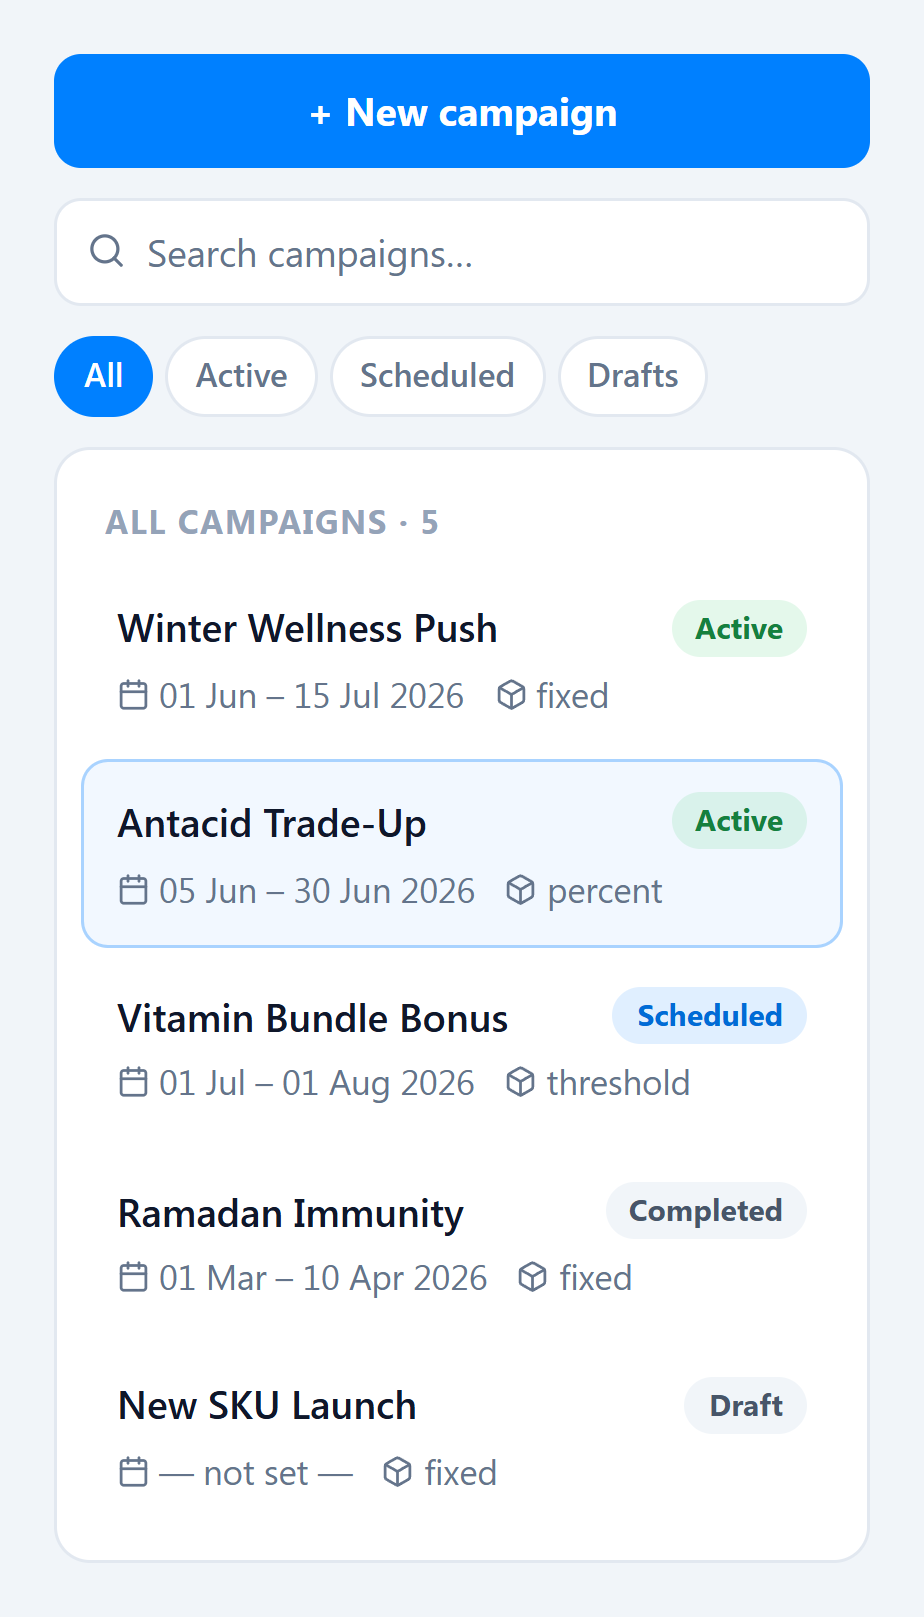
Click New campaign. A draft is created with sensible defaults (today → +60 days, a fixed incentive) and you’re dropped into the editor. (A Draft does not appear on the counter until you publish it.)
2. Step 1 — Details
Give the campaign a name and an optional Description (managers-only, not shown at the counter), and set the Start and End dates. The Status badge is read-only — it’s derived from the dates, not set by hand.
3. Step 2 — Incentive
Choose how staff earn commission: Fixed commission (flat amount per unit), Percentage (a share of sale value or gross margin), or Threshold (a reward unlocked after a target). Fill the fields for the type you pick.
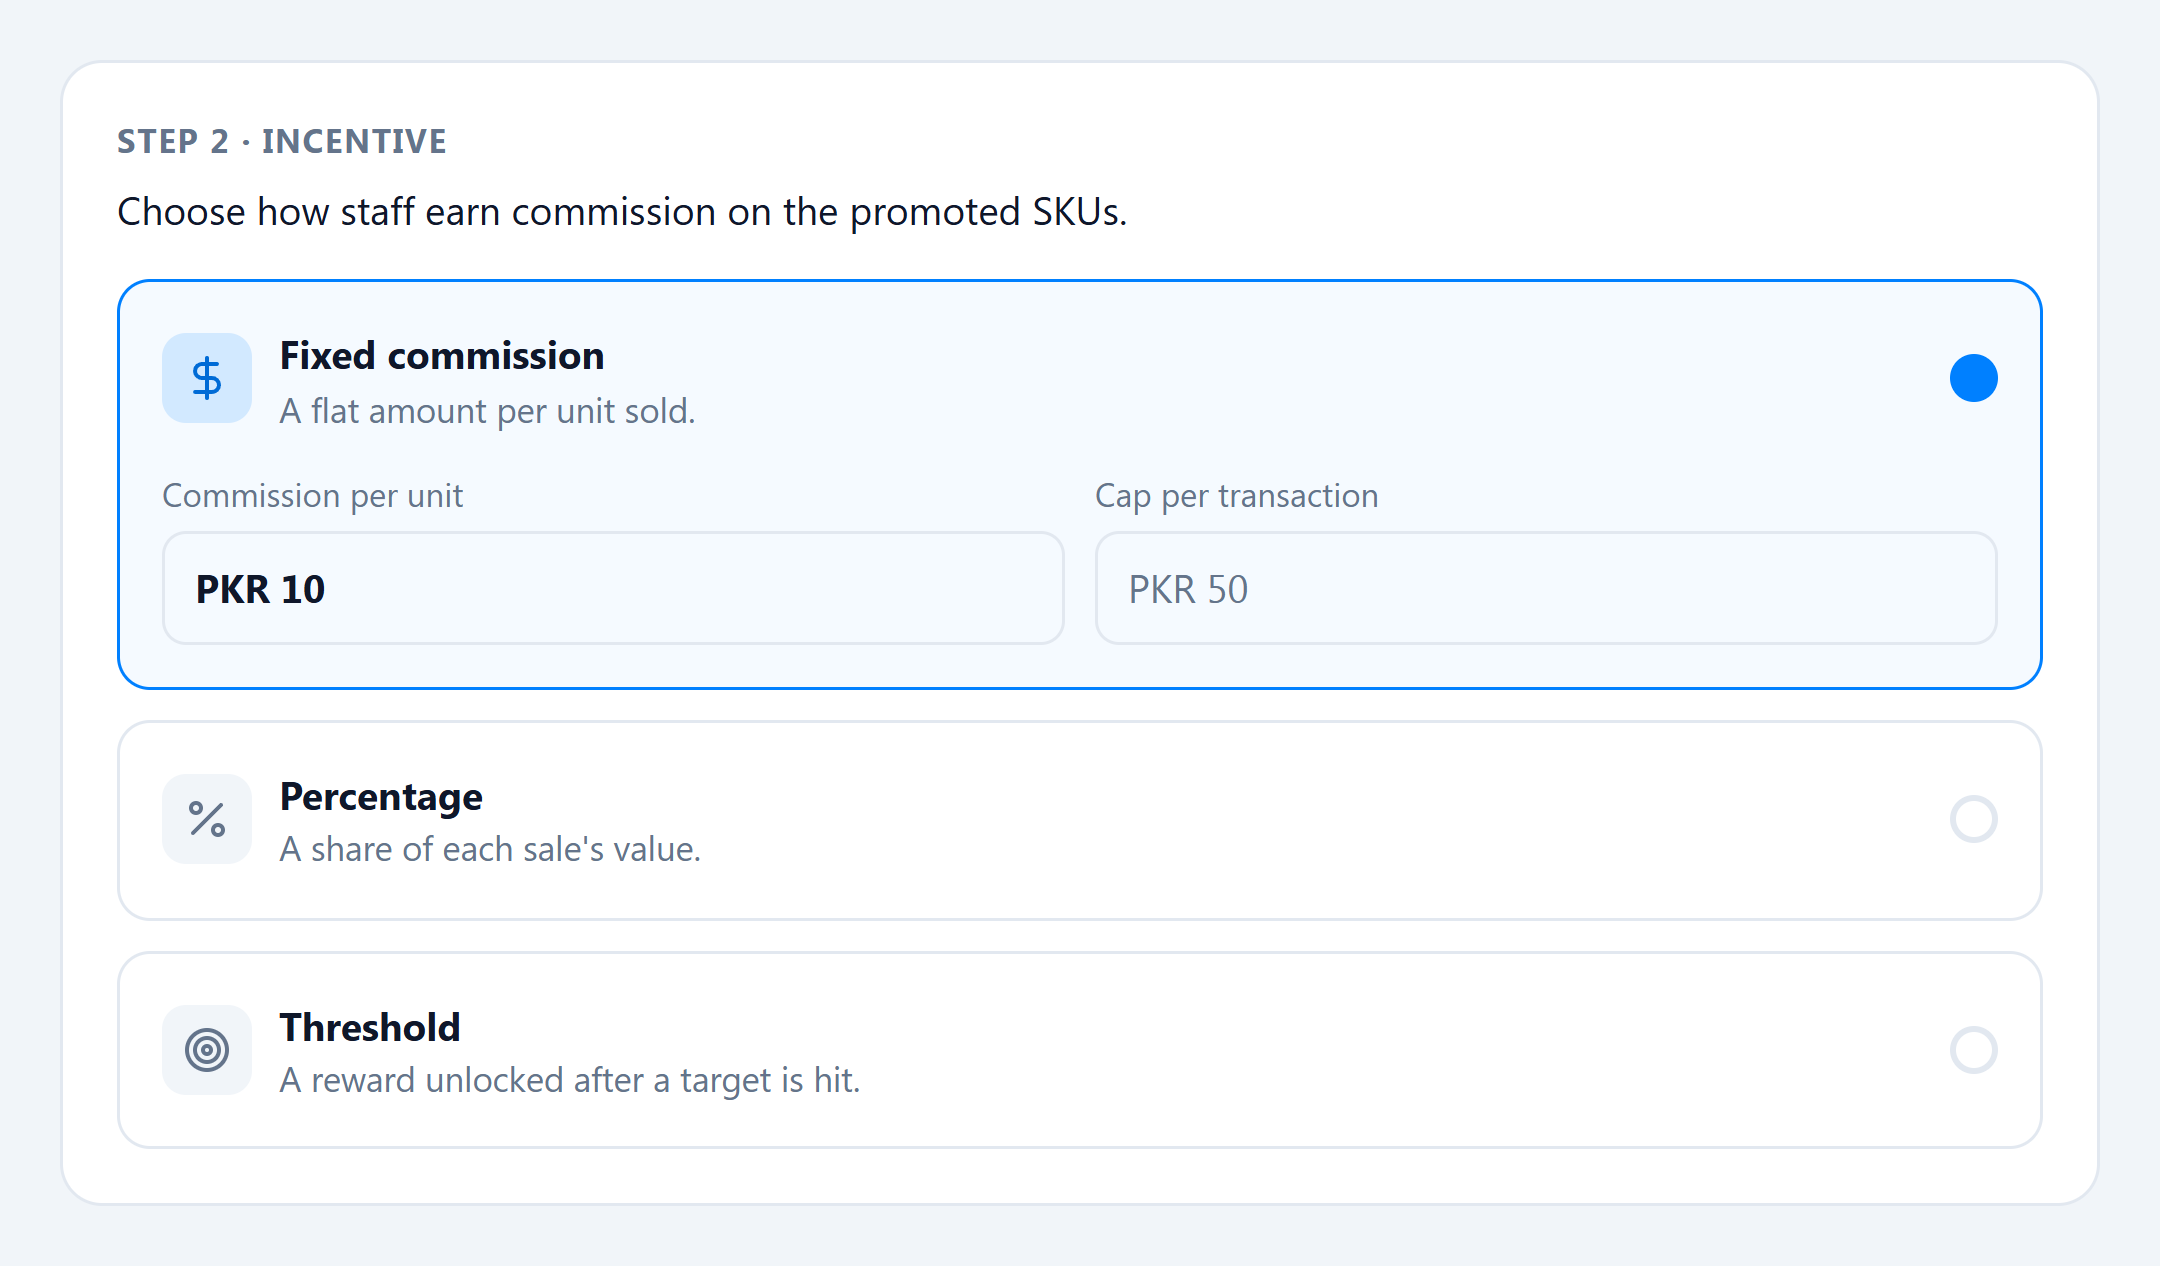
(Exact fields per type: Incentive types.)
4. Step 3 — Audience
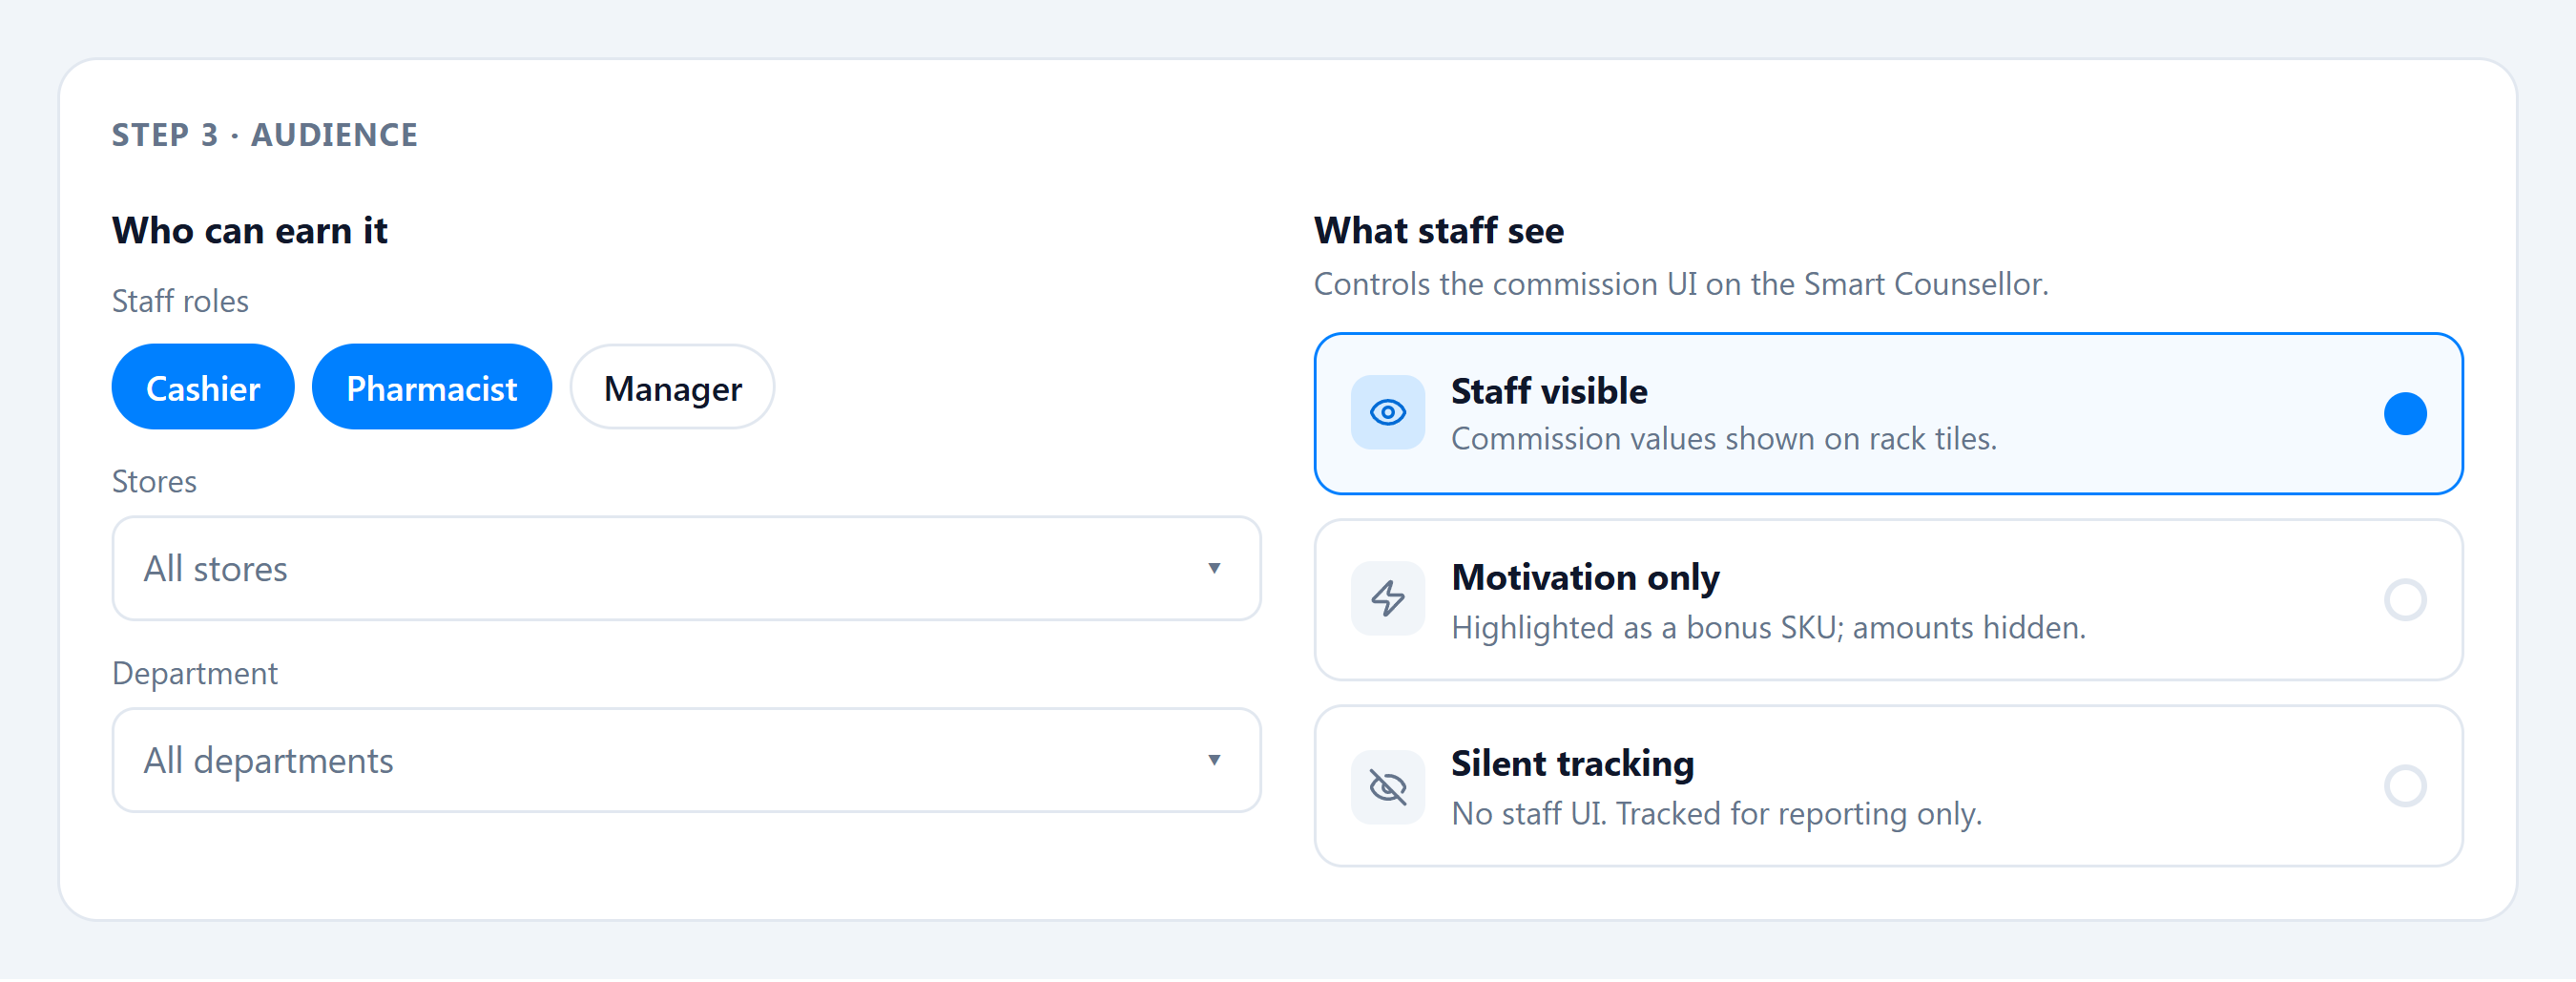
Set who can earn it (staff roles, stores, department) and what staff see on the rack — Staff visible, Motivation only, or Silent tracking. The live preview shows how a rack tile will look with your visibility choice.
5. Step 4 — Rack items
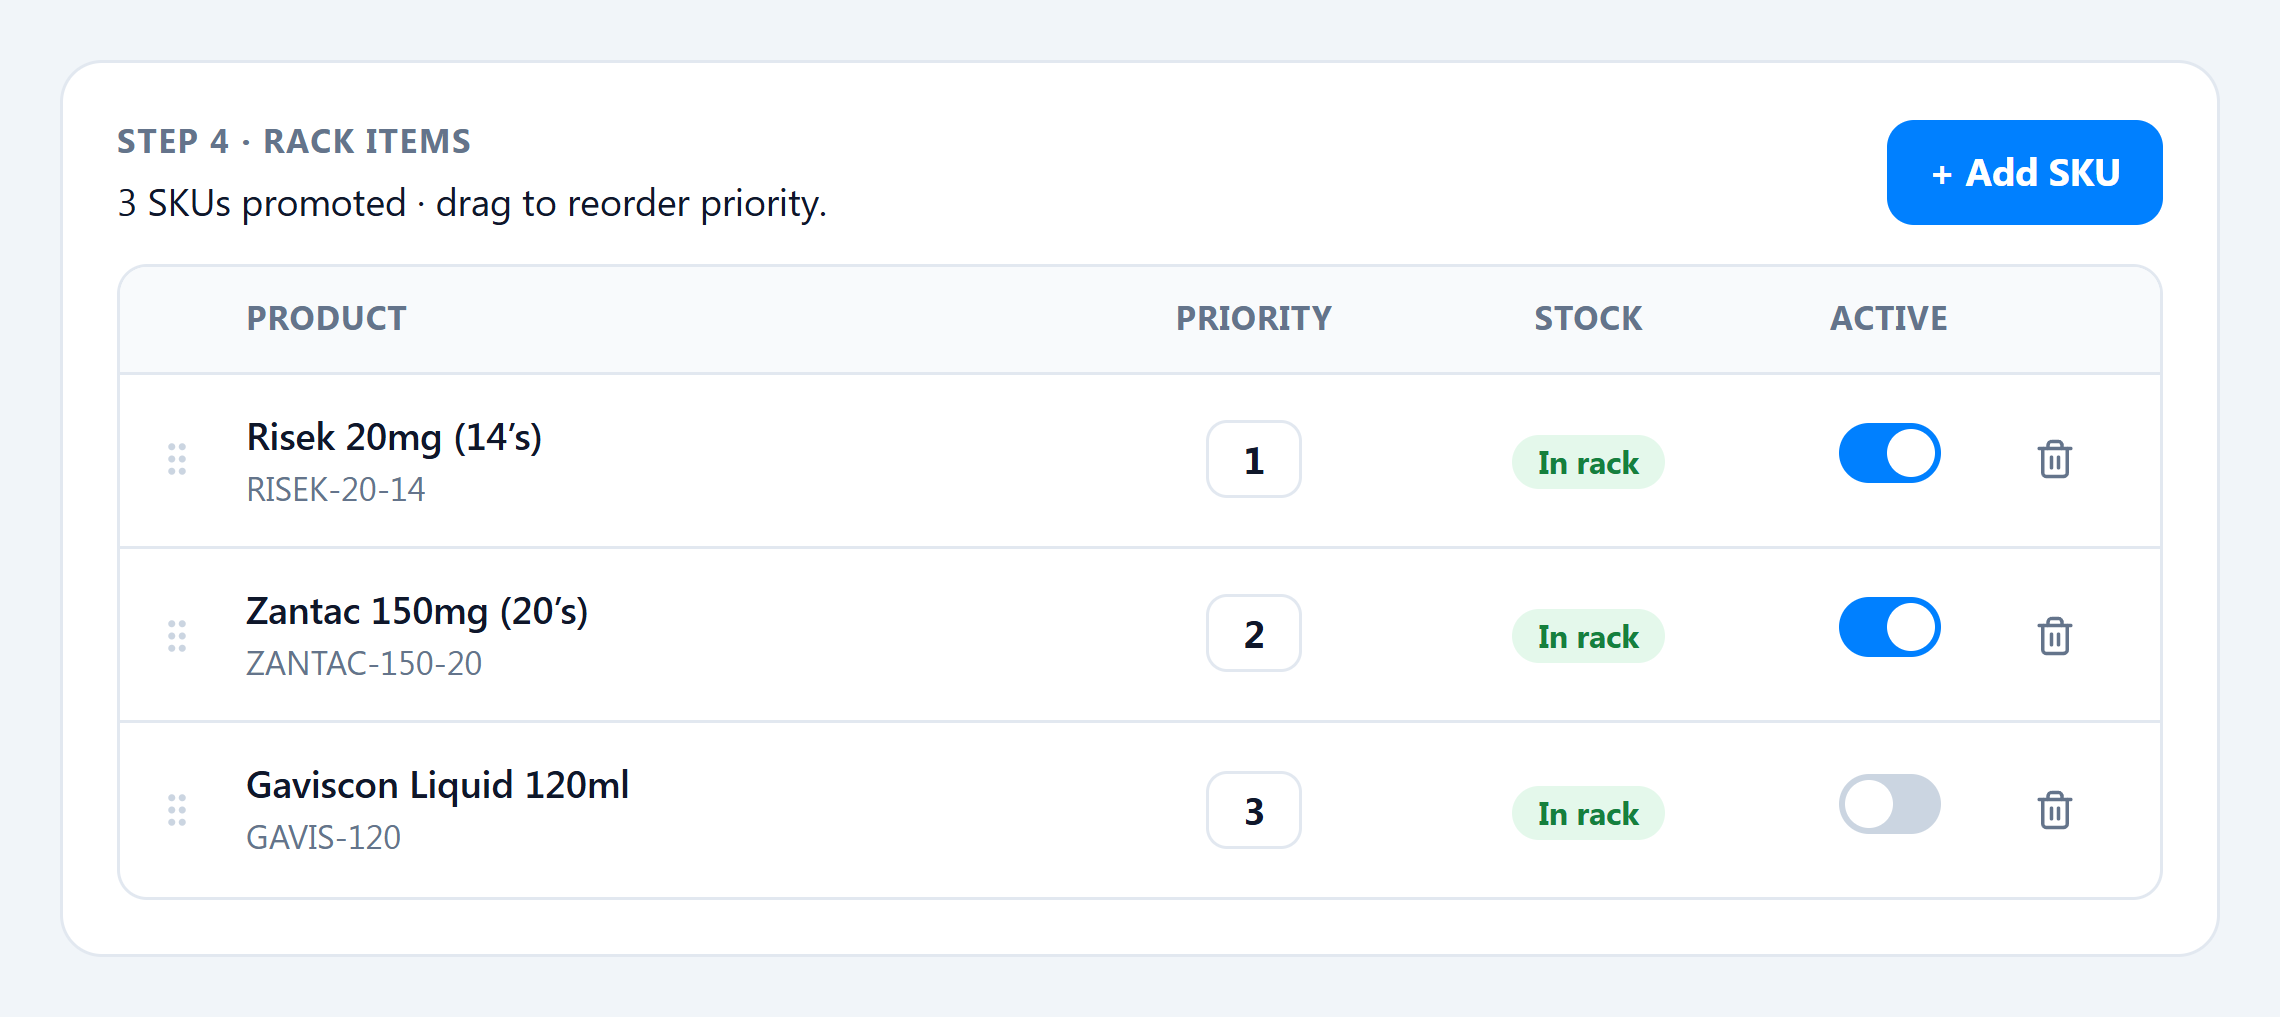
Promote the SKUs. Click Add SKU, search by name / SKU / barcode, and Add each product. Drag rows to set priority (1 = highest, shown first on the rack).
6. Publish
Click Publish campaign. You’ll see “Campaign published — status: {derived status}.” The campaign goes live on the Smart Counsellor Campaigns tab for the targeted staff/stores, within its date window.
That’s a full campaign: created, configured, stocked with SKUs, and published. Next: watch it perform in campaign reports, and see how it looks to cashiers in Audience & visibility.