Set up your supplier directory
You are setting up procurement for a pharmacy that buys from multiple manufacturers and distributors. By the end of this walkthrough you will have one supplier on file, with products mapped, ready for a purchase order.
1. Open the Suppliers list
In the sidebar go to Replenish Stock → Suppliers → Suppliers.
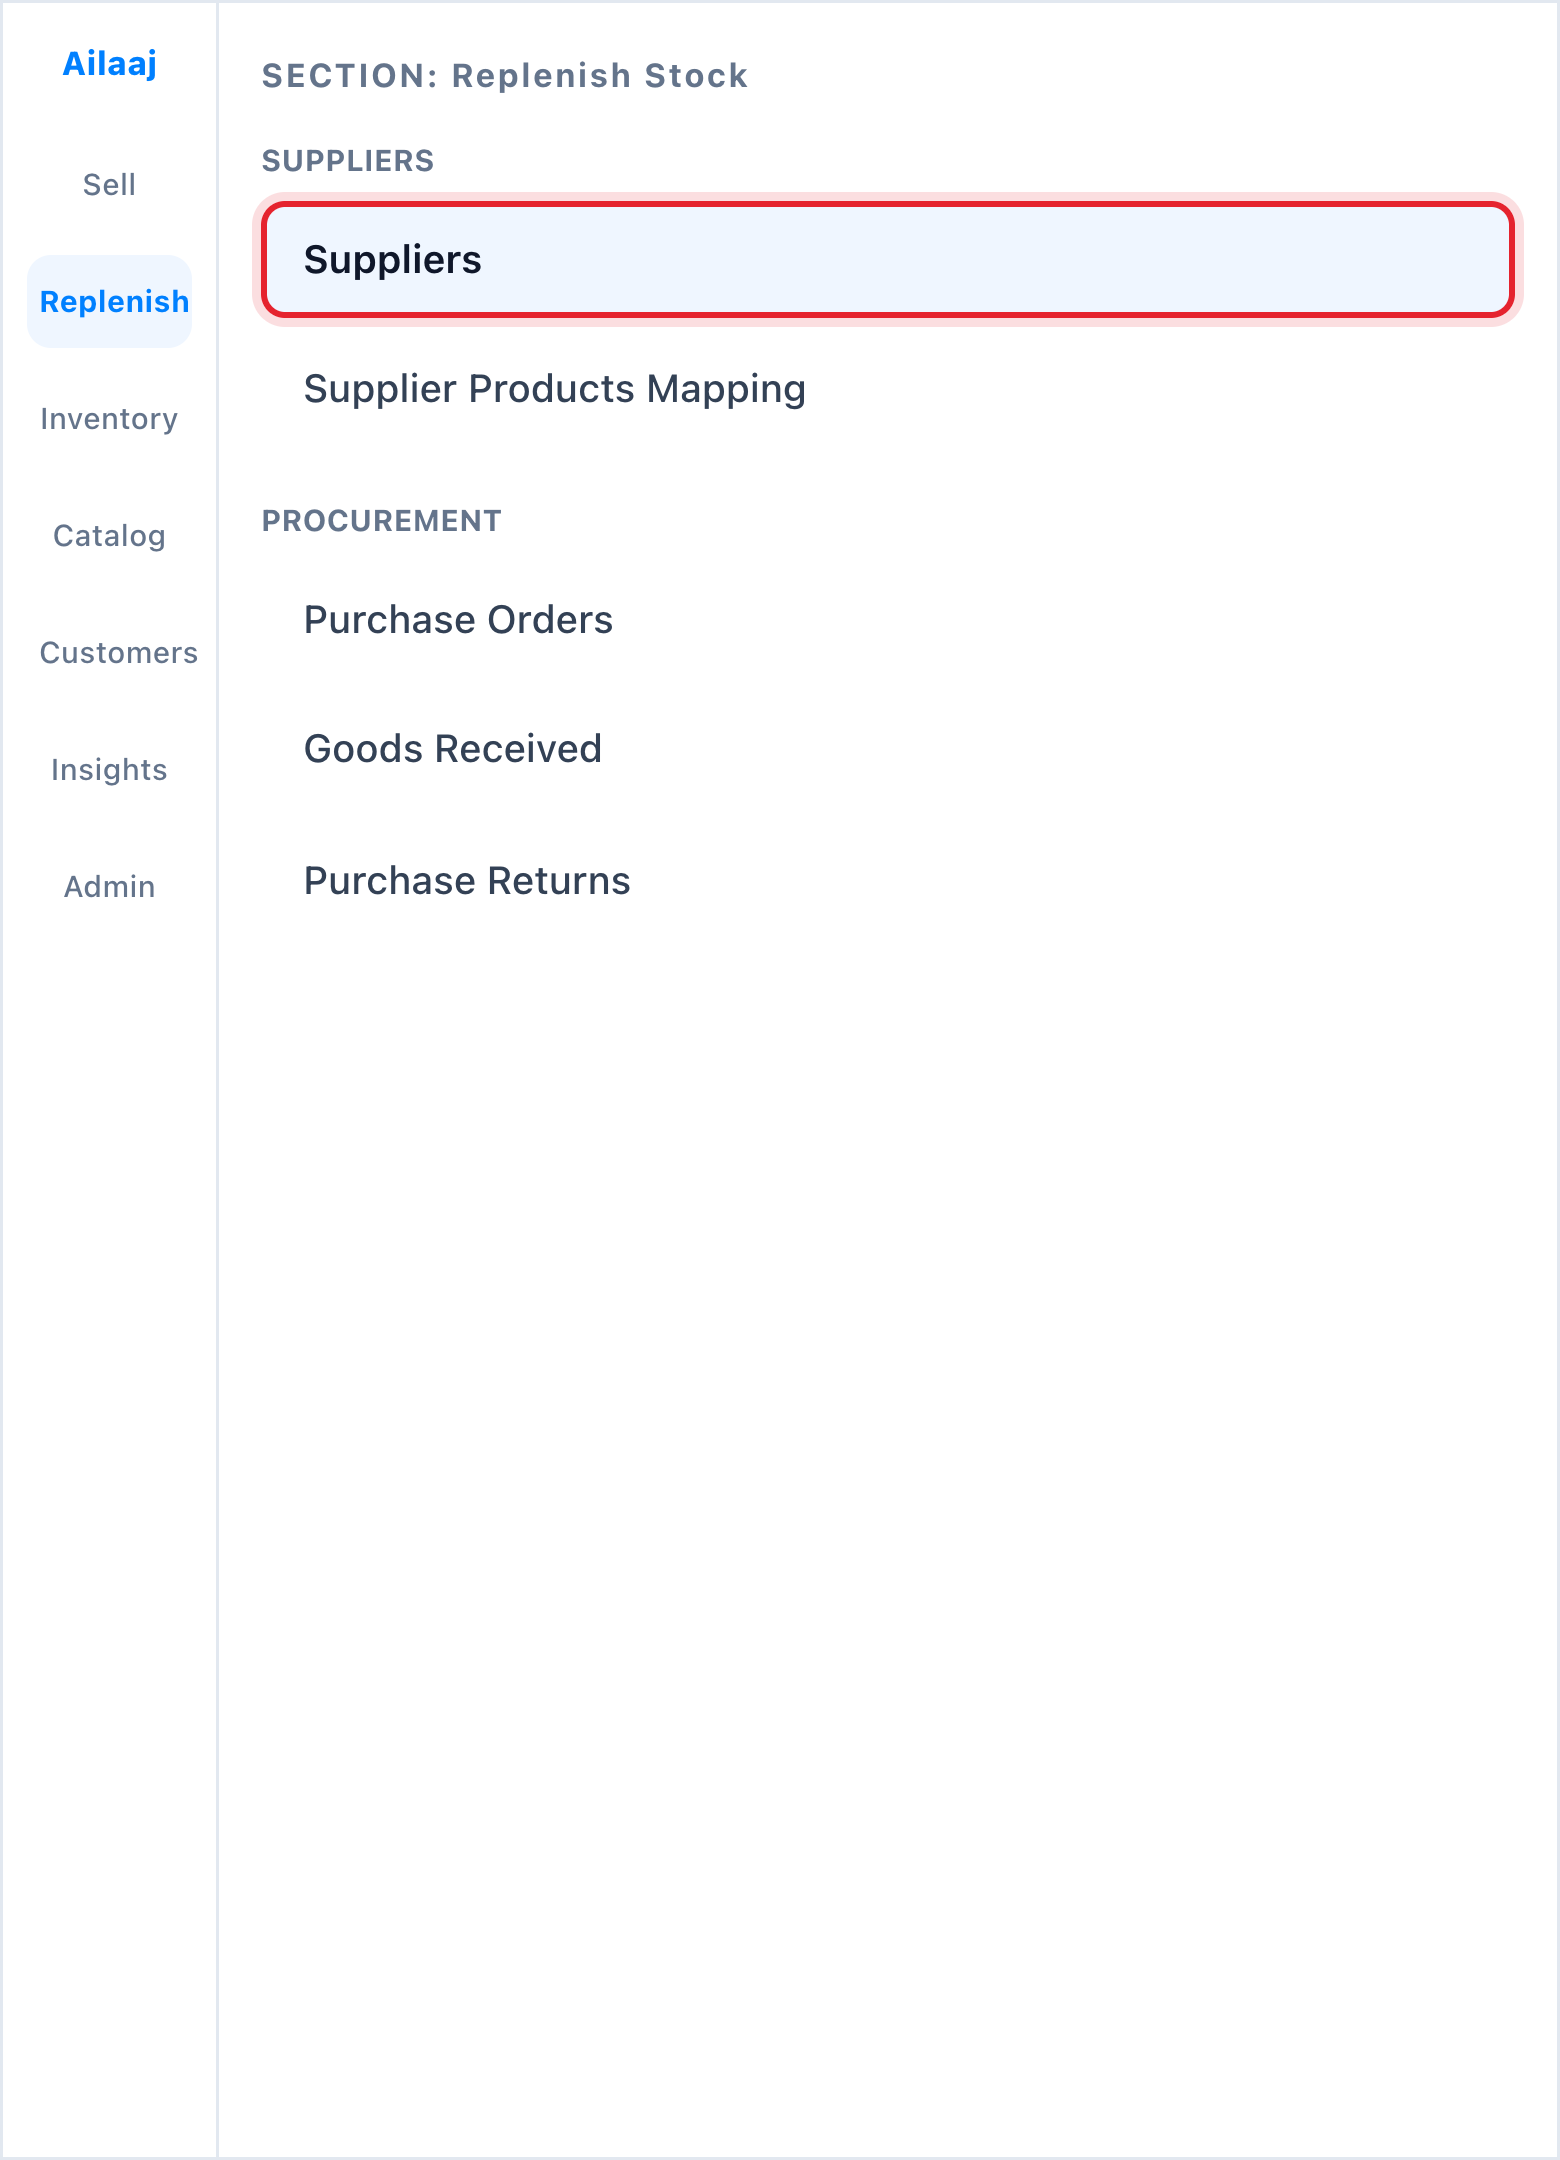
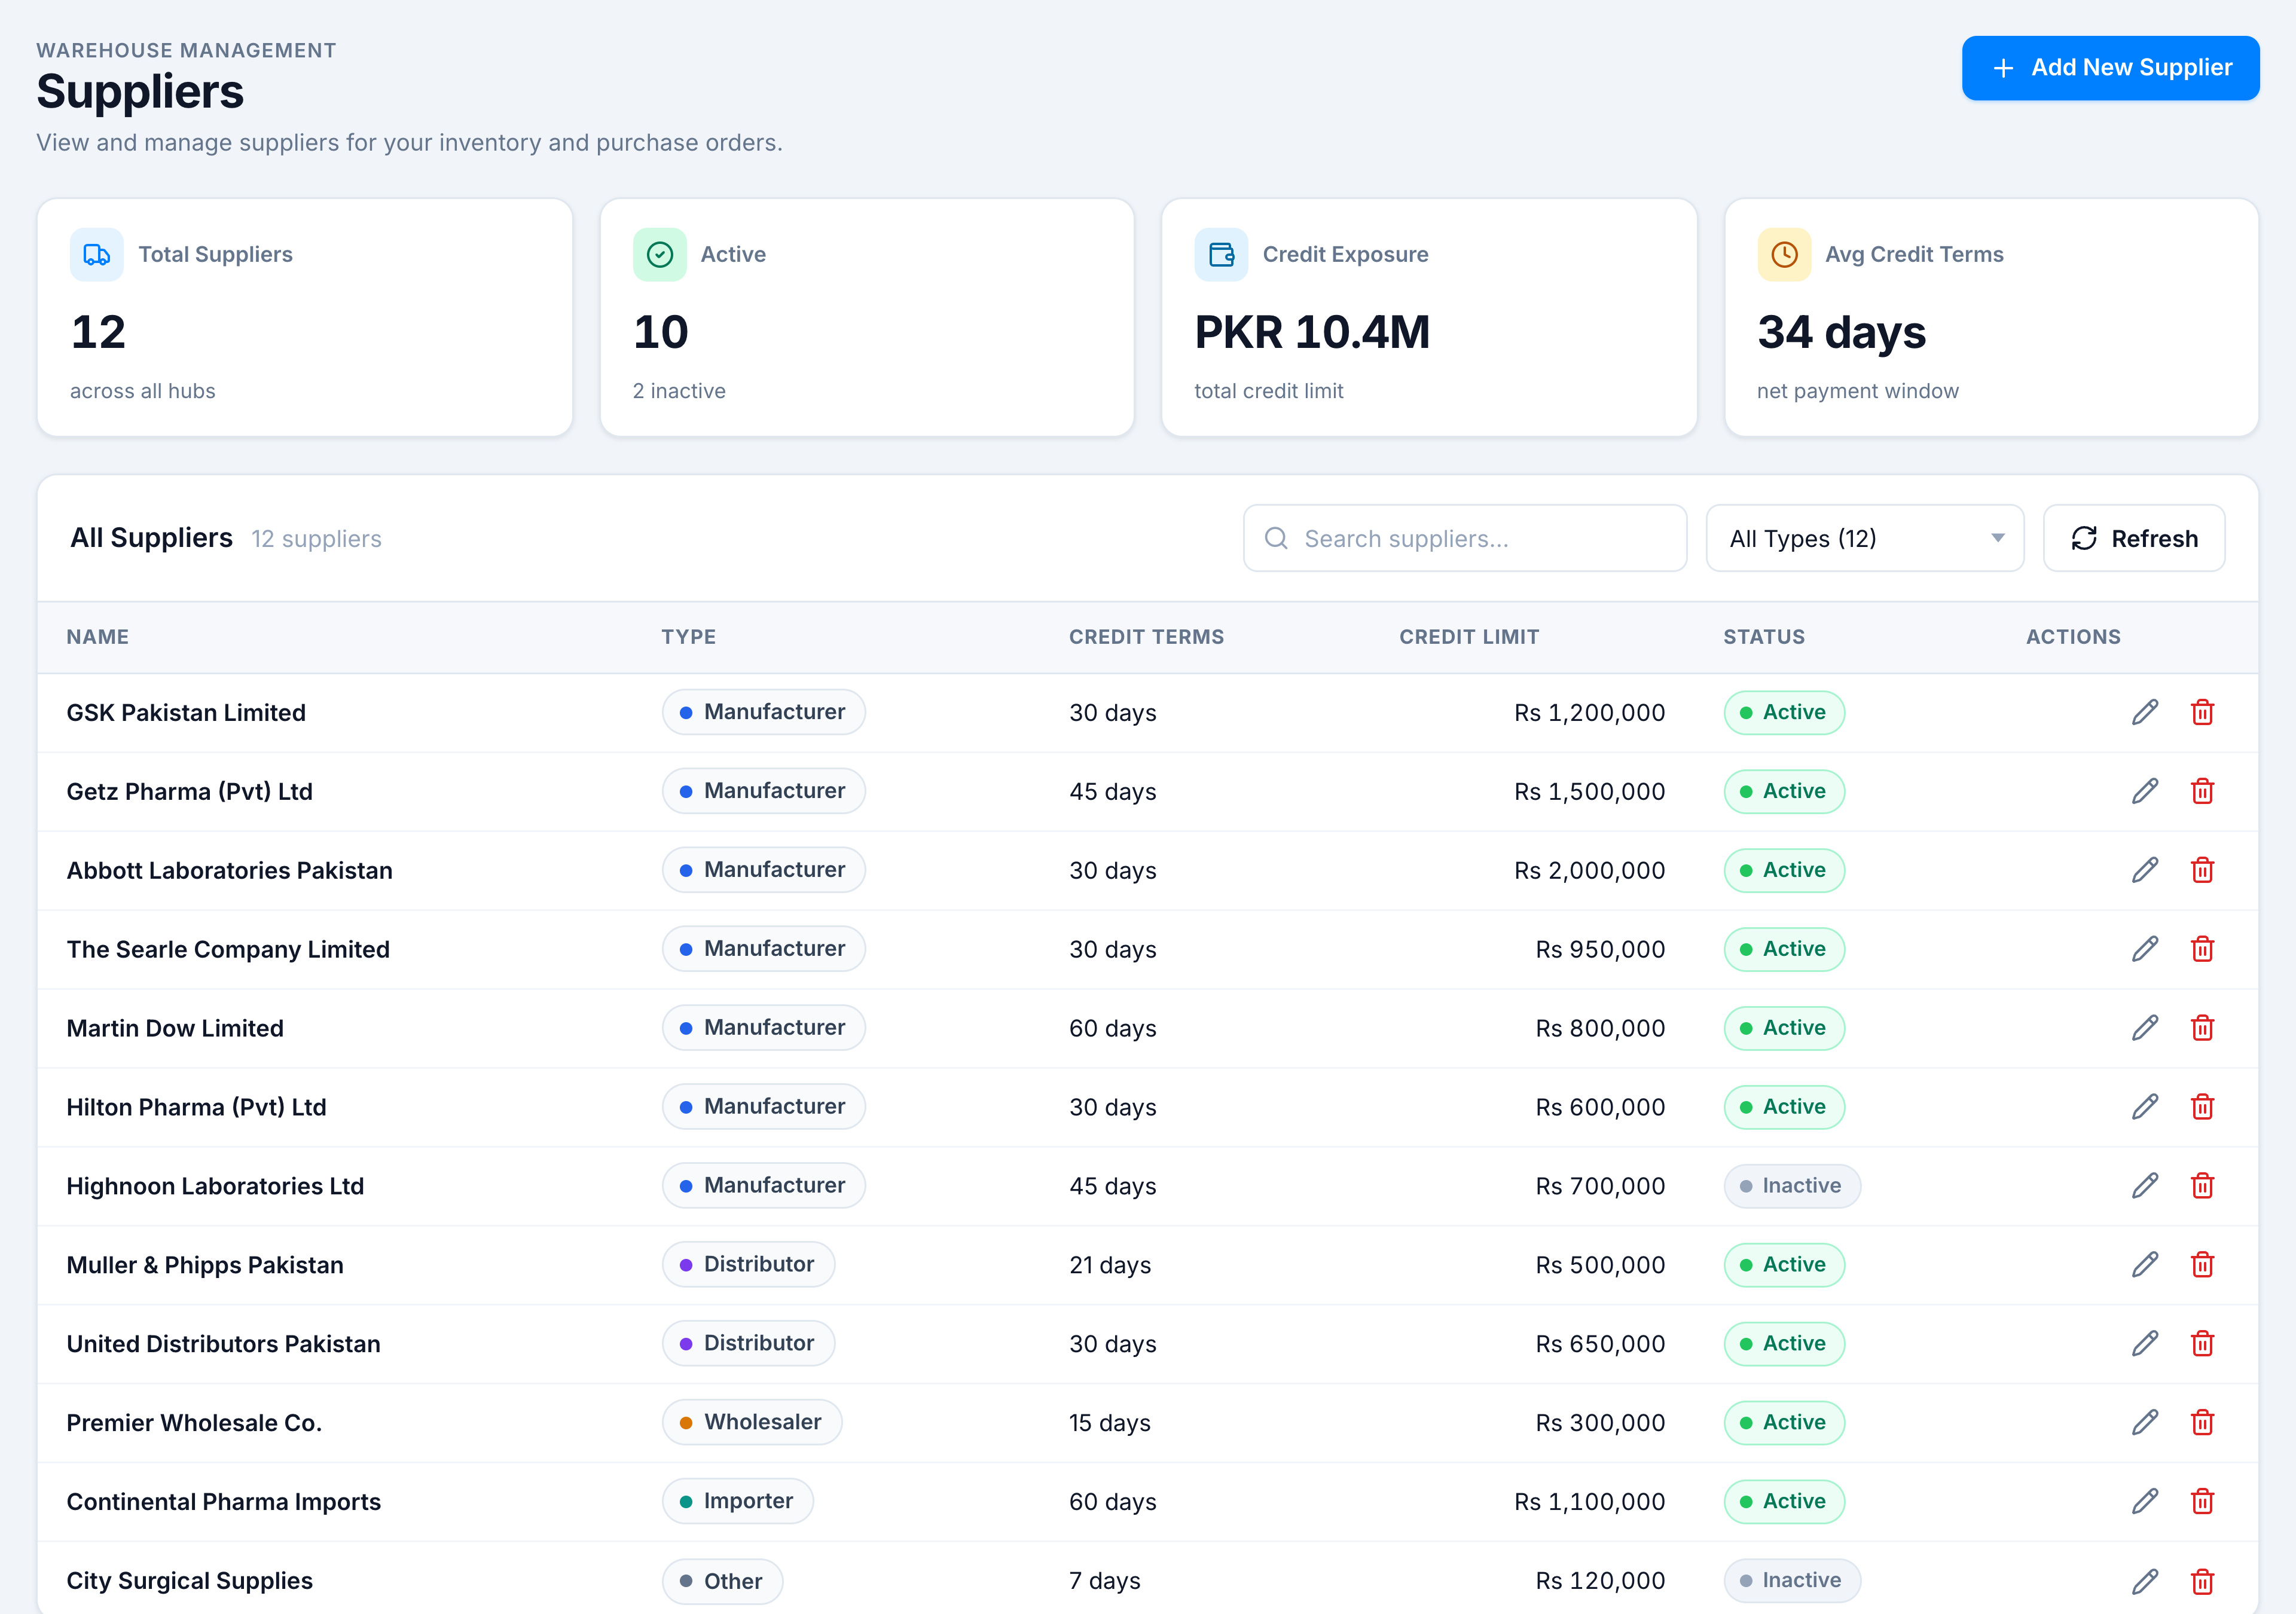
The list shows a KPI strip at the top and All Suppliers with a live count. If the table is empty, the empty state prompts you to Add New Supplier.
2. Add your first supplier
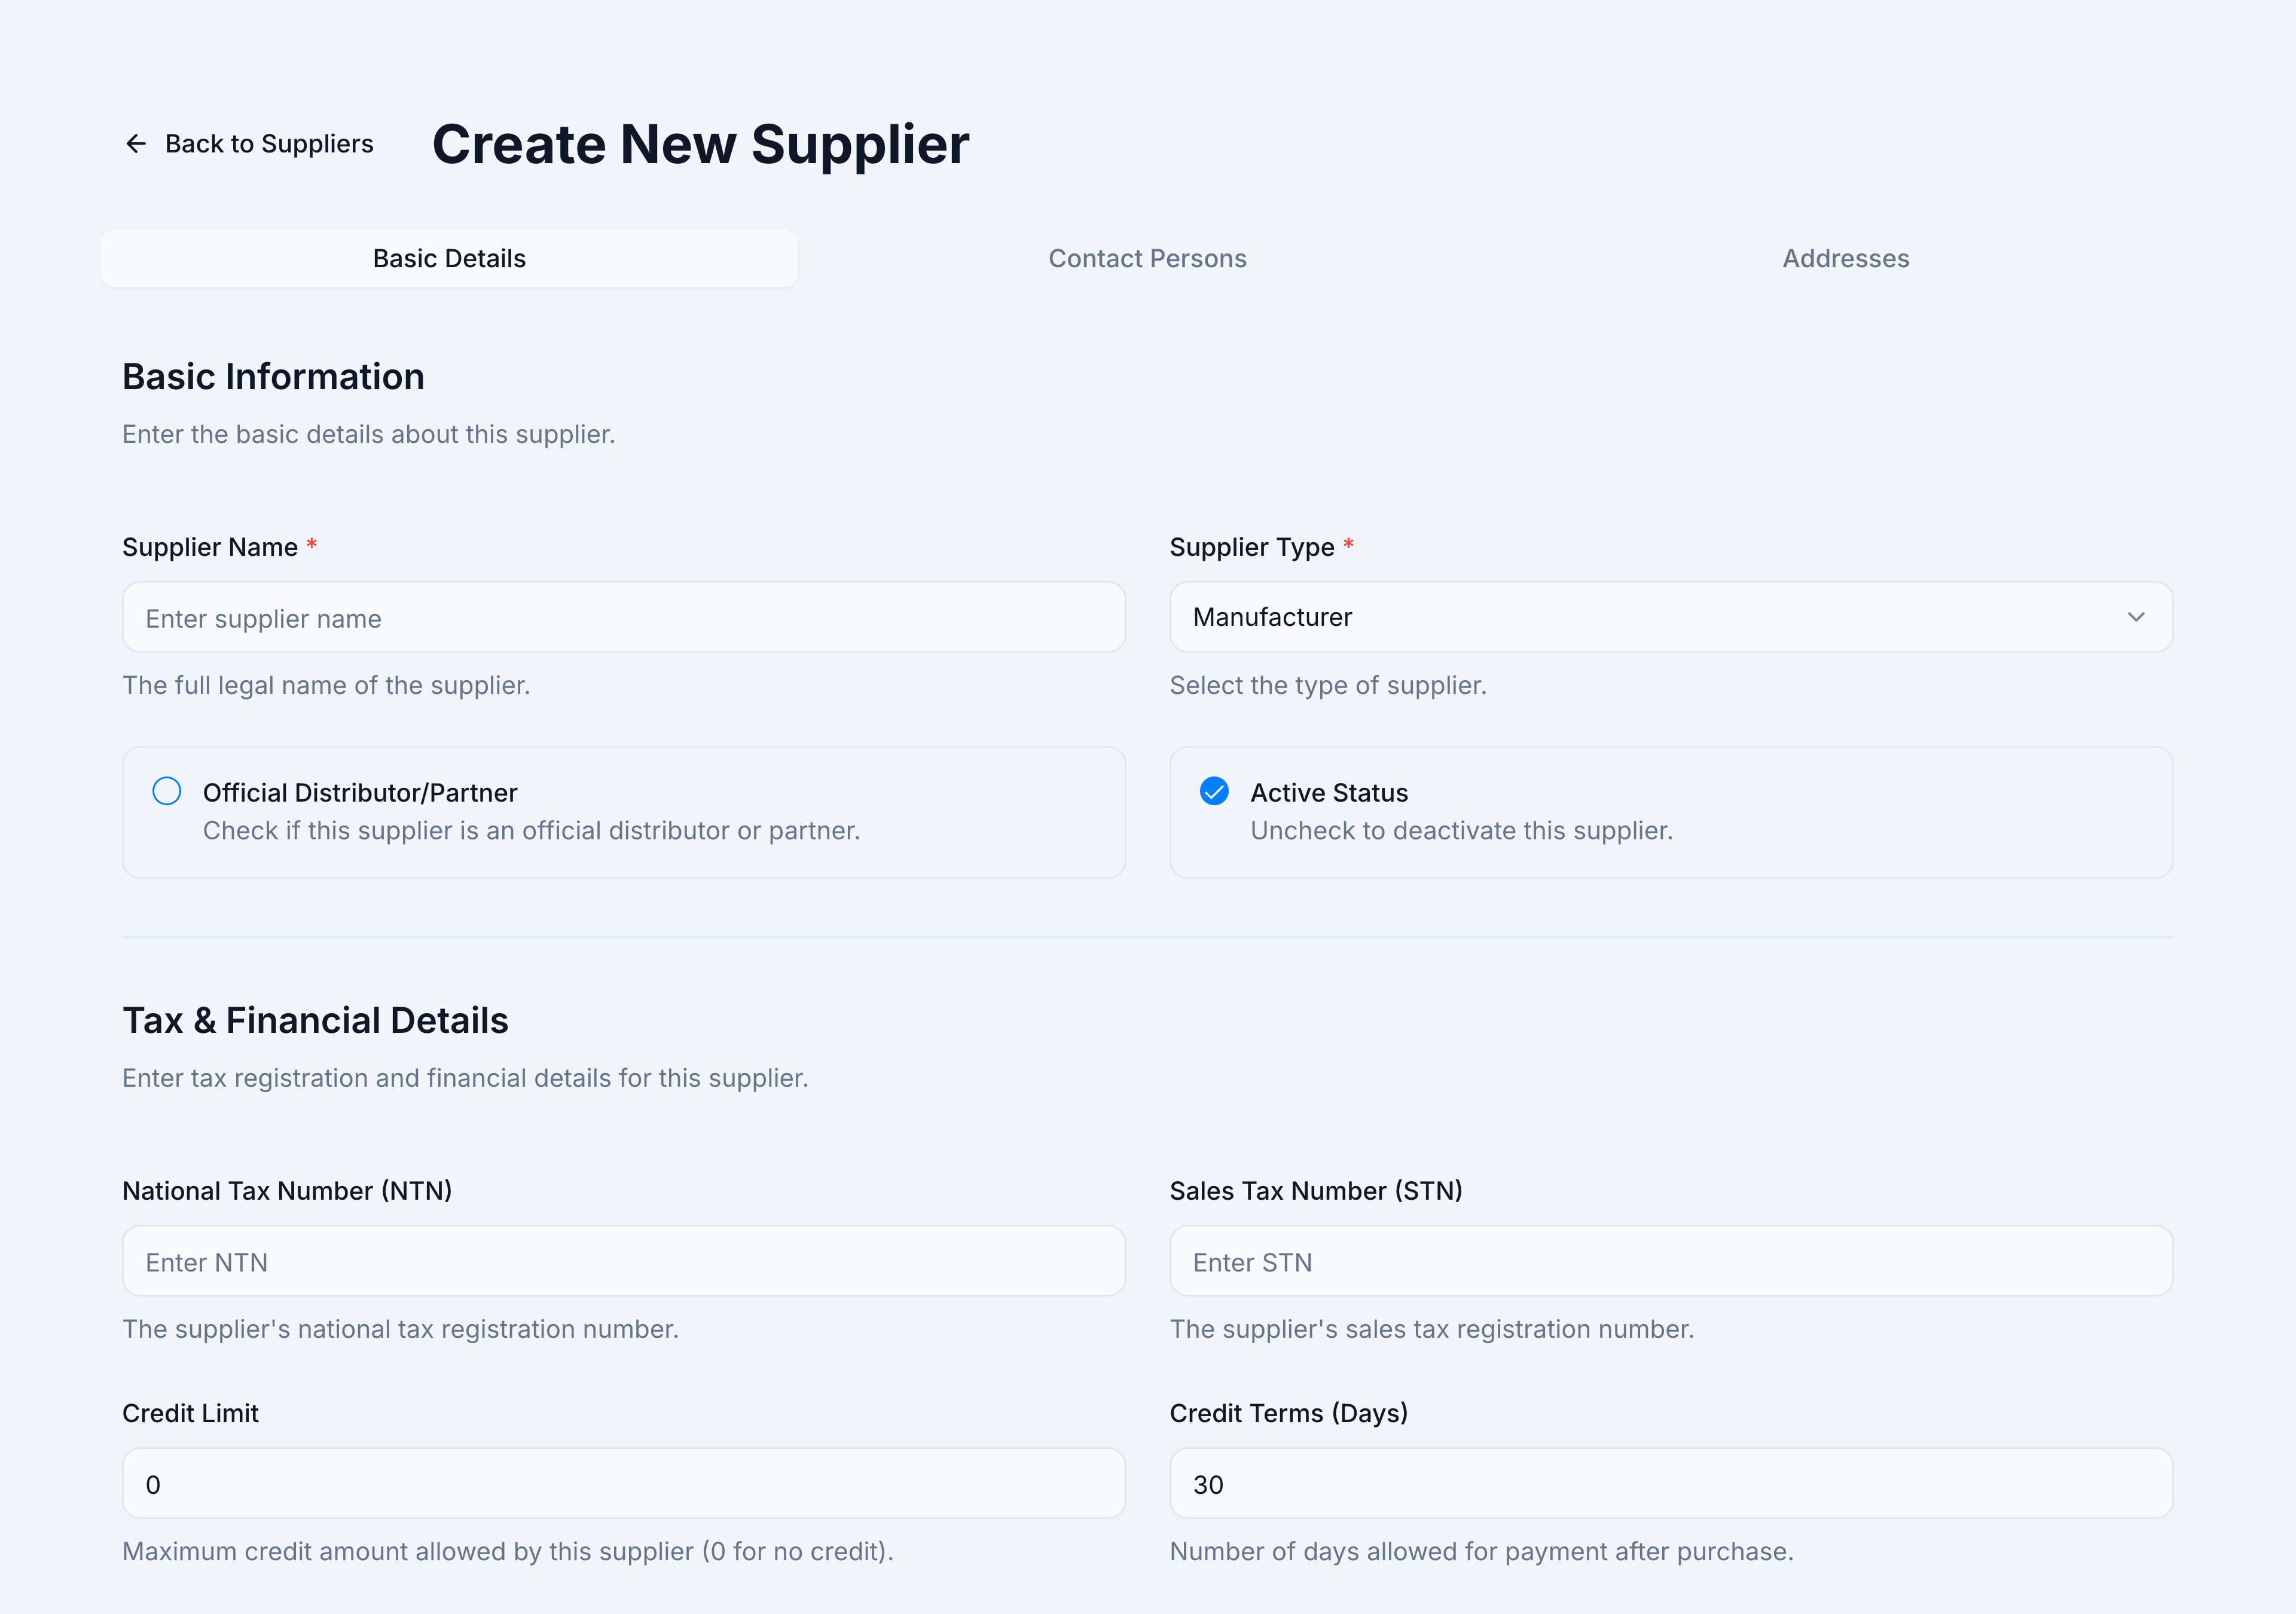
Click Add New Supplier. Fill Supplier Name and Supplier Type (required), then credit fields if you track terms with this vendor:
- Credit Limit — maximum exposure you allow (PKR).
- Credit Terms — net days (e.g. 30).
- Toggle Active on so the supplier appears on PO and GRN pickers.
Click Save on the profile form. After save you can add contacts and addresses on the same page.
3. Map products (optional but recommended)
Open Replenish Stock → Suppliers → Supplier Products Mapping. Select the supplier you just created, then Add Product to link catalogue SKUs. Mapped products appear on demand projection and speed up PO line entry.
4. You are ready
You now have a supplier in the directory. Next time you raise a PO, pick this supplier in the header — see Create a purchase order.
You have completed a full supplier setup: directory entry → profile saved → (optional) product mapping → ready for procurement.