Map products for a supplier
You are onboarding a distributor who supplies fast-moving OTC lines. By the end of this walkthrough you will have one supplier selected, several SKUs mapped with reorder levels and discounts, and KPIs showing margin at a glance — ready to use Load Supplier Products on a purchase order.
1. Open Supplier Products Mapping
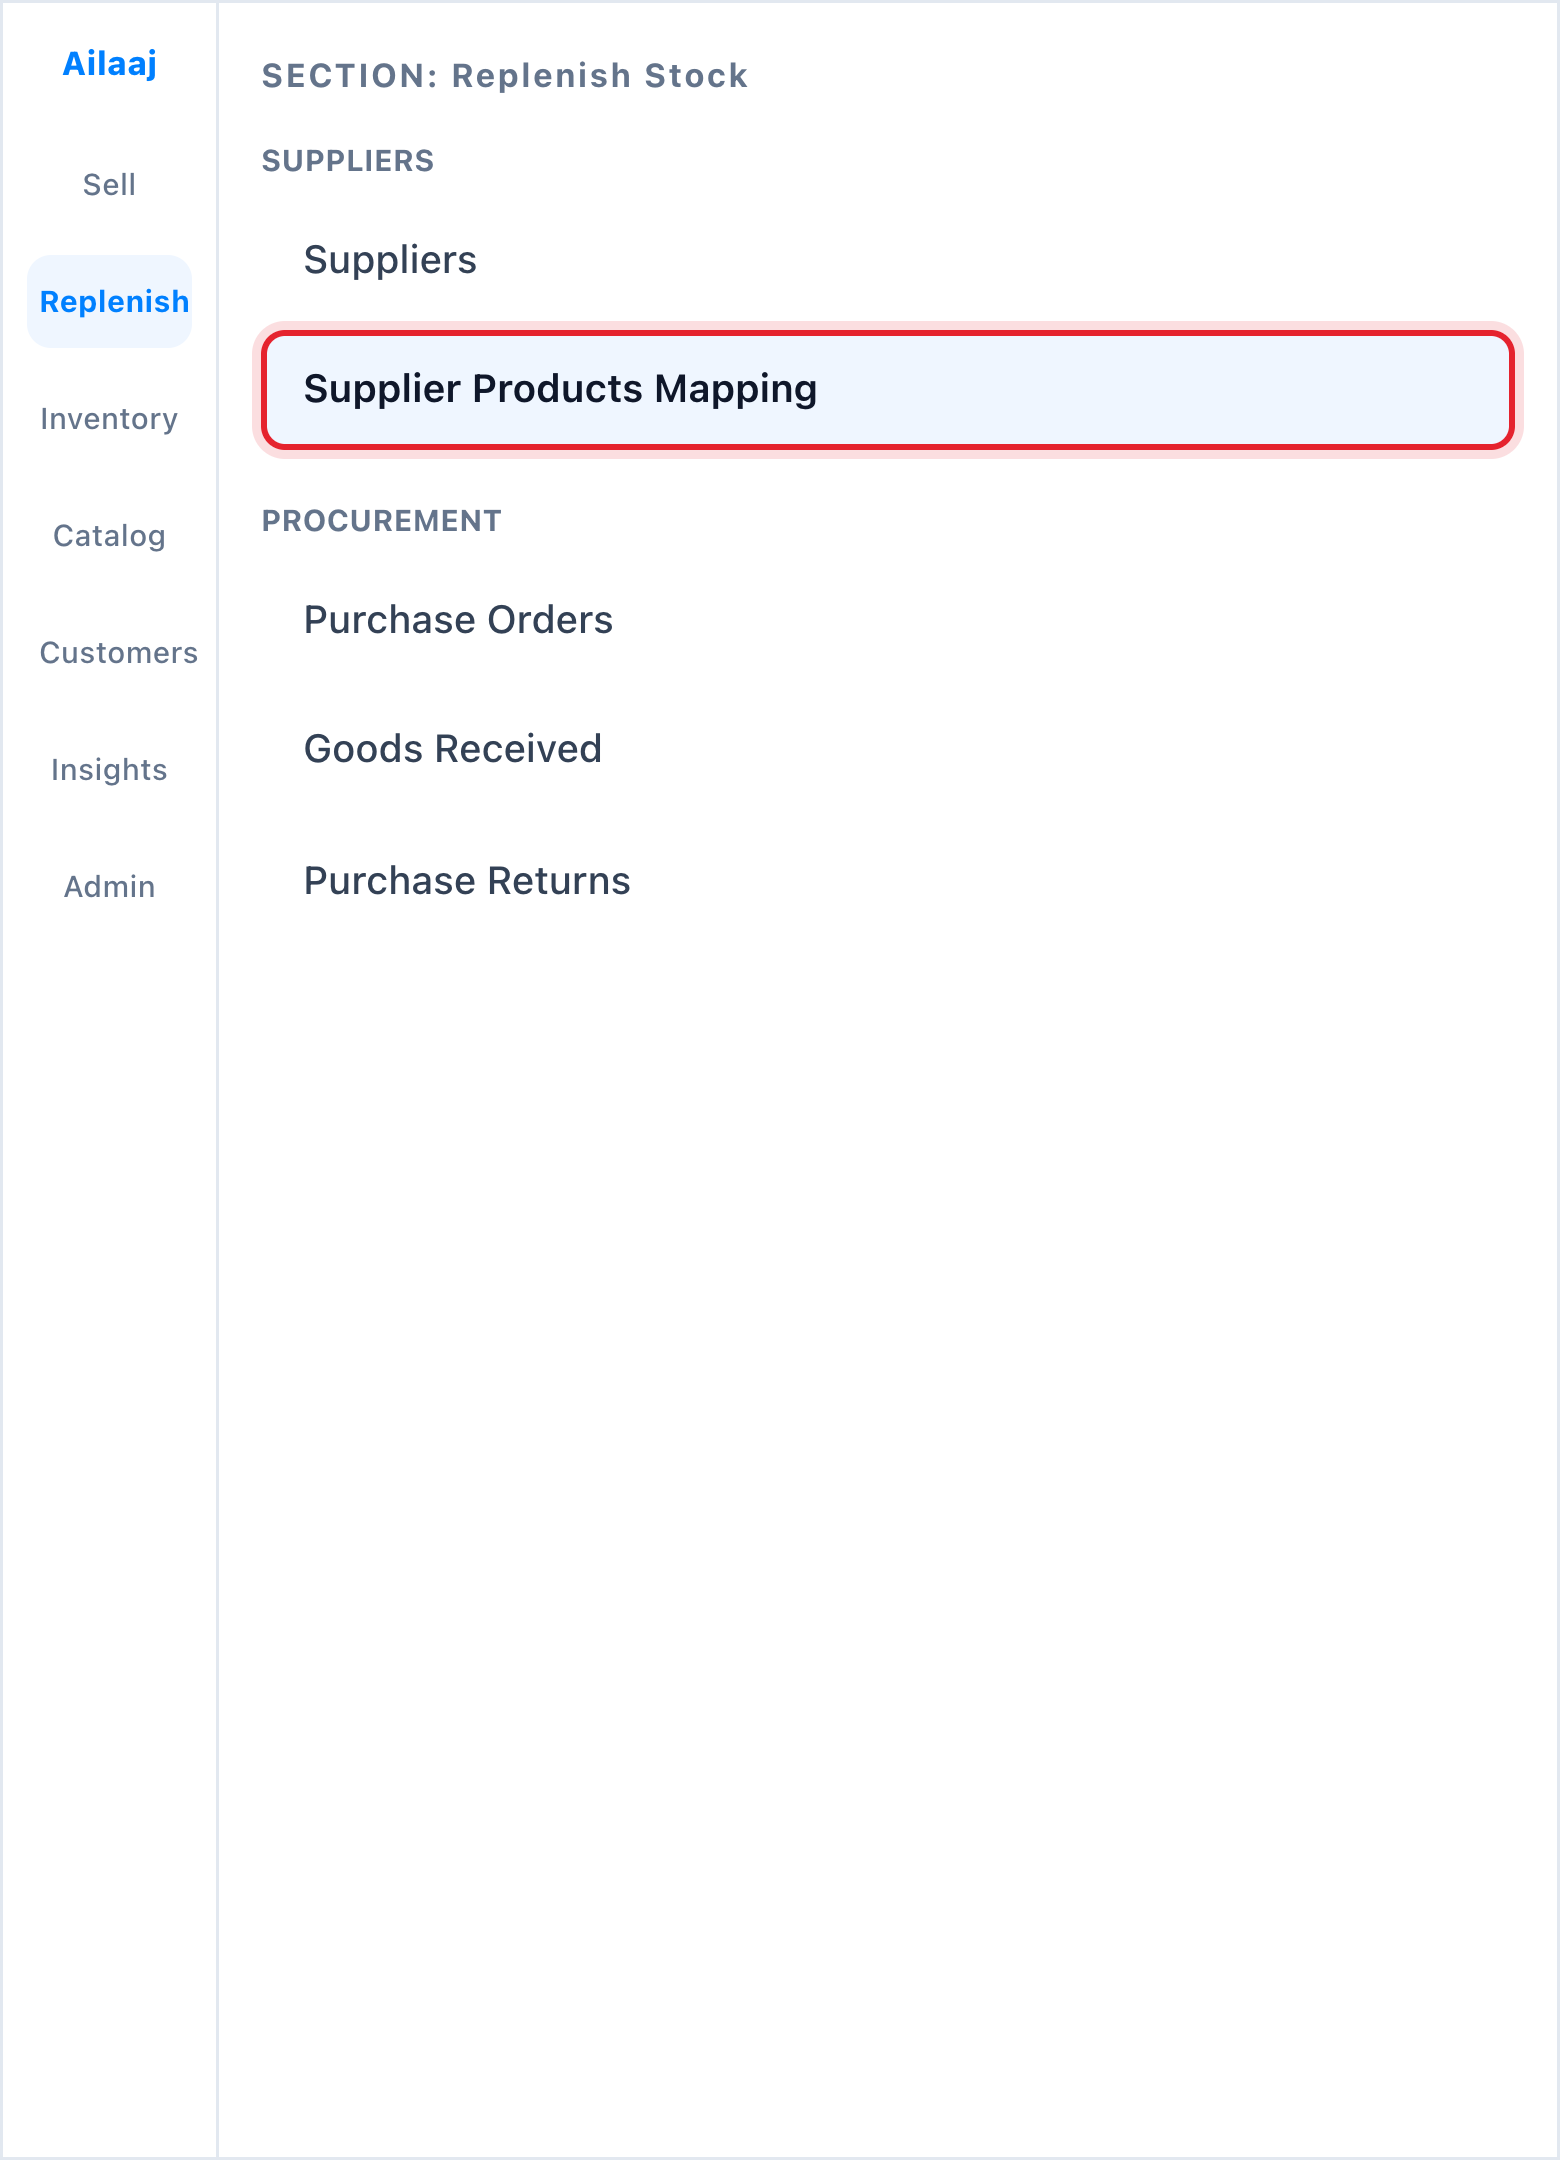
In the sidebar go to Replenish Stock → Suppliers → Supplier Products Mapping.
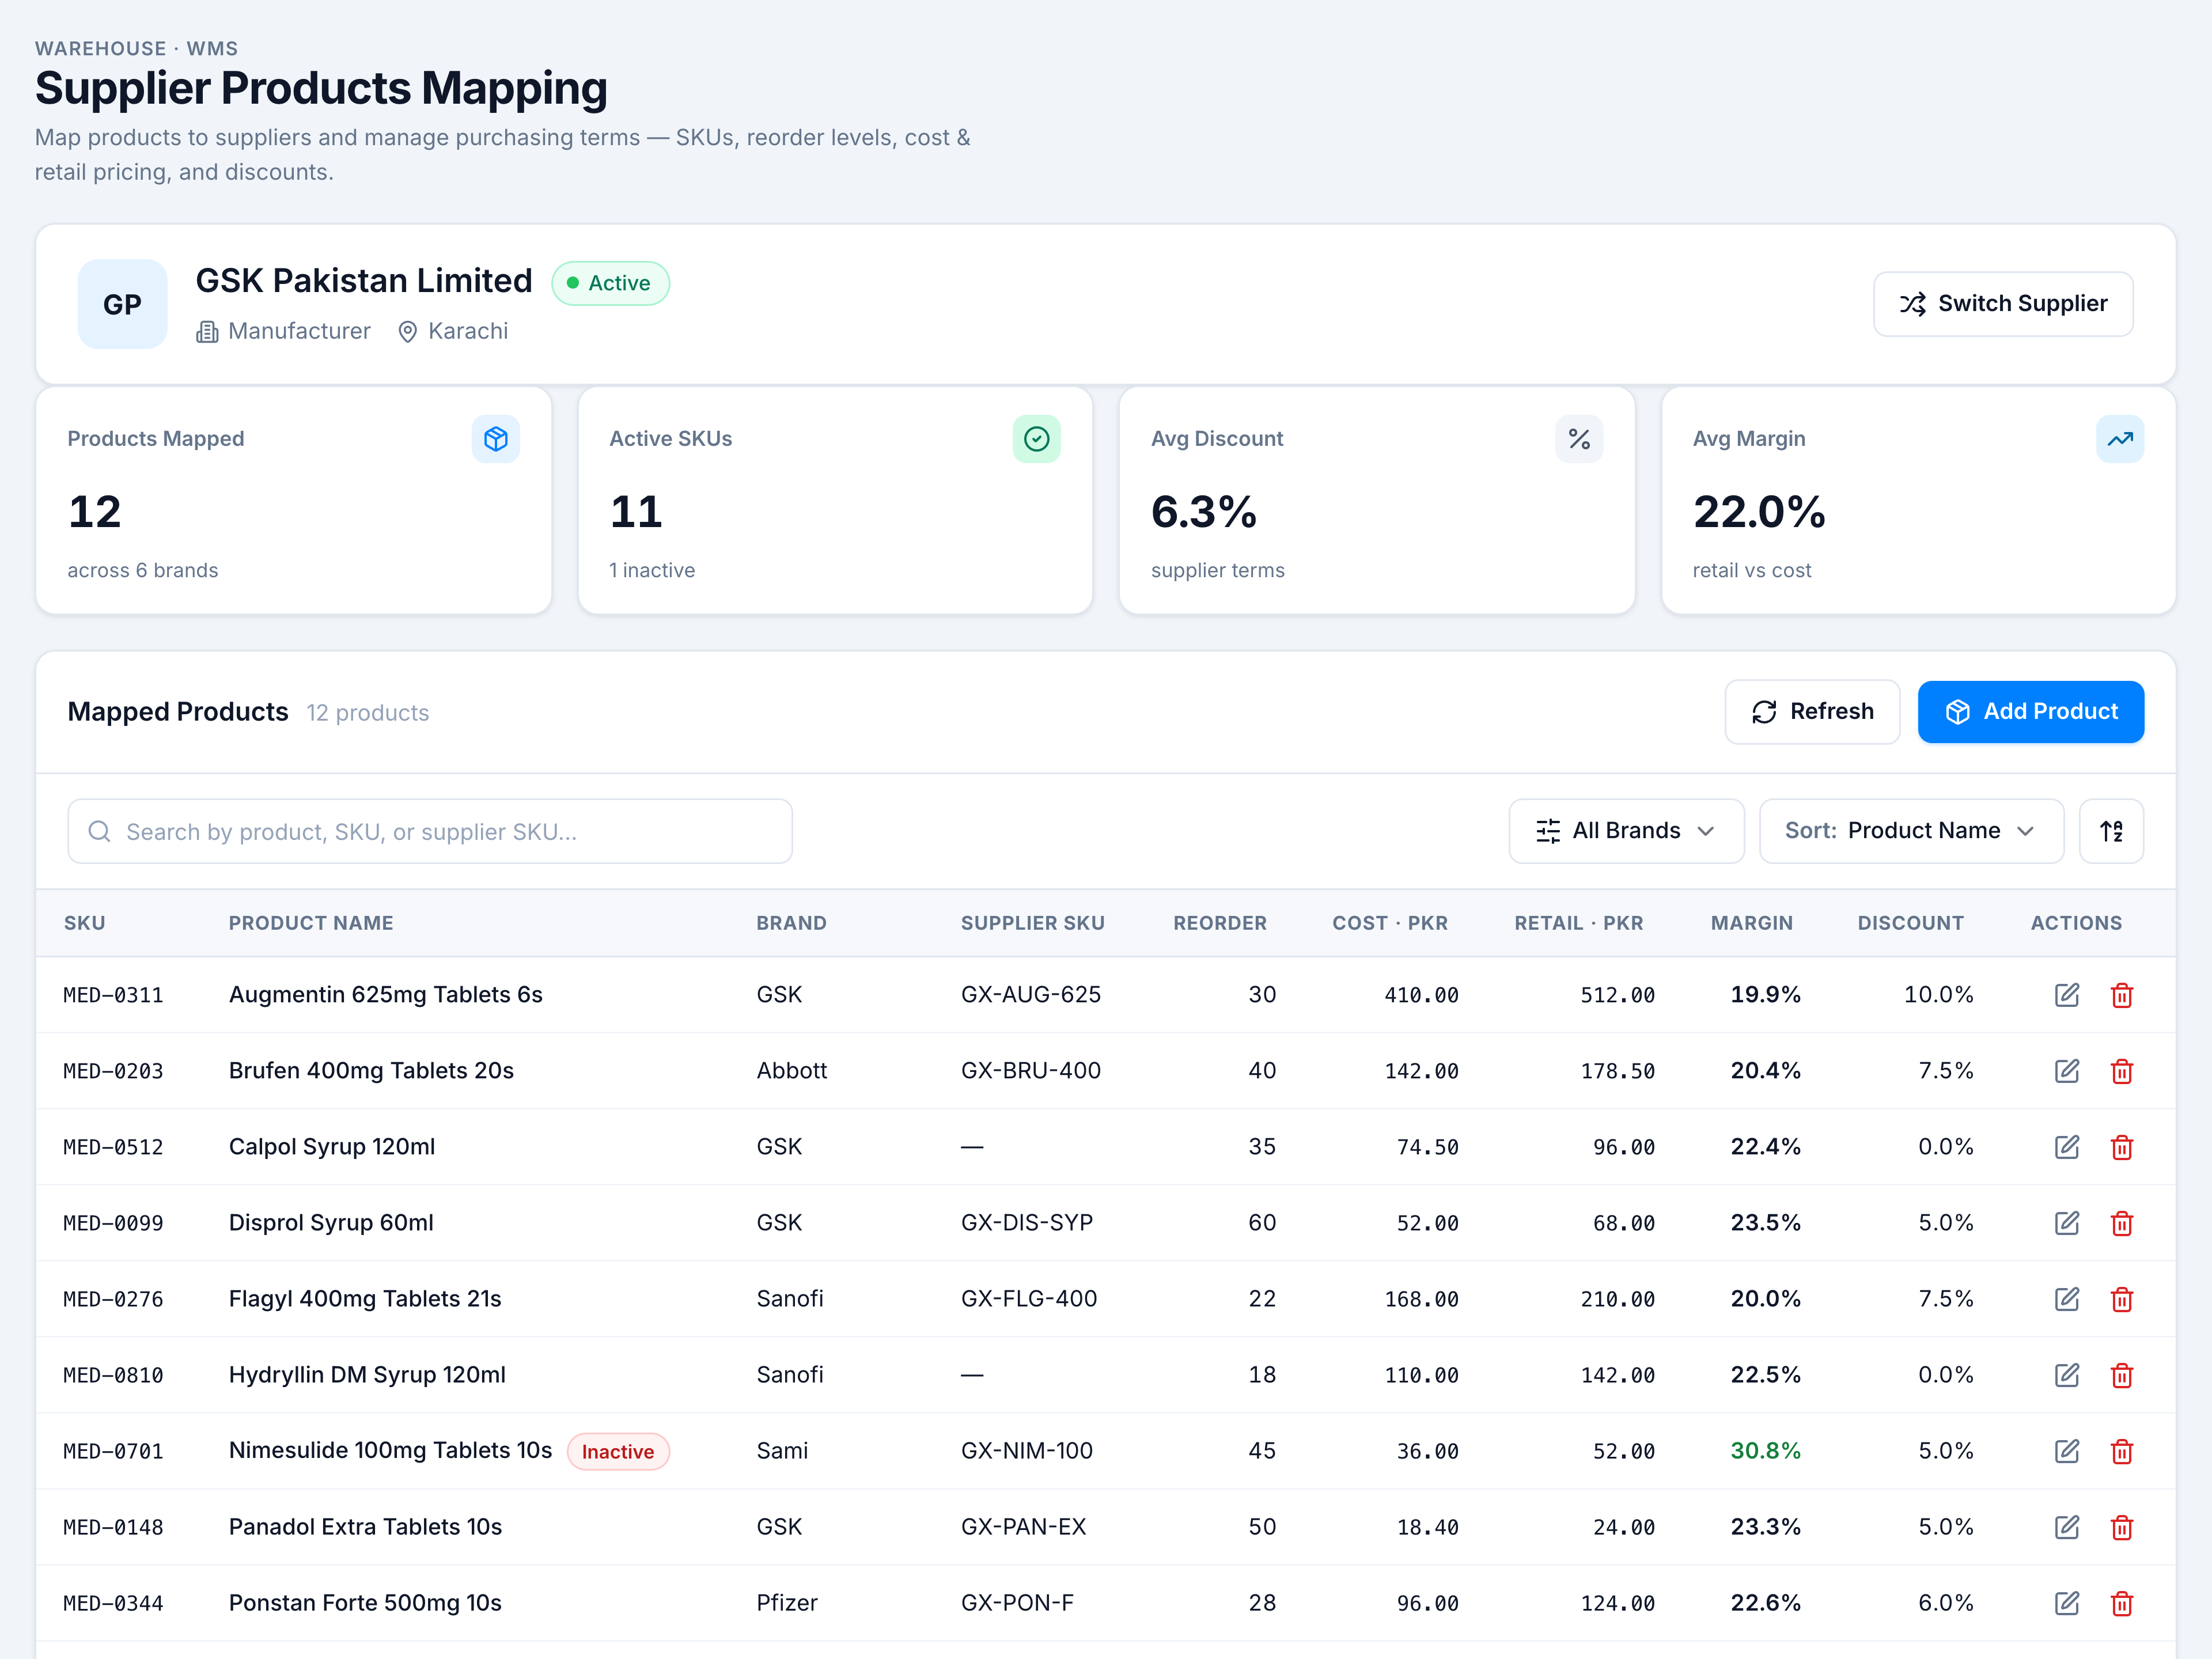
The screen opens with a supplier context bar, a KPI strip, and the Mapped Products card. If you already have suppliers on file, the first vendor is selected automatically; otherwise use Switch Supplier to pick one.
2. Confirm the supplier context
Check the context bar: supplier name, Active/Inactive pill, type, and location. To work with a different vendor, click Switch Supplier, search if needed, and pick from the list.
3. Add your first product
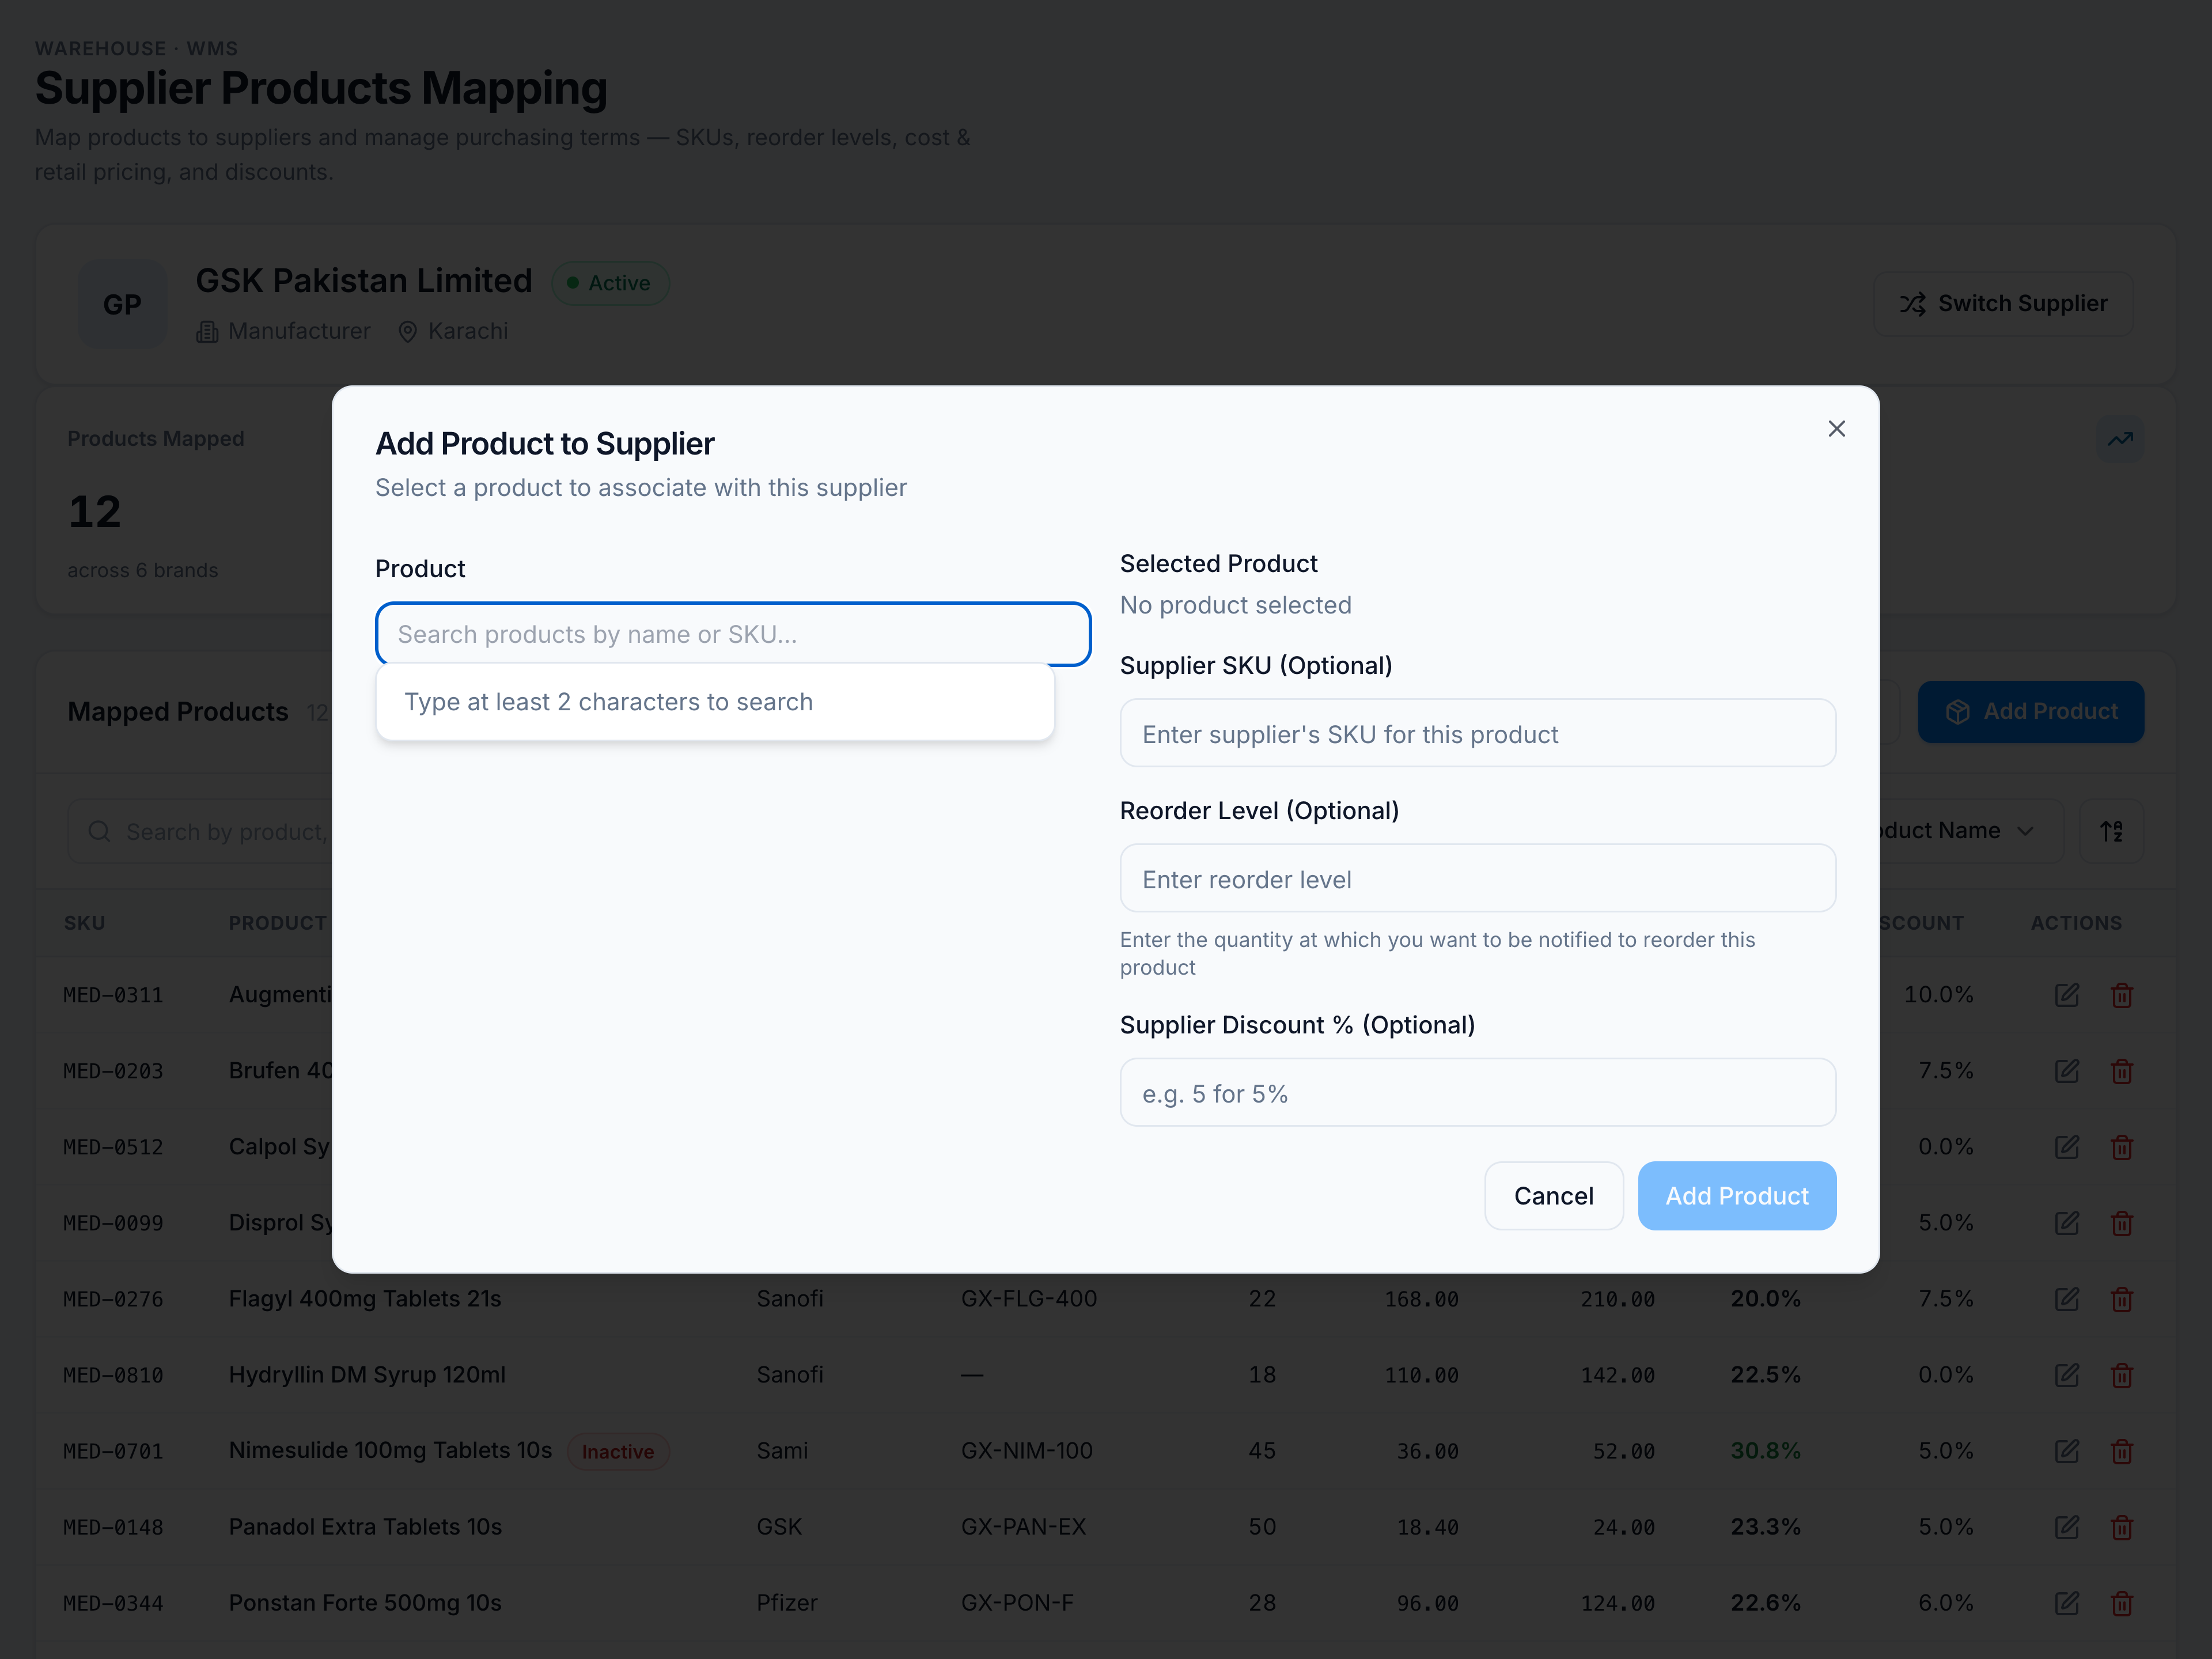
Click Add Product. Search the catalogue, select a SKU, then optionally set:
- Supplier SKU — the vendor’s own code on invoices.
- Reorder Level — minimum stock before you reorder from this supplier.
- Discount % — negotiated supplier discount on this line.
Confirm — you should see toast “Product added” and the row in the table.
4. Review KPIs and margin
After mapping several lines, watch the KPI strip update:
- Products Mapped and brand count.
- Active SKUs vs inactive catalogue items.
- Avg Discount across mapped lines.
- Avg Margin (retail vs cost) — margin cells are colour-coded in the table.
5. Next step — raise a PO
Open Purchase Orders, create a PO for the same supplier, and use Load Supplier Products to pull mapped SKUs onto the order. See Create a purchase order.