Run your first Auto STR plan
You’ll learn: how to redistribute stock across warehouses using Auto STR v2.0 — from configuration through finalized transfers. You’ll need: at least two warehouses with sales history, and permissions to generate, review, submit, and finalize plans (Head Pharmacist or Tenant Owner).
1. Open Auto STR
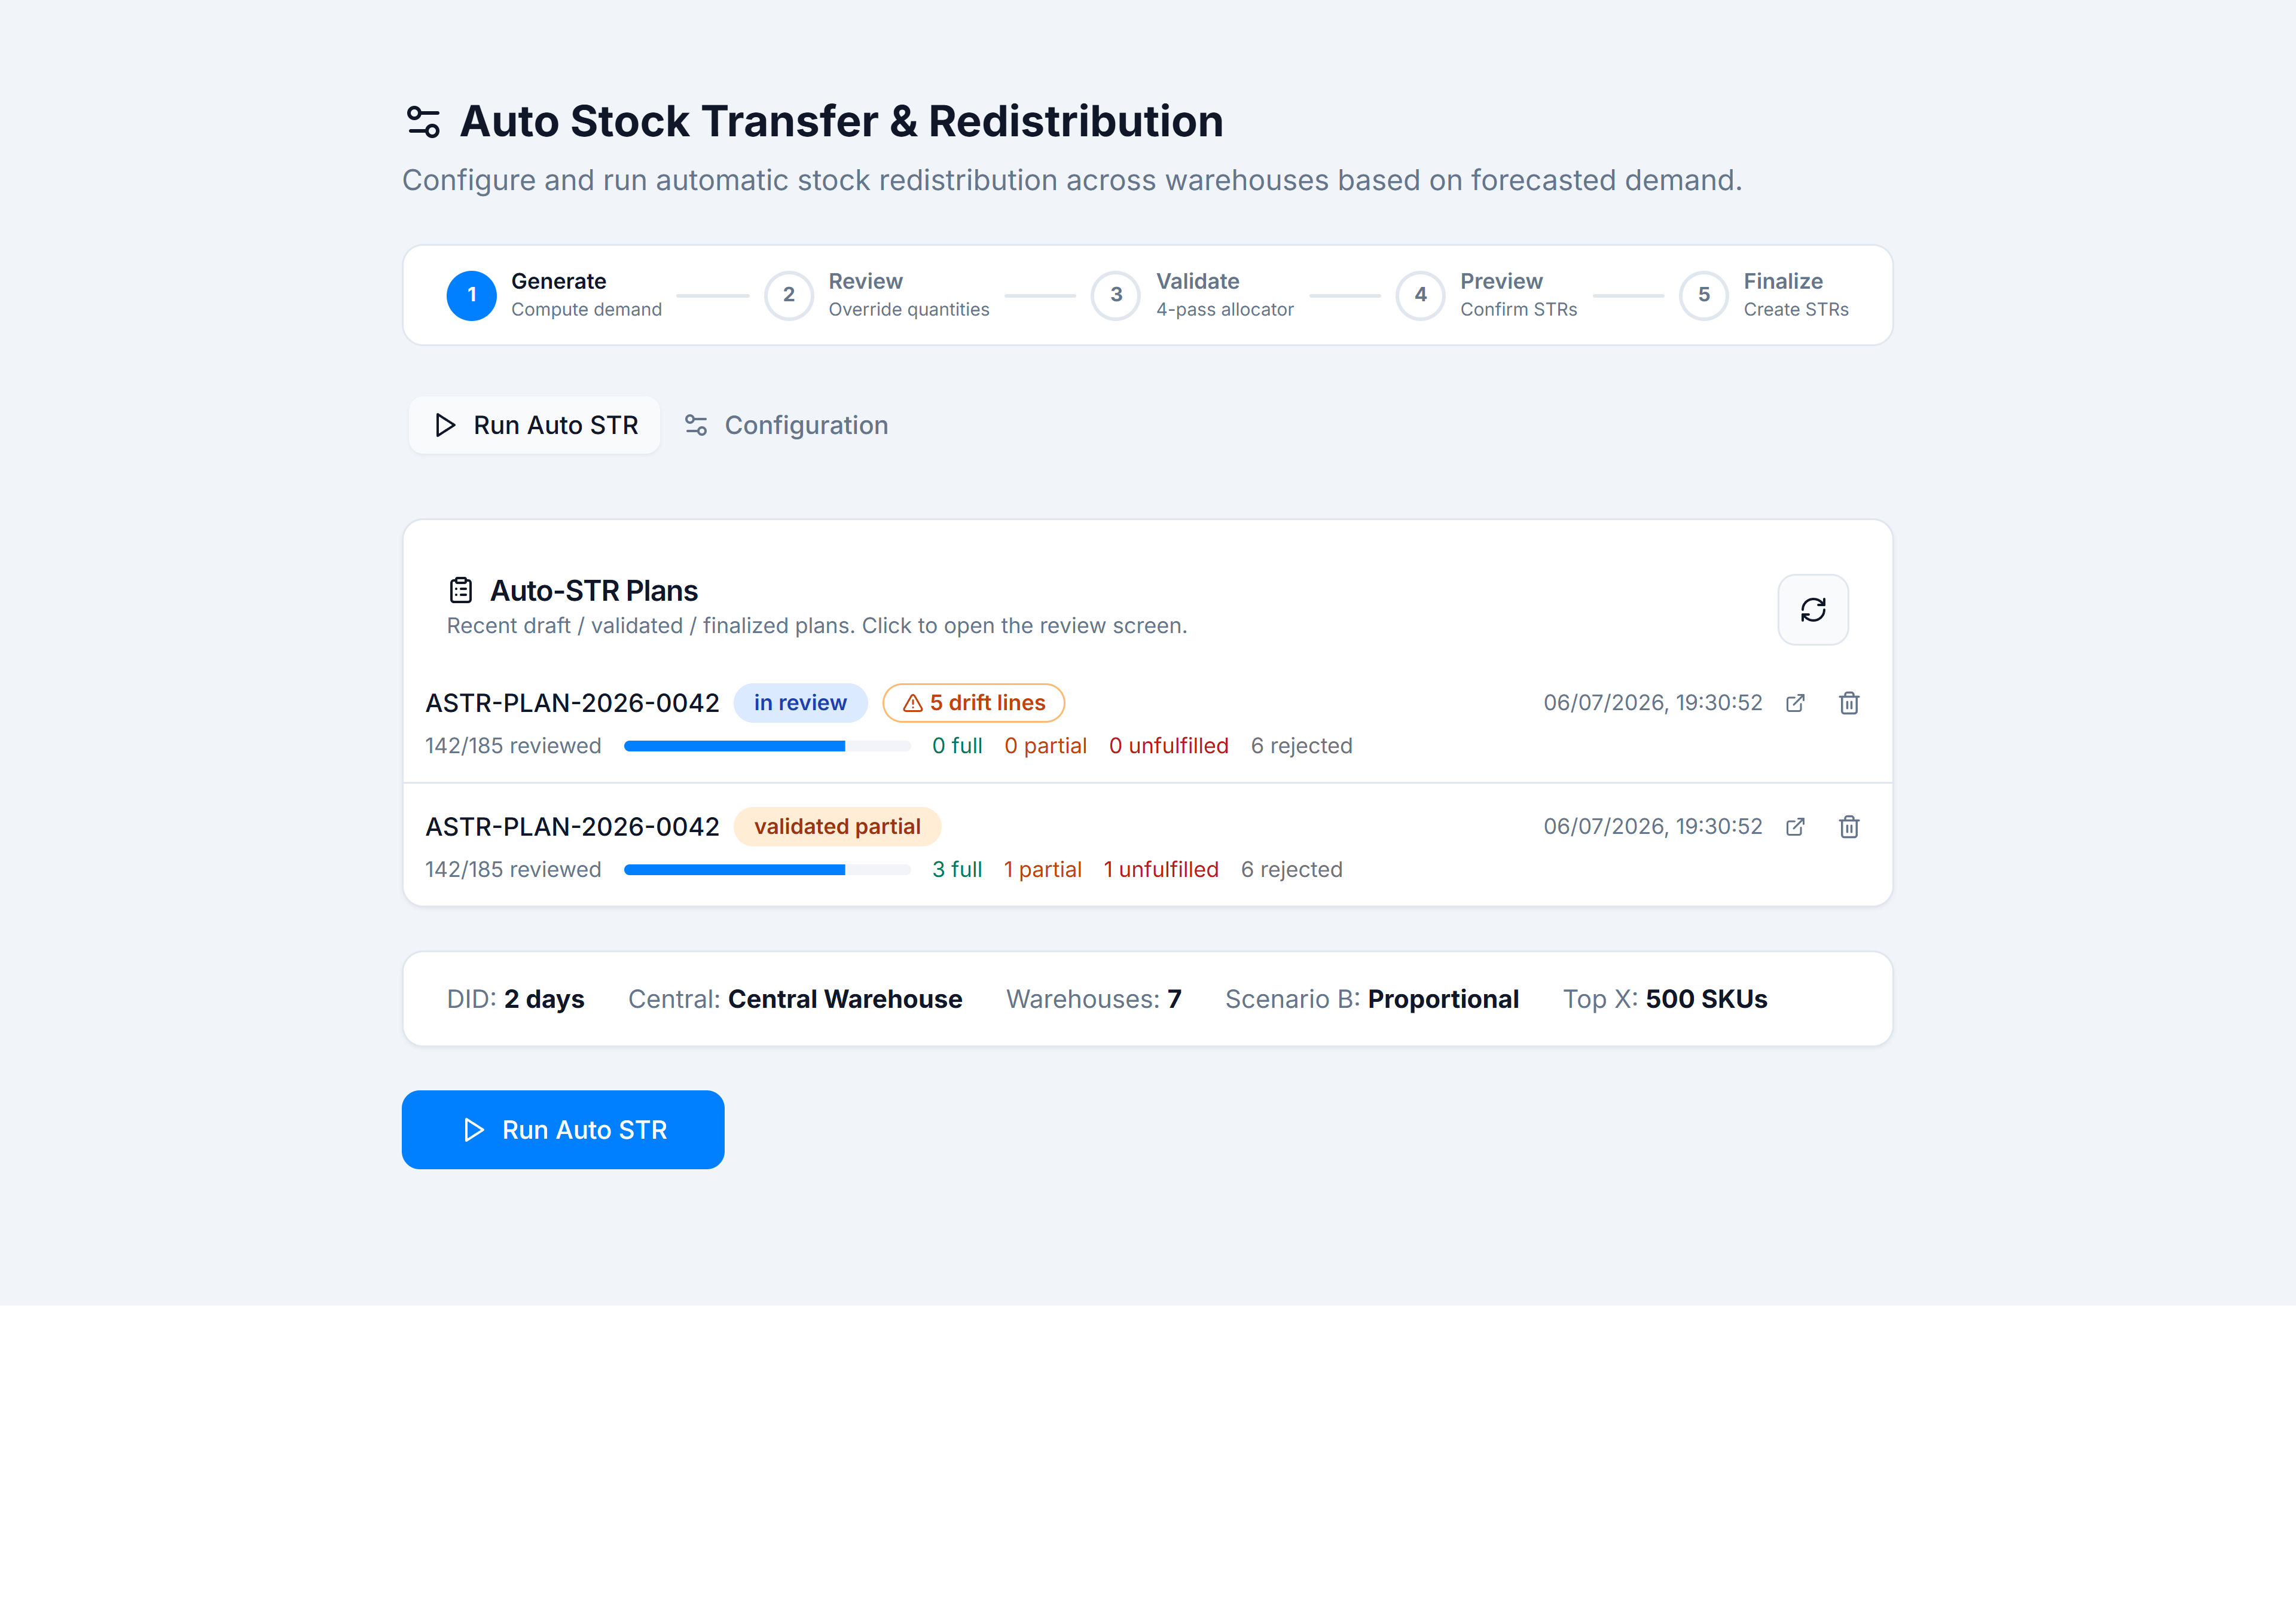
From the sidebar, open Inventory → Stock Control → Auto STRs. You’ll land on the Run Auto STR tab with the five-stage timeline showing Generate as the current step.
2. Configure warehouses (one-time)
Switch to Configuration and set:
- Desired Inventory Days (DID) — start with 2 (two days of cover from sales velocity).
- Central warehouse — pick Central Warehouse (example label). It dispatches first and never receives inward Auto STR transfers.
- Eligible warehouses — tick every branch that should participate, e.g. IPD Block B, IPD Block C, OPD Block B. You need at least two.
Click Save Configuration. Full field reference: Configuration parameters.
3. Run the engine
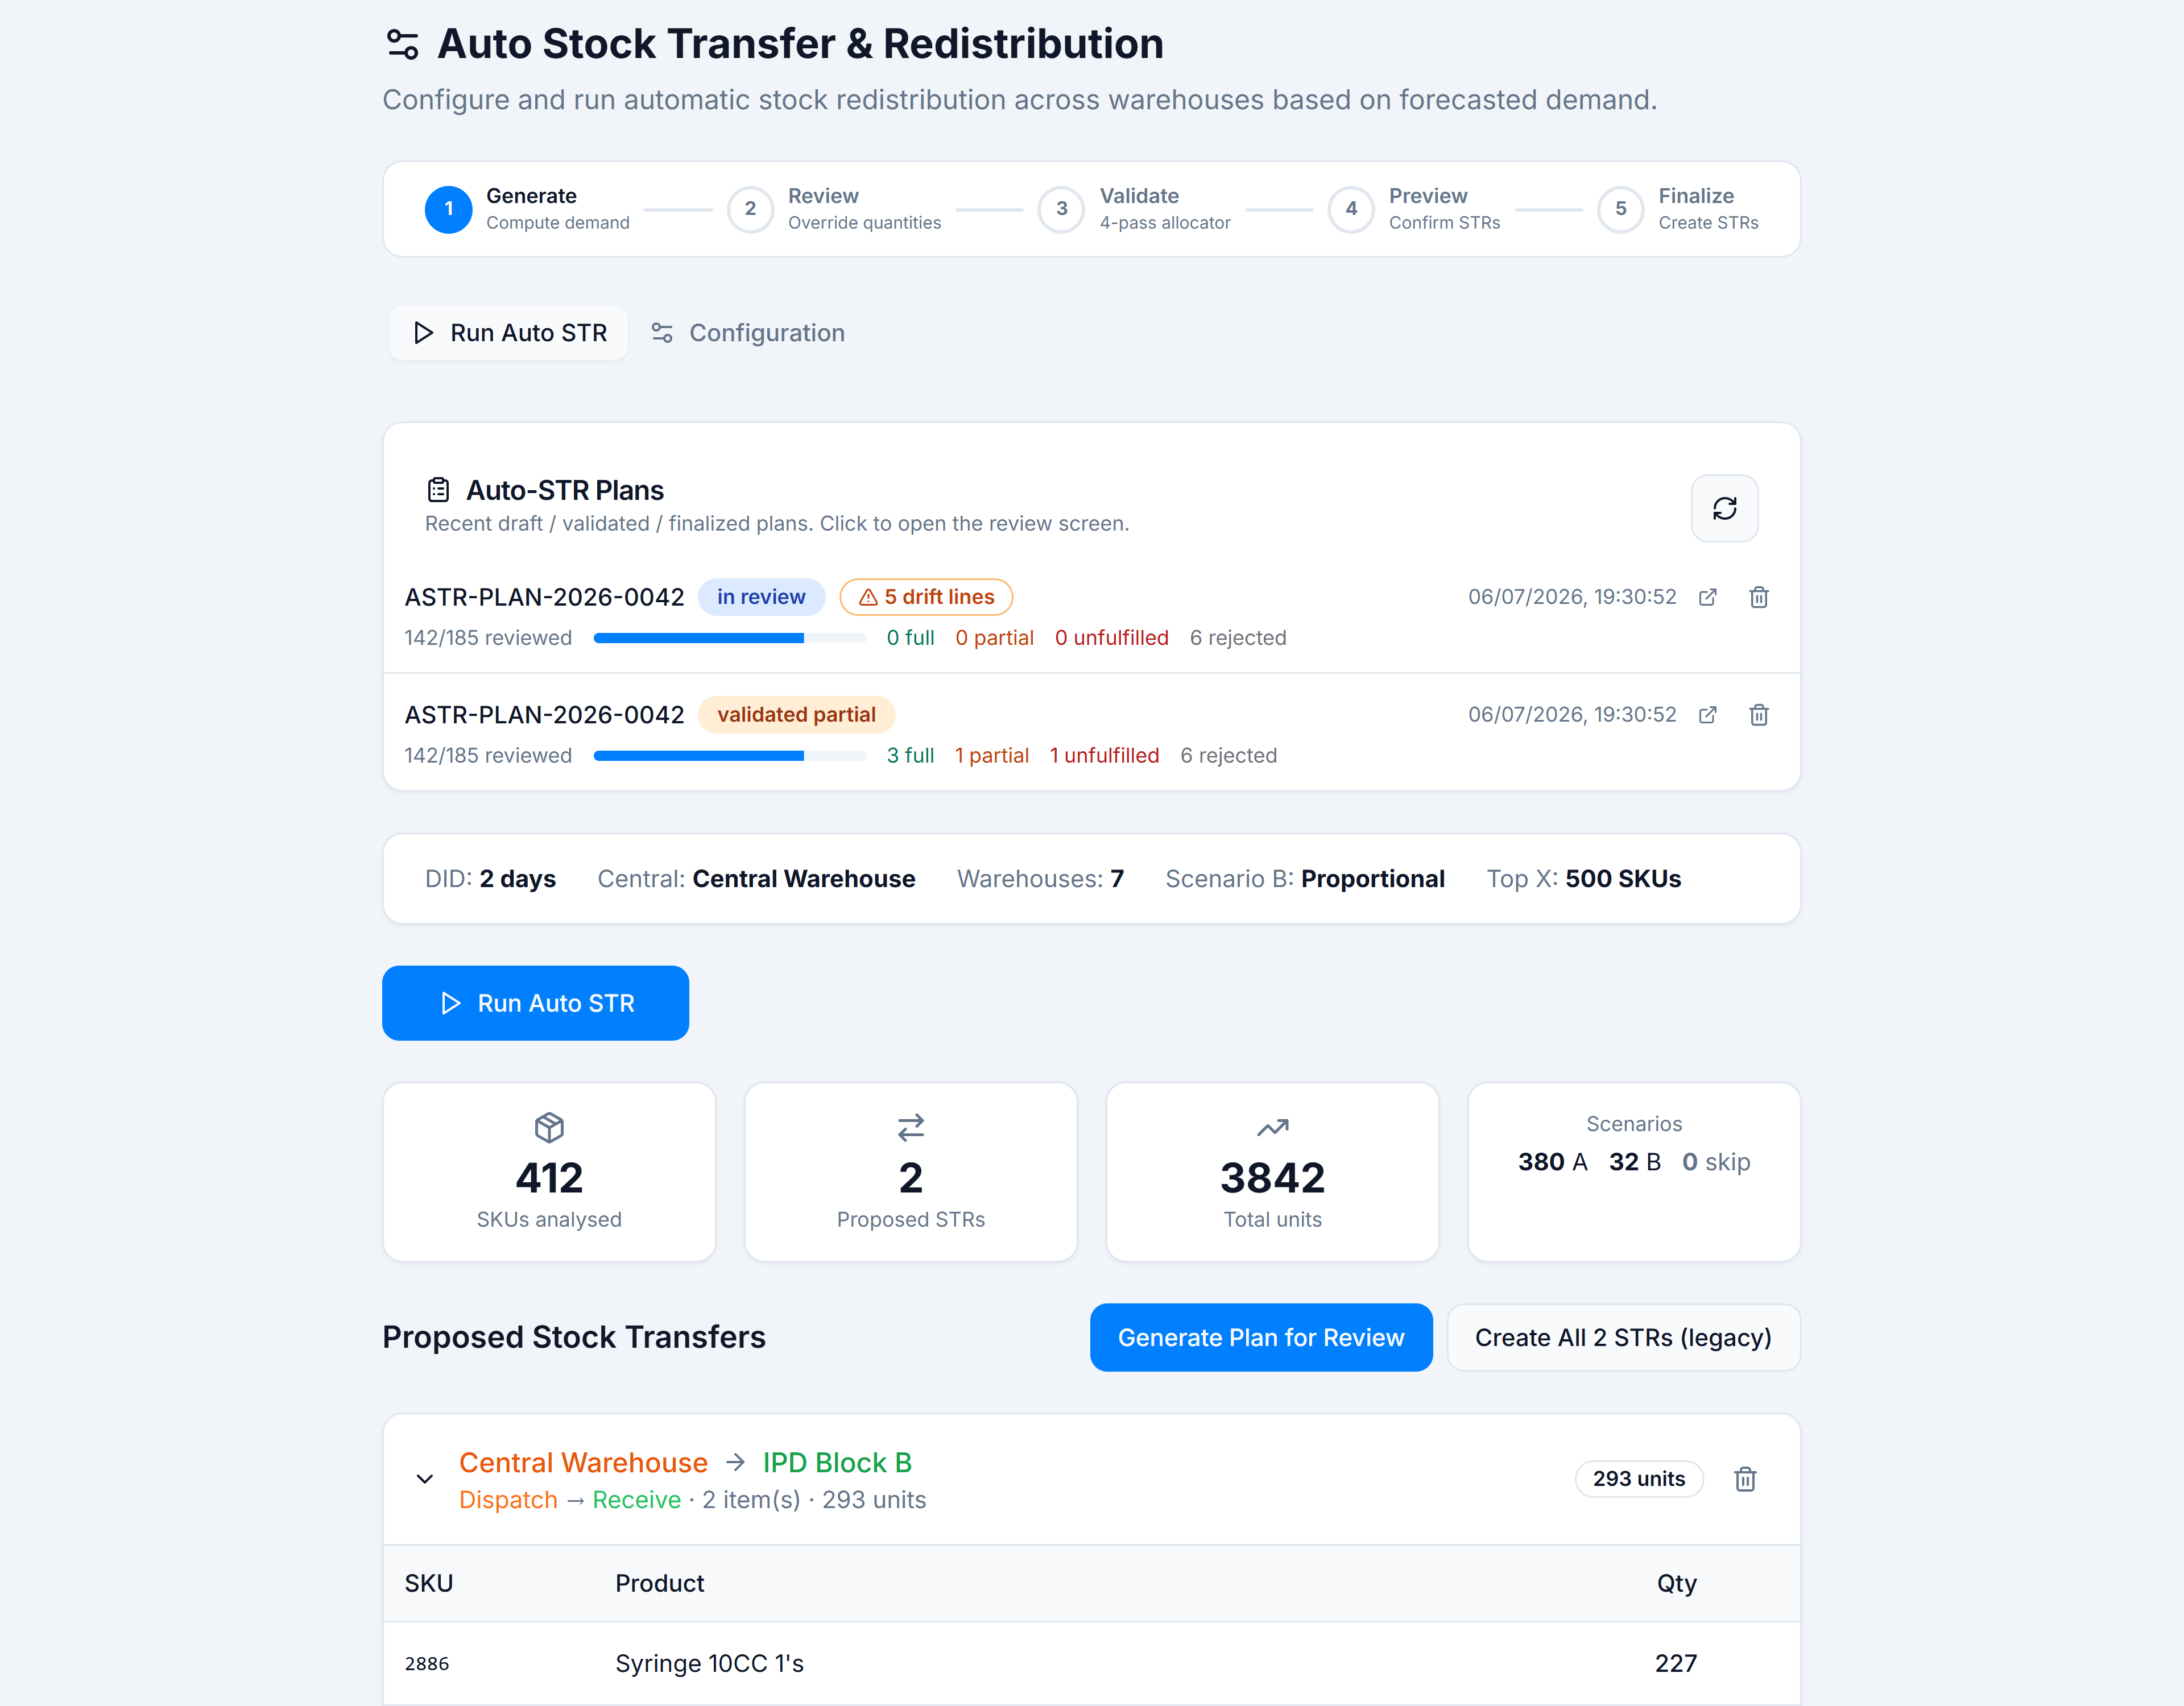
Back on Run Auto STR, click Run Auto STR. The engine analyses SKUs, classifies each as Scenario A (enough surplus to cover all deficits) or Scenario B (system-wide shortage — proportional rationing), and lists Proposed Stock Transfers.
Read the summary cards: SKUs analysed, Proposed STRs, Total units, and the Scenarios mix (A / B / skip).
4. Generate a plan for review
Review the proposed transfers. Remove any you don’t want (trash icon on a line or whole STR). When you’re happy, click Generate Plan for Review.
You’ll navigate to the Plan Review screen. The timeline moves to Review.
5. Review each line
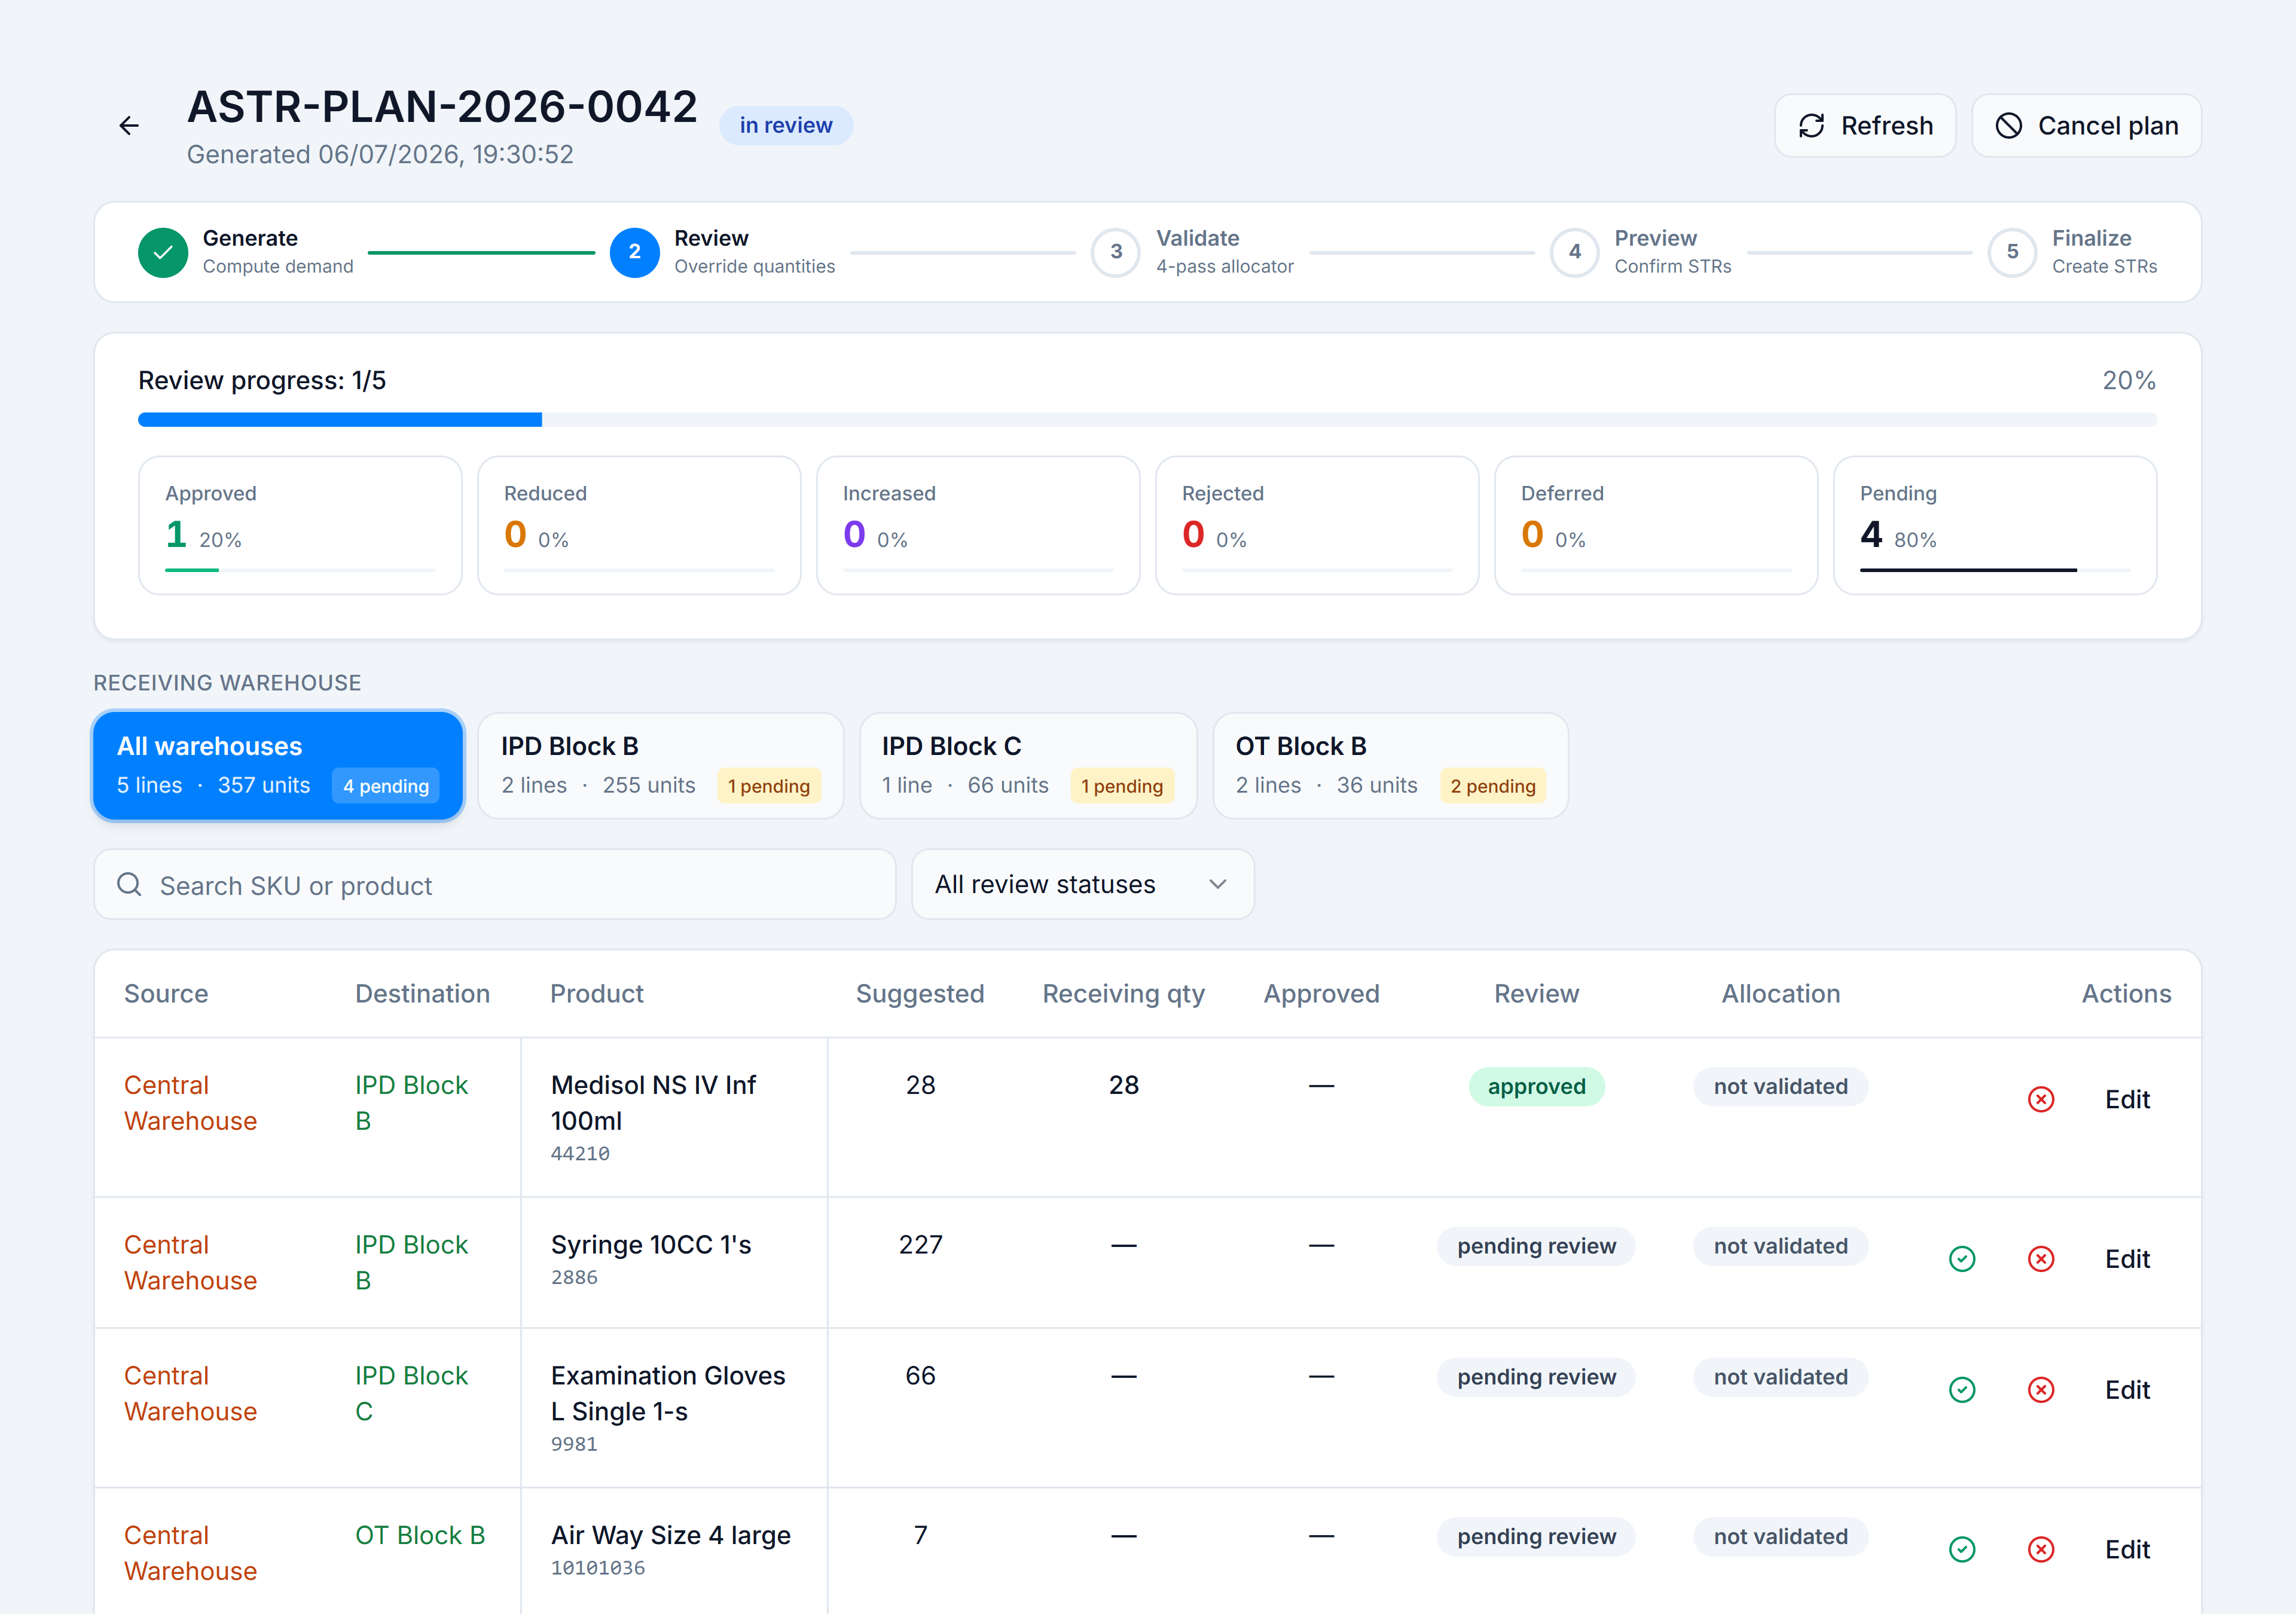
Work through the destination tabs (or stay on All destinations). For each line:
- Click the ✓ quick-approve to accept the Suggested quantity, or
- Open the edit dialog to change quantity, add a reason, or Reject line.
The counter tiles track Approved, Reduced, Increased, Rejected, Deferred, and Pending. Review every line until Pending reaches zero.
6. Submit for validation
Click Submit for validation. The allocator runs four passes (DID floor, cross-source steal, and more) against live stock snapshots. A Validation Result dialog opens.
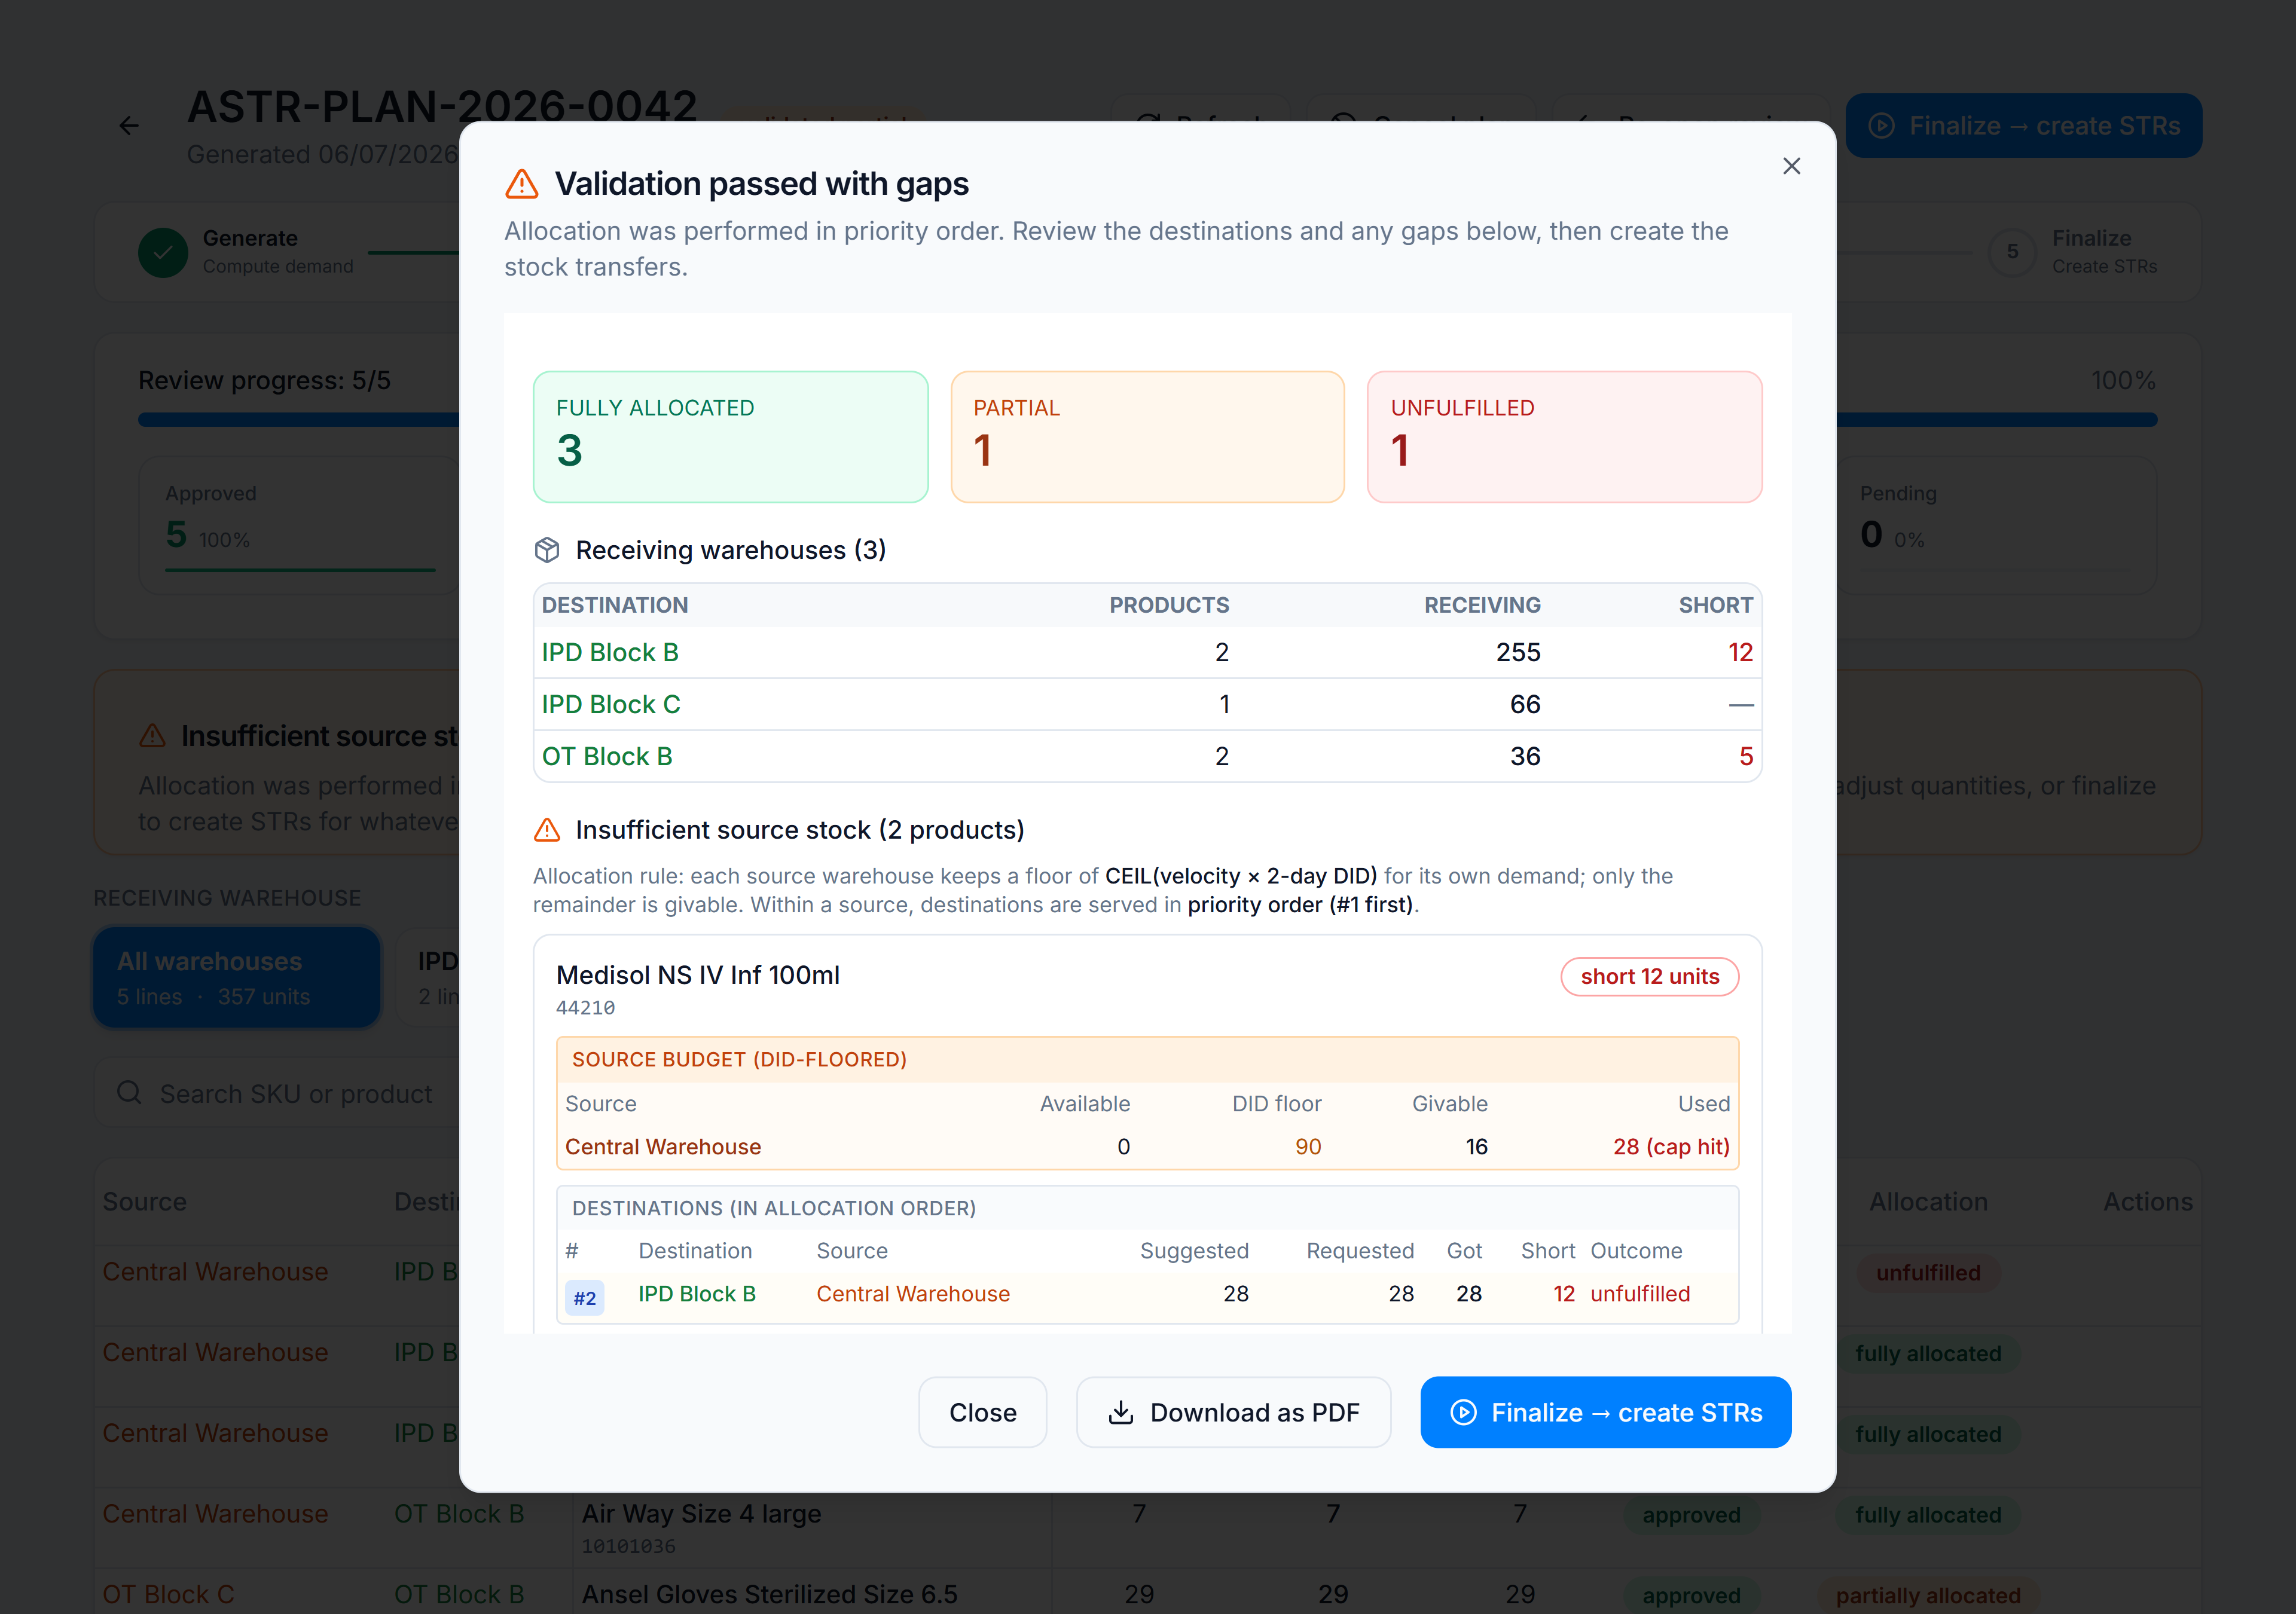
Read any gaps (shortfalls) and linked open POs. If the outcome is acceptable, proceed.
7. Preview and finalize
Click Finalize → create STRs. The STR preview shows one transfer per source→destination pair. Confirm, then finalize.
Toast: Created N STR(s) with M item(s). You’re redirected to Stock Transfers.
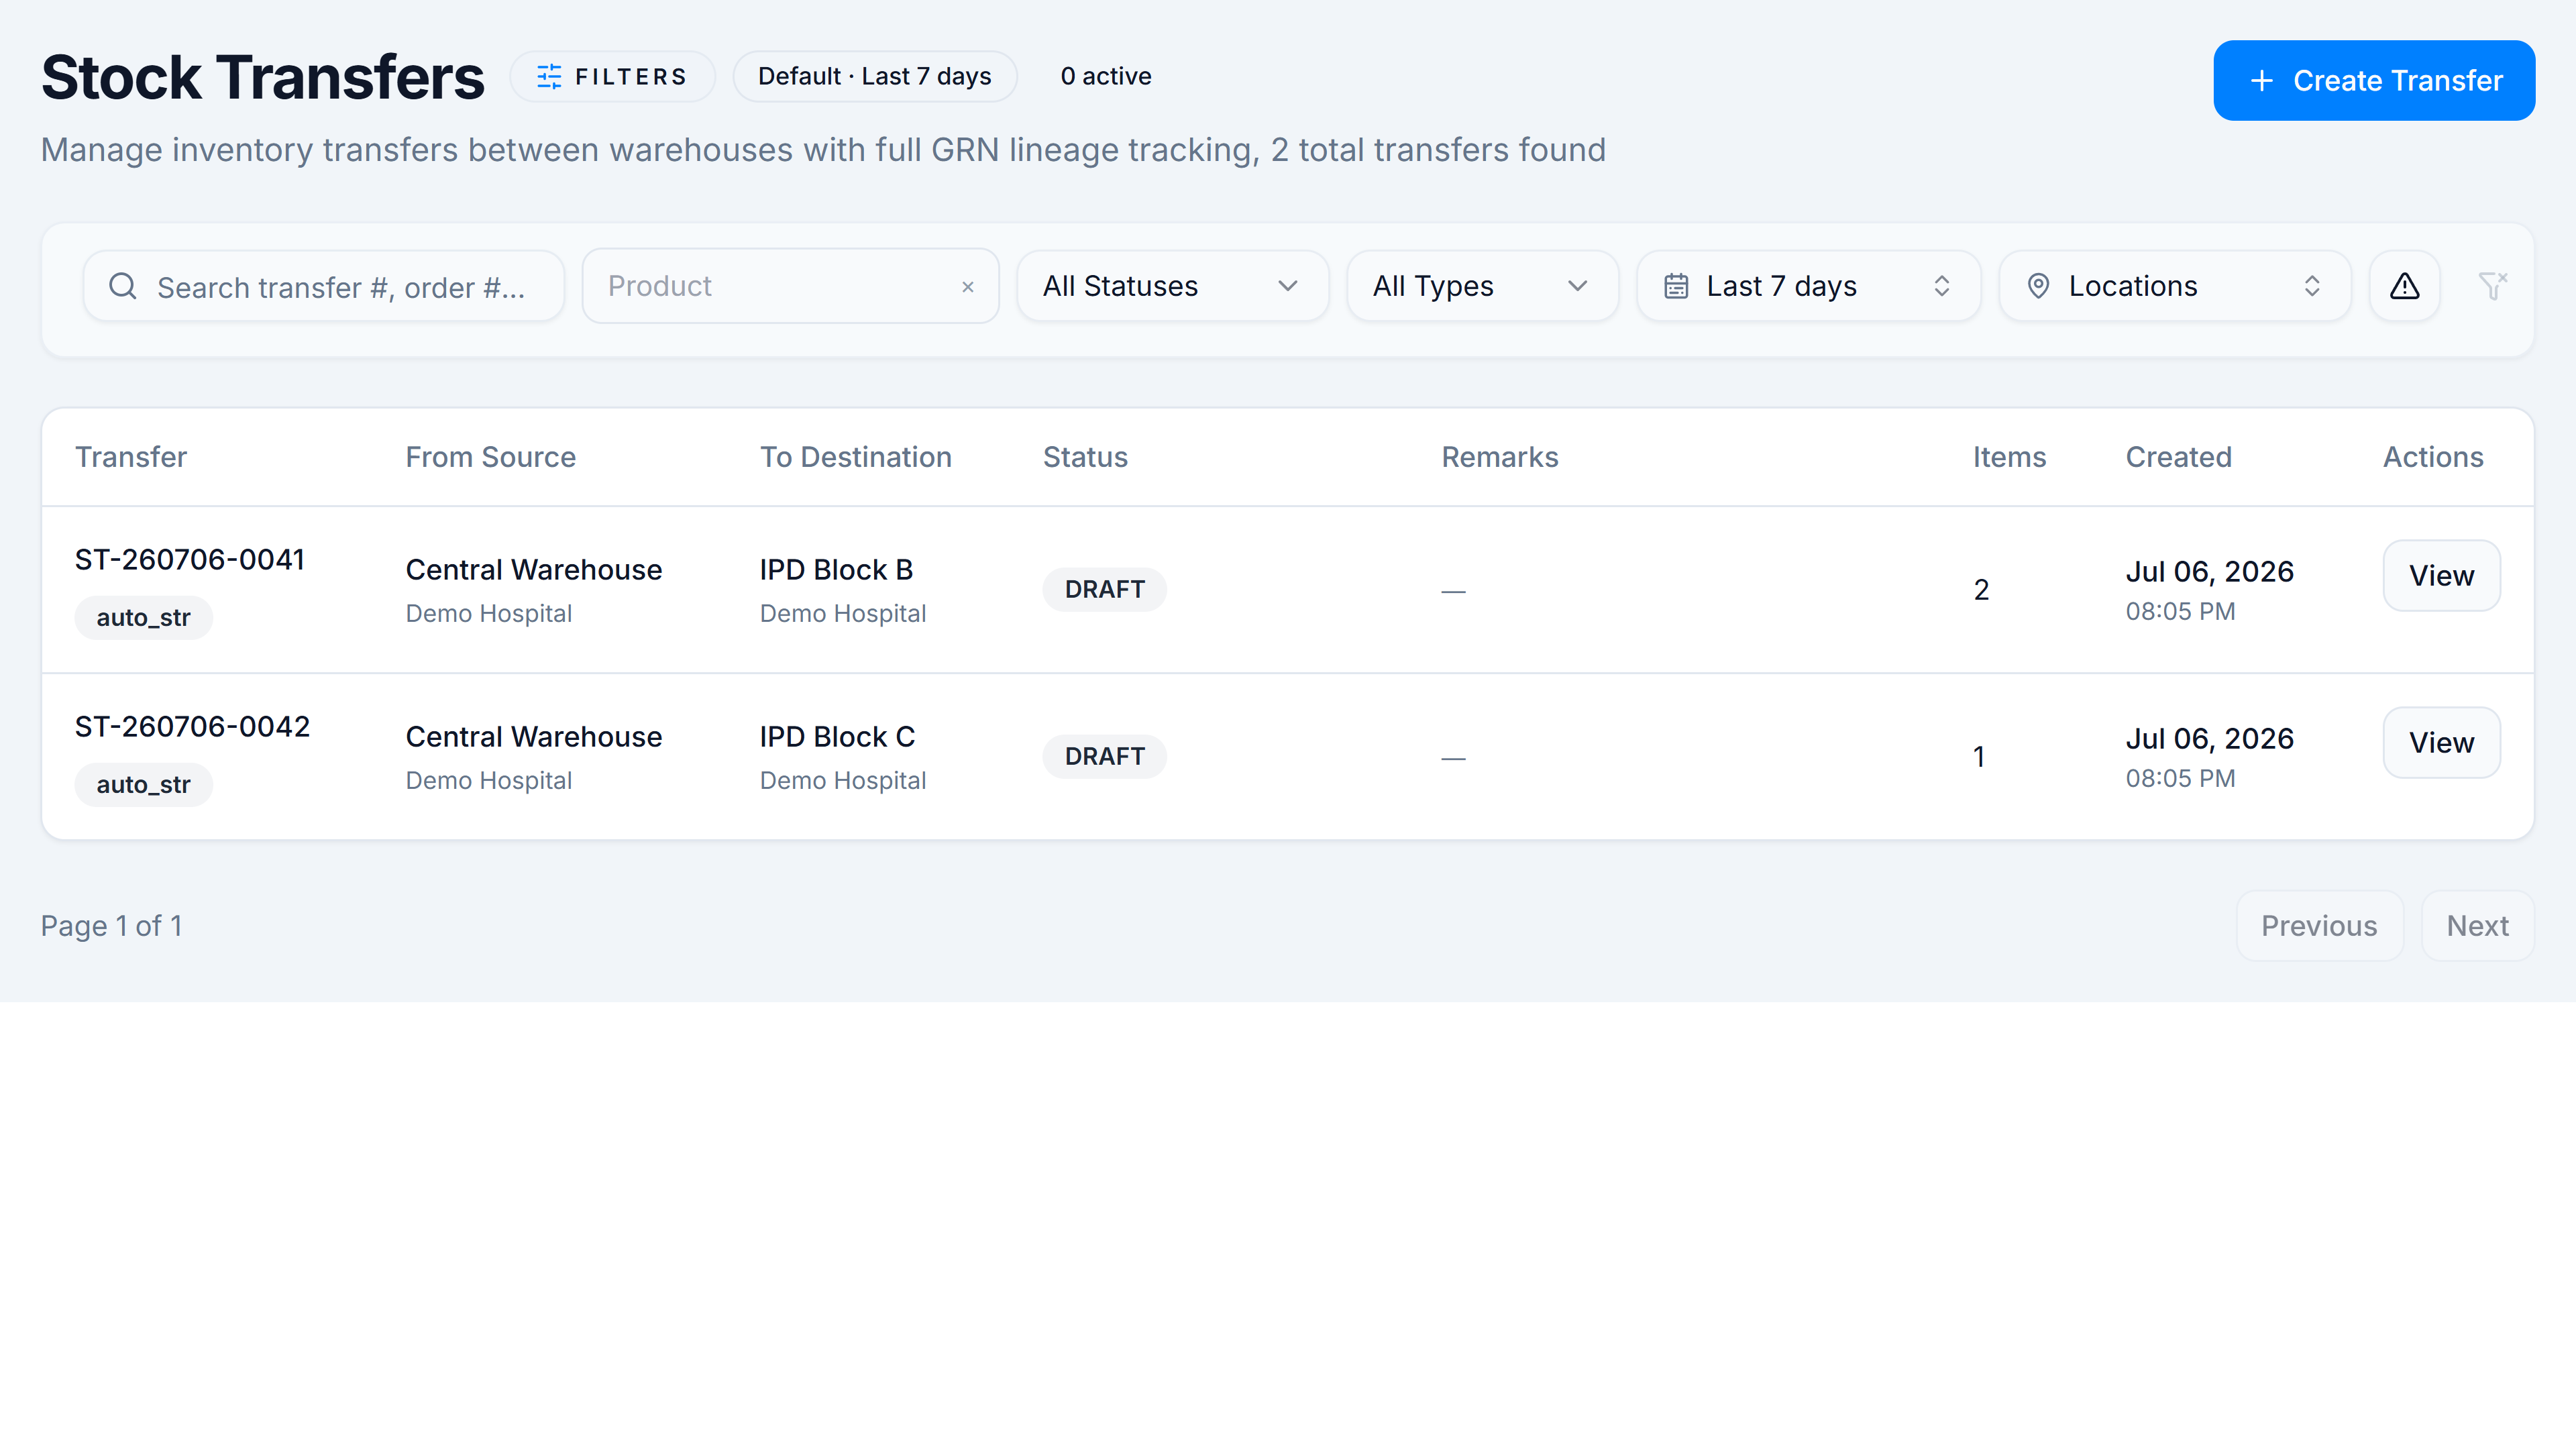
You’ve finished
You ran a full Auto STR cycle: configured warehouses, generated a plan, reviewed every line, validated allocation, and created real stock transfers. Next time you can skip configuration if nothing changed.
Where to next
- Tune DID or central warehouse: Configure Auto STR.
- Understand the maths: Scenario A vs Scenario B.
- Permission matrix: Permissions.