Print product stickers
When to use this: you are labelling shelves, fridge lines, or new intake after a GRN — and need barcode labels with optional price.
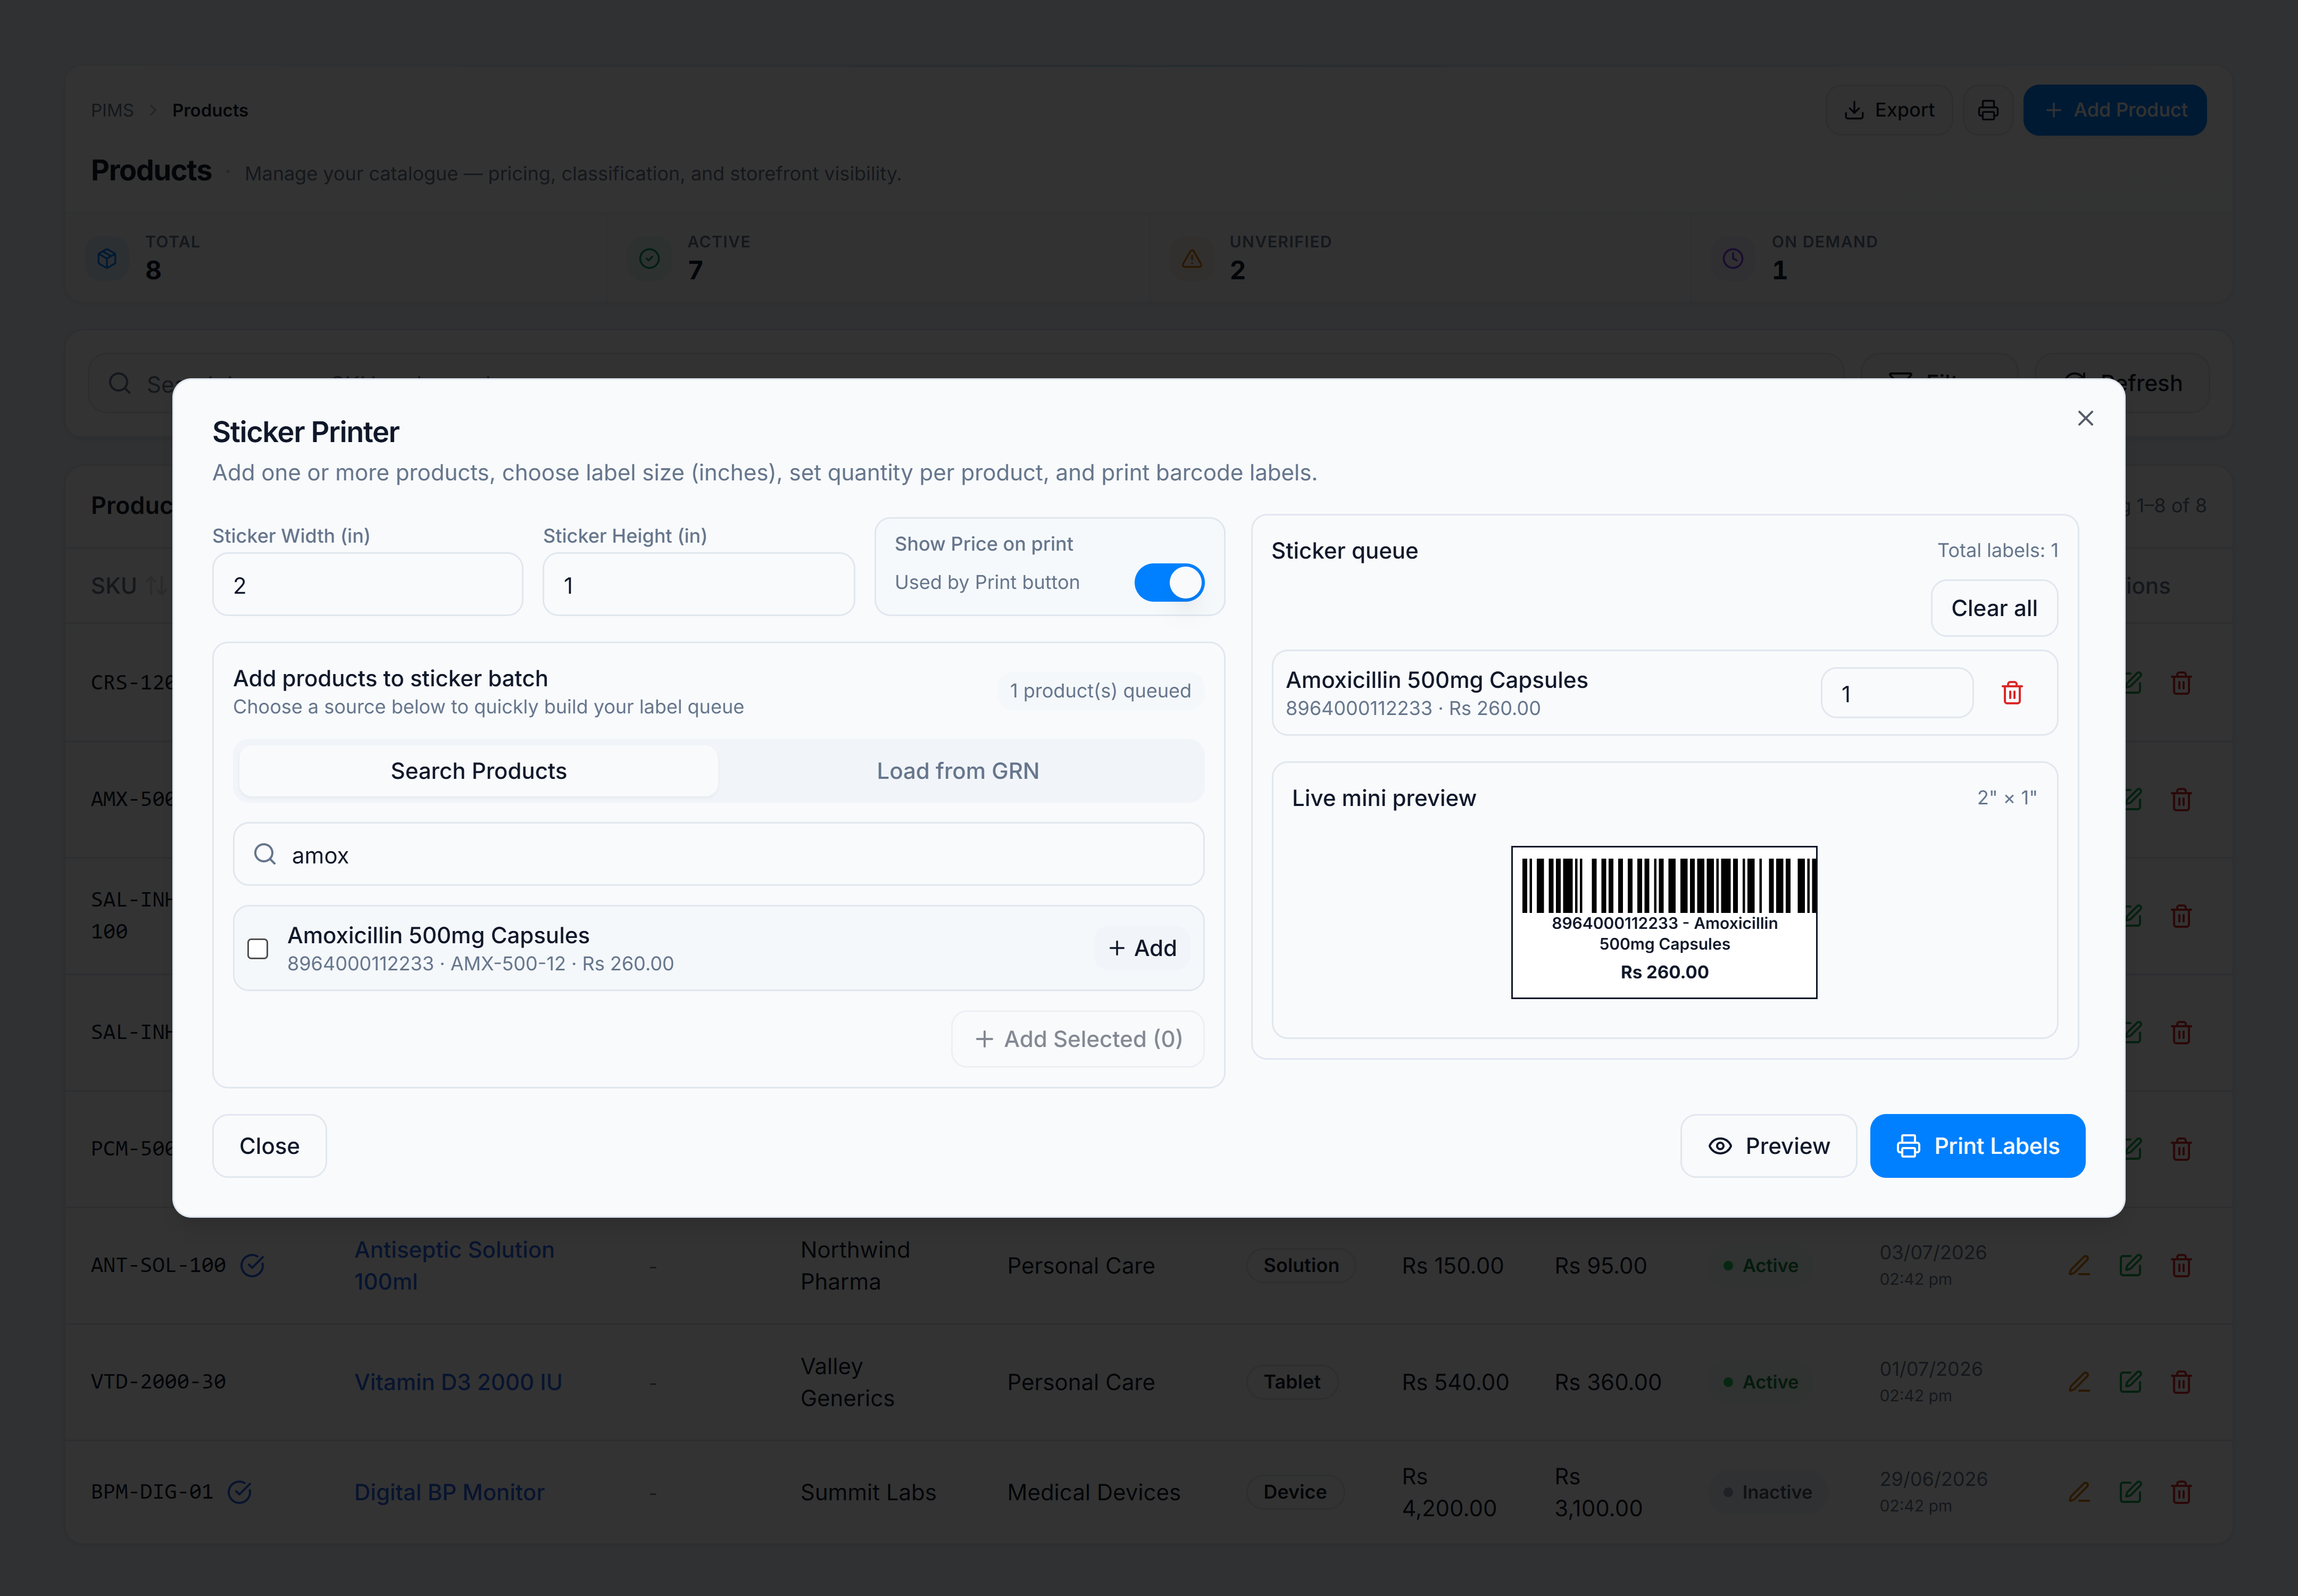
Steps
- Open Catalog → Products.
- Click the printer icon in the page header (next to Export). The Sticker Printer dialog opens.
- Set Sticker Width and Sticker Height in inches (defaults: 2″ × 1″).
- Toggle Show Price on print if labels should include retail price.
- Under Add products to sticker batch, choose a source:
- Search Products — type at least two characters, tick rows or click Add, then Add Selected
- Load from GRN — search a GRN number or pick from Latest 5 GRNs to load all received lines at once
- In Sticker queue on the right, set quantity per product and review the Live mini preview.
- Click Preview to open a printable window, or Print Labels to print directly (allow popups if blocked).
You’re done when
The queue lists your products with the correct quantities and the mini preview shows barcode, SKU/name line, and price (when enabled).
Tips
| Situation | What to do |
|---|---|
| New stock from a GRN | Use Load from GRN instead of searching one SKU at a time |
| Price-free shelf tags | Turn off Show Price on print before printing |
| Popup blocked | Allow popups for the POS domain, then retry Preview or Print Labels |